
How to Resolve iTunes Backup Session Failed Issue? - 6 Solutions

Backing up iPhone data is an important step to prevent data loss. Although Apple provides iCloud and iTunes to back up their iPhone, iTunes is the most common way users use because iCloud only provides 5 GB of free storage space, which is not enough. However, when using iTunes to back up iPhone, many people will receive a notification that "iTunes backup session failed". Why does iTunes keep on saying backup session failed? How do I fix iTunes backup session failed error? This article has everything you want to know.
If you face iTunes could not backup because backup session failed, in order to resolve this issue successfully, the first thing you need to do is to find the possible reason behind this. The possible reasons we find as follows:
If you receive a notification saying iTunes could not back up the iPhone because not enough free space is available on this computer, click the link below to learn the solutions to fix this issue.
How to Fix iPhone Backup Not Enough Space on Computer IssueAfter we know the possible reasons for this error, let's fix this issue now. Here are five fixes you can try. If one doesn't work, skip to the next one.
First of all, restarting both the computer and iPhone is often the first troubleshooting step recommended for resolving temporary glitches or errors. It's a straightforward way to clear out any temporary software issues that may be causing malfunctions and can often restore normal functionality, including backup processes.
Restart iPhone:
Step 1. Simultaneously press and hold the "Power" and "Volume" buttons until a slider appears on your screen.
Step 2. Slide the switch to power off your device.
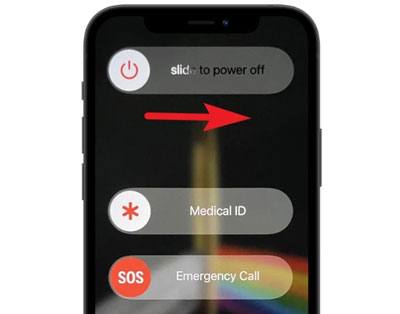
Step 3. After a brief pause, press and hold the "Power" button again to turn your device back on.
Restart Windows Computer:
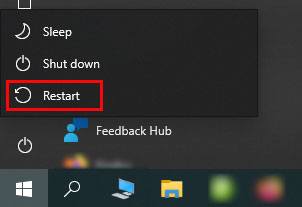
Step 1. Press the "Windows" button followed by the "Power" button.
Step 2. Select "Restart" to initiate the process of resetting the PC.
Restart Mac Computer:
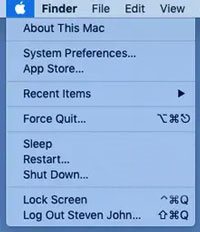
Step 1. Choose "Restart" from the "Apple" menu.
Step 2. Finally, click "Restart" once more to confirm the action.
If the first fix fails, the issue may lie with your iTunes. Your iTunes is too outdated to back up. To solve this, you can attempt to update iTunes to the latest version or uninstall it completely and then reinstall iTunes. To update iTunes, follow the steps below:
Step 1. Launch iTunes and select "Help" from the top menu of the iTunes window. Then, click on "Check for Updates".
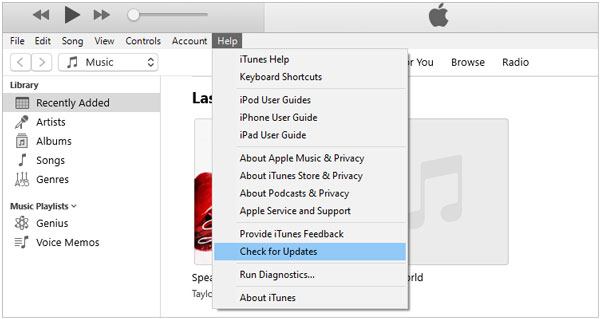
Step 2. This will prompt the Apple software update window to appear. Check for any available updates. If a newer version of iTunes is found, click on "Download iTunes" to initiate the update process.
Another cause of the backup session failure on iTunes is iTunes being unable to obtain permission from your computer. Resetting the Lockdown folder can resolve your issue. This folder is used to store the certificate from your device, allowing iTunes to read your iPhone. Here is how to do it:
For Windows:
Step 1. Close the iTunes application and disconnect your iPhone from the PC.
Step 2. Next, launch File Explorer and input "C:\ProgramData\Apple\Lockdown" into the search bar.
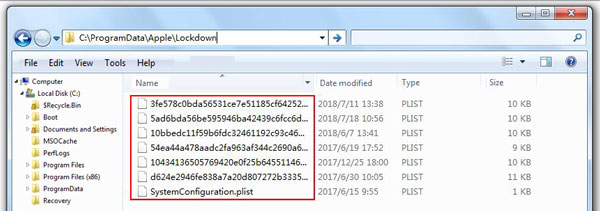
Step 3. Now, proceed to delete all files within the "Lockdown" folder.
Step 4. After that, restart iTunes, reconnect your iPhone to the PC, and attempt to create a backup for your files again.
For Mac:
Step 1. Close iTunes and disconnect your iPhone from your MacBook.
Step 2. Open Finder and choose "Go To Folder". Enter "/private/var/db/lockdown/" and hit "Enter".
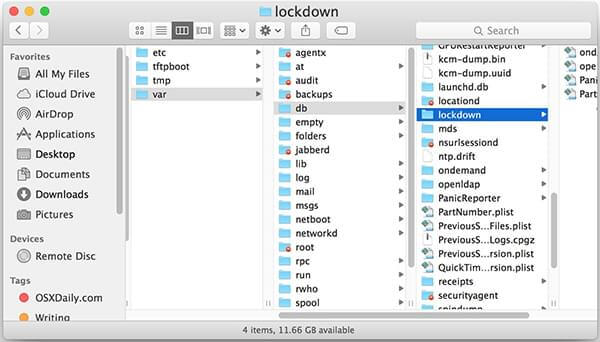
Step 3. Delete all files from the Lockdown folder and attempt to back up your data through iTunes once more.
In some cases, antivirus programs on your computer might mistakenly identify iTunes backup files as threats and prevent their creation. This can result in backup sessions failing. To address this issue, we can attempt to disable the antivirus program temporarily during the backup process and then proceed with the backup operation.
You May Like: If you find the Back Up Now button greyed out when you back up your iPhone with iTunes, you can read this article to learn how to fix it.
If you have tried all the fixes we list above and none work, you have to use a professional tool to resolve this issue. iTunes Repair is one such tool. It can fix many iTunes errors, including iTunes not being updated to the latest version, the iPhone not being recognized or connected to iTunes and so on.
Key features of iTunes Repair:
Here is how to use iTunes Repair to fix the iTunes backup session failed:
01Download and launch the software and then choose "Repair" from the available options.
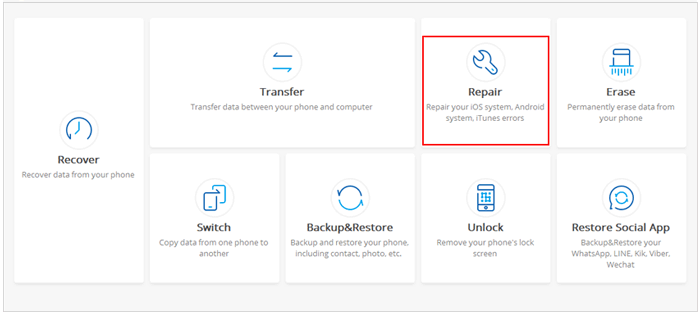
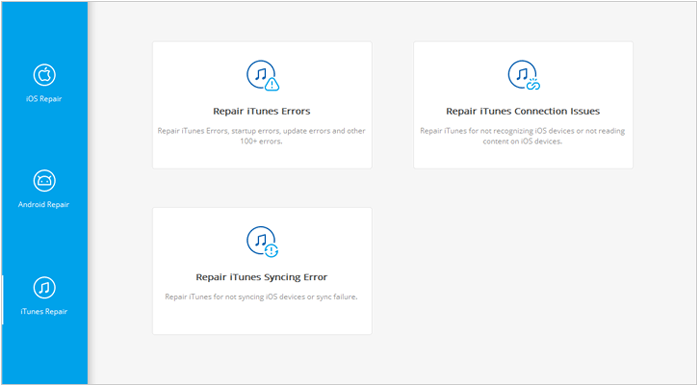
02Select the "Repair iTunes Errors" option from the displayed pop-up window. Once selected, iTunes Repair will begin checking iTunes components.
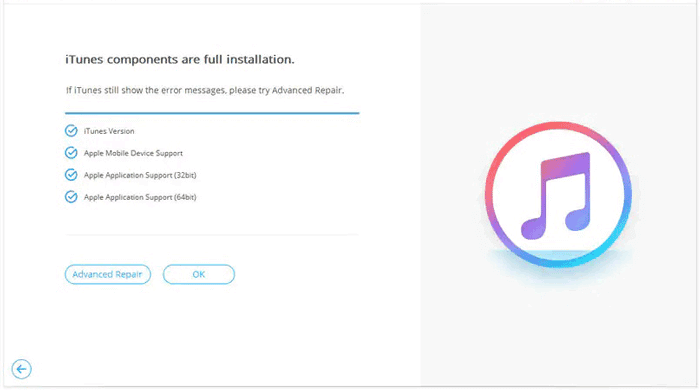
03After successfully installing the iTunes components, click "OK". If you still encounter an iTunes error message, click on "Advanced Repair". Please allow some time for the process to complete.
You can use the methods we mentioned above to fix this issue. Of course, you can also use another iPhone backup software to back up your iPhone to your computer instead of iTunes. Although there are a large number of backup tools you can choose from, Coolmuster iOS Assistant is the most popular and effective one. It supports backing up the whole iPhone in one click or selectively backing up the iPhone. What's more, you can transfer, restore, and manage your iPhone with this software.
Highlights of Coolmuster iOS Assistant:
The following are the specific steps to back up your iPhone to your computer using iOS Assistant:
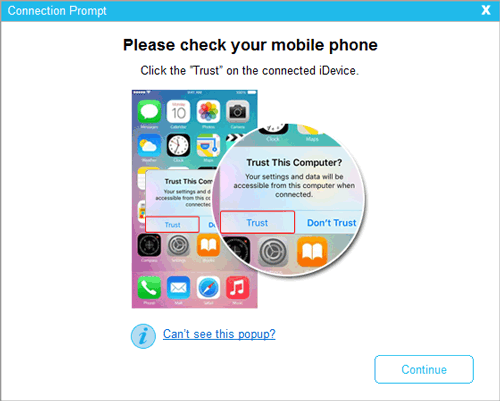
01Download, install, and launch the program on your computer. Connect your iPhone to your computer using a USB cable. When prompted, tap "Trust" on your iPhone and then click "Continue" on your computer.
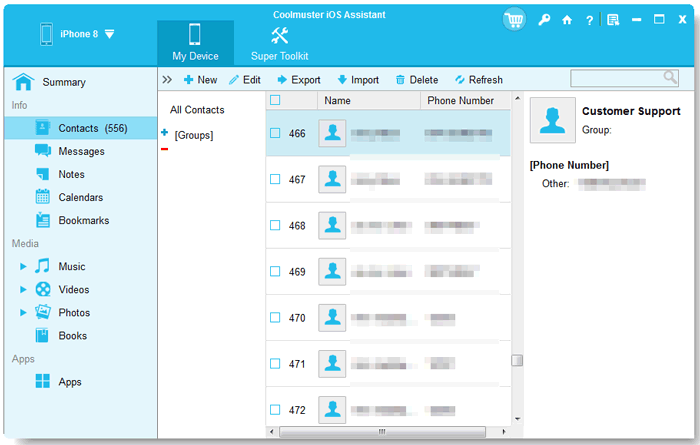
02Once the program successfully detects your iPhone, the interface will appear on your screen.

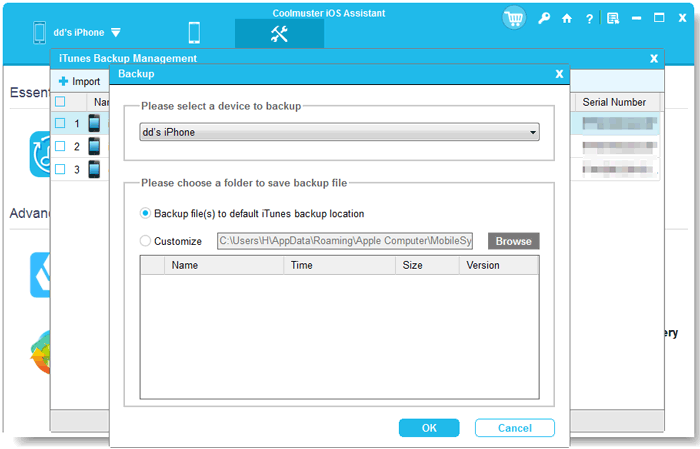
03To create a complete backup of your iPhone, navigate to the "Super Toolkit" section and select the "iTunes Backup & Restore" tab. Click on "Backup", choose your device from the drop-down menu, and then select a location to store the backup file by clicking the "Browse" button. Finally, initiate the backup process by clicking "OK."
If you prefer to selectively back up your iPhone data, navigate to the "My Device" section. From the left panel, click on a specific data type. Preview and select the items you wish to transfer from your iPhone to your computer. Then, click the "Export" button to begin the transfer process.
Video Tutorial:
When you receive a notification that "iTunes backup session failed", you don't need to worry. You can use the fixes we list in Part 2 to fix this issue. If the basic fixes fail, you can use a professional tool - iTunes Repair, to do this without data loss. What's more, you can even use the best iTunes alternative - Coolmuster iOS Assistant to back up your iPhone to your computer without facing this issue.
Related Articles:
iCloud Backup Failed | iPhone Not Backing Up to iCloud (14 Fixes)
[9 Solutions] iTunes Could Not Backup the iPhone because An Error Occurred
Keep Seeing "iPhone Backup Failed" Notification? Here're Reasons & Solutions
iTunes Backup Corrupted? How to Fix Corrupted iTunes Backup or Incompatible Problem?


