
Why iTunes Error 50 (or -50) Occurs and How to Fix It [Resolved]

Synchronization between iPhone and other Apple devices to iTunes is usually not a problem. But sometimes, you may receive an error saying iTunes error 50 (-50), which can be frustrating. If you receive this message, your device is not connecting to iTunes, so it will not sync with the iTunes library.
Do you know what that means? No more listening to your songs, conducting downloads, or accessing the iTunes library. This can be devastating. But what causes such an interruption? Can it be resolved? Absolutely. Keep reading this guide to learn how to solve iTunes error code 50 or -50.
iTunes regularly communicates with its database servers before users can sync their devices. One common iTunes error that users may encounter is "Error 50". It usually occurs when there's difficulty connecting to Apple servers, preventing one from accessing their library or making purchases on the app store. Due to this, users cannot sync music, videos, apps, and any other content. Furthermore, they won't have access to the online iTunes music library either.
Several technical issues may be the root cause of this problem, such as iTunes not operating correctly or your computer having problems and settings that affect its compatibility with iTunes. These might include:
While this iTunes error 50 can be frustrating and be an inconvenience on how you use the device, there is still hope. It can be fixed in simple ways. In the following section, we will provide several methods that you can use to successfully fix iTunes Error 50, so you can return to syncing as usual.
Want to get rid of iTunes error code 50? We have the best solutions here. Follow our quick and easy steps to resolve your iTunes connection with its database, so you can start using it again.
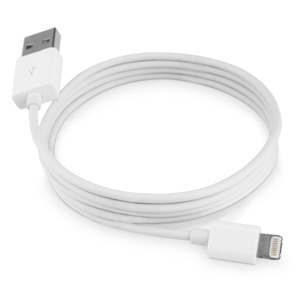
For an optimal synchronization experience between your device and iTunes, there should be a smooth connection between the computer and iPhone. And this connection is established with a USB cable. However, if the cable is damaged, there might be problems.
Ensure the USB ports gold plates on a PC touch that of your cable. If they fail, unplug and reconnect both ends of your USB cable before attempting again. Also, ensure there is no debris in your computer and iPhone ports. This will ensure both devices connect successfully through a USB cable. If the cable is damaged, consider replacing it.
You might need: What is the 0xe80000A error on iTunes? If you want to solve it immediately, open this guide.
You can only connect to the iTunes with good internet; if not, you'll likely get error 50. So, ensure you check your connection first. To check if it is a network issue, open your favorite browser on iOS smartphone or a PC and head to any website you usually visit. If that page loads without difficulty, it's likely not a problem with the network connection. If it fails to load, it's likely the internet connection.
Therefore, check the router. The signal has to be green and blinking and if it's not, you'll need to reset the router. Unplug the router from its position, disconnect it from the power source, and wait for a few seconds before plugging it back in again. After a short time, reconnect the router again.
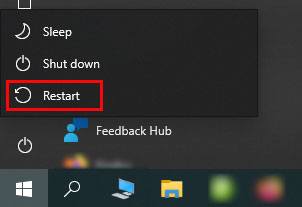
If the internet is not causing this error, we strongly advise restarting your iPhone. Restarting your iPhone will clear all apps and any other services running in the background and refresh Wi-Fi, USB connections, and Bluetooth. A restart will help clear any glitches that could be in the system. After restarting your iPhone, connect it to the computer again and try using iTunes.
Restarting the computer is also ideal for fixing any iTunes errors. By refreshing both systems, everything will run smoothly.
See more: iTunes Keeps Crashing on Computer? How to Fix It? (Tips and Tricks)
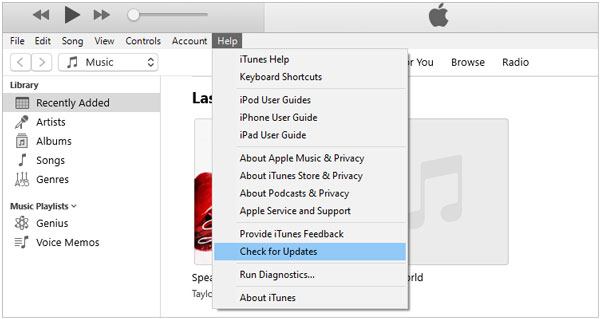
When attempting to synchronize your iPhone with an outdated version of iTunes, you may experience the error code 50. If that's the case, consider updating to the latest iTunes version. Here is how to update the iTunes version and ensure your computer has the latest version of iTunes:
Update iTunes on Windows:
Step 1: To upgrade iTunes on your PC, open iTunes.
Step 2: Click the "Help" option at the upper menu; choose "Check for Updates" to see if one is available.
Step 3: If there's an update, simply follow the provided instructions to complete your update seamlessly.
Update iTunes on a Mac:
Step 1: Open the AppStore. When there, click "Updates" and see if iTunes has an available update that can help optimize your app performance.
Step 2: Easily download and install iTunes latest version by following the simple steps outlined on the screen.
When you still experience the same issue even after updating iTunes, it's recommended to delete and reinstall iTunes on your computer. Wait sometime before reinstalling.
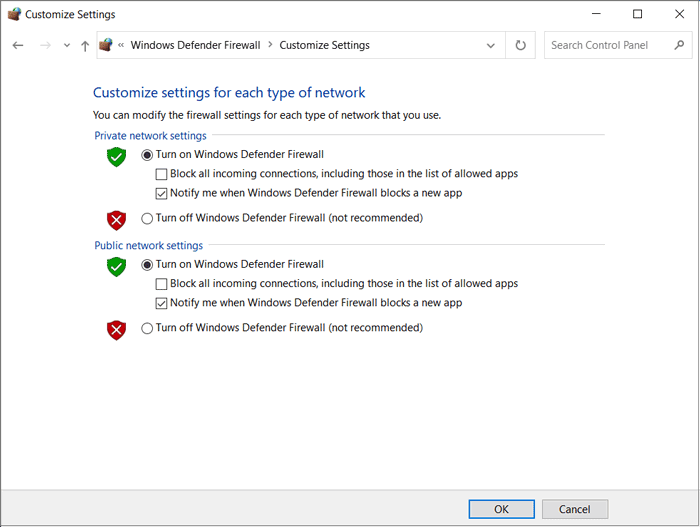
Antivirus or firewall apps are mainly used on computers to protect them from virus attacks. However, they can interfere with connecting to iTunes. As such, you'll have to disable the antivirus or firewall and get into your iTunes.
Step 1: Click on the antivirus program on the computer to open it.
Step 2: Navigate to the settings section, and look for the "Blocked Software" option. Check if iTunes has been blocked and unblock it.
Step 3: If iTunes is not blocked, you'll need to turn off your antivirus/firewall on the main settings page so that iTunes can reconnect.
Guess you need: Your iPhone fails to restore with iTunes? Then you can use these 6 ways to fix it.
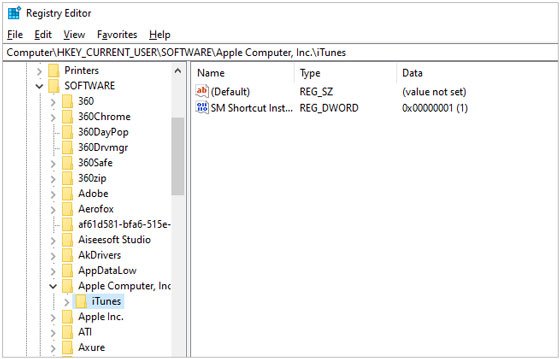
Windows heavily depend on the registry to store its crucial settings, which can often lead to the iTunes 50 error. The registry database is essential for Windows to function correctly, yet it continuously generates many errors that prevent the proper running of the operating system. To address this issue, you should clear the registry.
Step 1: Click the "Search" icon on your computer, and type "Regedit".
Step 2: Press "Enter" to open the "Registry Editor" on your PC.
Step 3: Check and find the "iTunes" option. Then delete the iTunes folder.
This is also a solution to try out when facing iTunes error 50. Besides, Apple also suggests entirely wiping out the current network settings on your Mac if you face iTunes error 50. Here's how to do it:
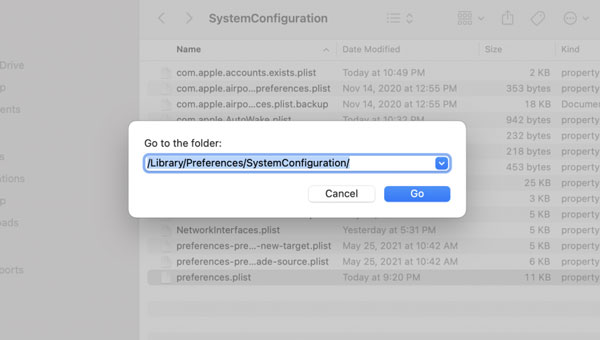
Step 1: Choose "Go" and head to the "Go to Folder" in the Finder menu.
Step 2: Enter "/Library/Preferences/SystemConfiguration", and press "Go" for successful navigation. Then locate the "NetworkInterfaces.plist" file, then drag it to the trash bin for disposal.
Step 3: Reboot the Mac computer, and when the desktop appears, access "System Preferences" and "Network". Choose the "Edit Locations" option from the Location drop-down menu to alter your locations.
Step 4: To add a new location and sync your device, simply click on the "+" icon to apply any settings that may be necessary.
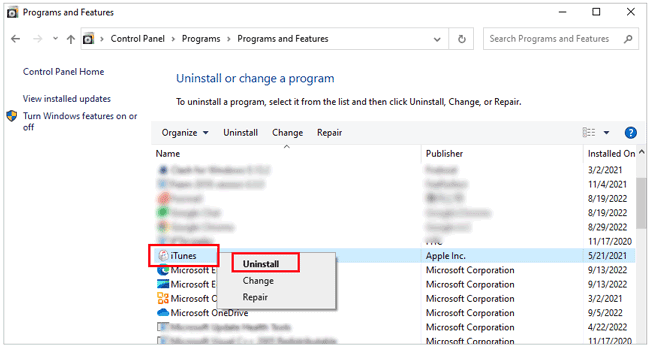
You need to reinstall iTunes to rectify this issue. iTunes is an essential tool for managing media files and controlling Apple devices (manage iPhone data). Sometimes, however, it can become corrupted or malfunction, so reinstalling it may be what it needs to operate again. Reinstalling iTunes can fix many software-related issues that can cause instability in the program. Here's how to reinstall iTunes:
Step 1: Open the "Control Panel" then head to "Programs & features".
Step 2: Then find "iTunes" and hit "Uninstall". After that, download iTunes again on your PC.
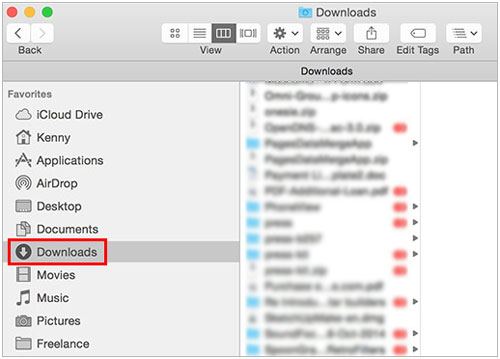
This error will most likely appear when there are timeouts and conflicts while writing files onto your computer during the download process. To avoid future mishaps like these, delete all downloads from the Downloads folder on your device. This will help clear out any faulty data that might have been downloaded and stored in your Downloads folder.
To remove unnecessary downloads from your PC, access the Downloads folder in "This PC" on the Desktop. Once it is opened, select all the files you want to delete.
To quickly delete all items in the folder, simply press "Ctrl + A" to select all files. Then, hit the Delete key or right-click and pick "Delete" from the context menu for an effortless clean-up. Wait for a few moments until your selected downloads are deleted from your Downloads folder.
On a Mac, you can quickly access the "Downloads" folder through the Finder's side panel. If you don't find it listed under "Favorites", navigate to "Finder" > "Preferences", and enable it on the "Sidebar" tab.
Also, you may find it by pressing the "Option", "Command"and "L" key. Pressing these keys will open the "Download" folder instantly. Now you may delete those items you want.
iTunes error 50 can be so annoying that you might want to throw your iPhone out the window. But it shouldn't be that way. This issue is easier to resolve; you just have to employ the right mechanism to solve the problem. You can try removing your SIM card from your iOS device and try restoring it with iTunes your SIM card to fix the iTunes error.
If all the above solutions are unsuccessful in resolving error 50, it is best to seek professional help from Apple. Deciding to factory reset your device will only add more problems instead of lessening them since it will delete all of your data. So, the best thing to do is contact Apple Support, where professional technicians can provide you with tailored solutions that will get rid of iTunes error 50.
Learn more: How to Fix iTunes Error 0xE8000015 on iPhone/iPad?
You can download and use the iTunes Repair software to diagnose and alleviate any issues causing iTunes error 50 on your iOS device. This advanced software will provide an effortless, data-loss-free solution to this pesky issue, thus alleviating all of the stress associated with iTunes error code 50.
Furthermore, this iTunes Repair tool can solve various other iTunes issues, like iTunes error 56, error 14, error 13010, and more. It is no exaggeration to say that this program can work out most iTunes errors without effort.
Key features of this repair software:
Let's see how to resolve iTunes error 50 using iTunes Repair:
01First, download, install, and launch iTunes Repair (Windows) on the PC. When done, you'll get to the primary interface with a pop-up window. Please choose the "System Repair" tab and the "Repair iTunes Errors" option.
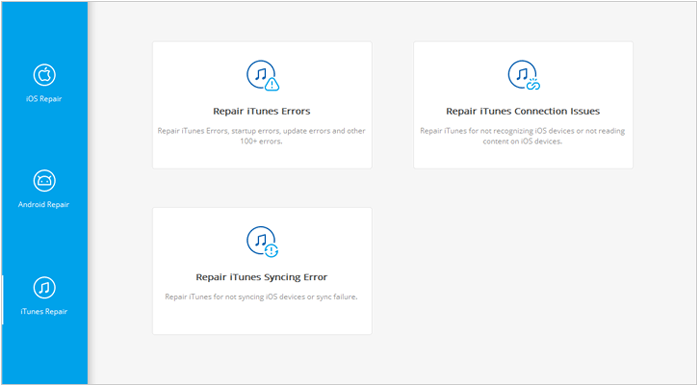
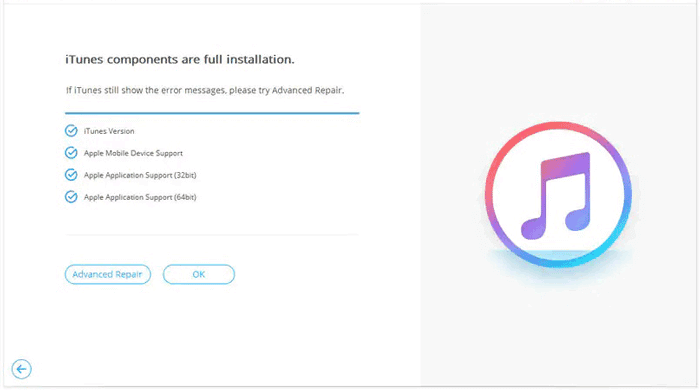
02Once done, the program will start checking for iTunes components. Then click the "Repair" icon to fix error 50 on iTunes.
03When finished, check your iTunes. If it works, click "OK". Otherwise, tap the "Advanced Repair" icon to start further repairing.
Although we have provided some troubleshooting tips, fixing iTunes error 50 can still be exhausting. This error is usually caused because of data issues or file corruption. If this annoying message appears, you can try erasing downloaded content from the Downloads folder, removing your SIM card, and contacting Apple Support for help. You may also need to download and use a reliable iTunes Repair tool to diagnose and solve the problem in one click. With this software, you can figure out all the errors on iTunes at once.
Related Articles:
How to Fix iTunes/iPhone Error 54 | 11 Proven Solutions
How to Fix the Issue iPod Won't Sync with iTunes in Every Possible Way?
10 Tricks for the Issue "Cannot Restore Backup to This iPhone Because the Software Is Too Old"
How to Fix iTunes/iPhone Stuck on Preparing iPhone for Restore?