
How to Recover Data from Locked iPhone with or without Backup?

Have you ever found yourself in a situation where your iPhone is locked, and you are unable to access your data, leaving you feeling anxious and helpless? This is a common concern, especially considering the valuable photos, contacts, and essential information stored in our phones. Therefore, the question of iPhone disabled data recovery has become a significant issue for many individuals.
Are you curious about how to recover data from locked iPhone? If your answer is yes, you've come to the right place. In this article, we will explore some effective methods and tools, regardless of whether you have a backup, to help you overcome this challenge and regain your precious data from the locked iPhone.
Absolutely! Recovering data from a disabled iPhone is indeed possible. Once you've installed iTunes on your computer and linked your iPhone using a USB cable, the device will have automatically backed up all its data onto the computer. Additionally, every time you connect your iPhone to the computer, iTunes will perform an automatic backup. This iTunes backup can then be utilized for recovering data from an unavailable iPhone.
Furthermore, iPhones come equipped with an Automatic Sync function when iCloud backup is enabled. This means that whenever your iPhone is connected to a power source, connected to Wi-Fi, and locked, your data gets automatically synchronized with iCloud. Consequently, you can restore a disabled iPhone without relying on a computer by utilizing the iCloud service.
Luckily, if you haven't previously backed up your iPhone data to either iTunes or iCloud, there are still methods available for accomplishing this. Continue reading to explore these methods in detail.
How to recover data from a disabled iPhone without backup? It's time to use iOS Data Recovery. It is a professional and powerful tool designed to help users recover lost data directly from the device without backup. Whether it is due to device disabled, accidental deletion, system crash, failed upgrade or other reasons for data loss, the software can quickly and effectively scan, retrieve and recover various file types on iPhone, including photos, contacts, messages, call logs, etc.
However, make sure the software is downloaded on a computer that has recognized your iPhone before it was disabled.
Key Features:
Here is how to recover data from disabled iPhone without backup using iOS Data Recovery:
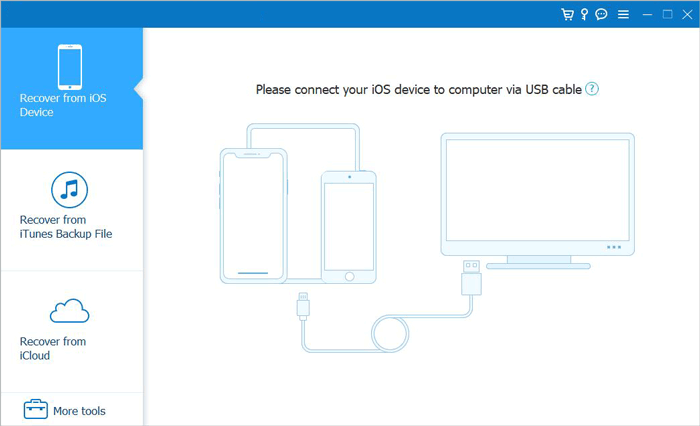
01Launch the program and connect your iOS device to the computer using a USB cable. Choose "Recover from iOS Device", then click the "Start Scan" button to initiate the scanning process for deleted data.
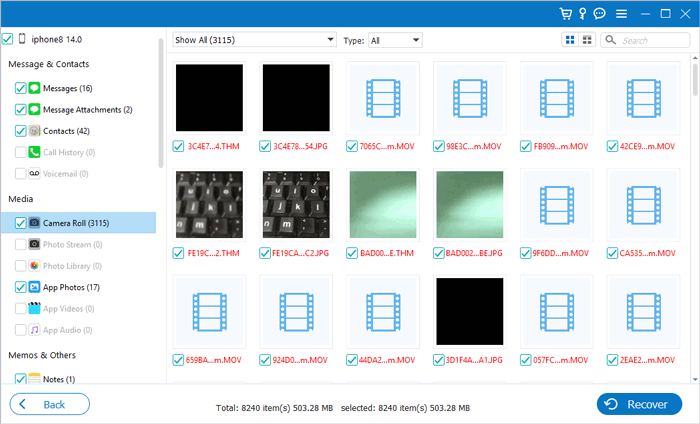
02After scanning, all files on the device will be listed by category. Please note that if your iPhone contains a large number of files, the scanning process may take a longer time. Kindly be patient and wait for the completion.
03You can find it in its respective category among the target files and preview it. Select the content you need, then click the "Recover" button. The chosen files will be exported and saved on your computer.
Recovery mode is a mode that allows your iPhone to communicate with iTunes, and it can help you address some issues that cannot be resolved through normal means, such as when your iPhone is disabled. However, using recovery mode will also result in your iPhone being erased. Therefore, if you haven't backed up your iPhone, you will lose all your data. If you are willing to take this risk, you can follow the steps below to use recovery mode:
Step 1. Open iTunes on your computer and connect your disabled iPhone to the computer.
Step 2. Depending on your iPhone model, press the corresponding button combination to enter recovery mode. The specific button combinations are as follows:
For iPhone 8 and later:
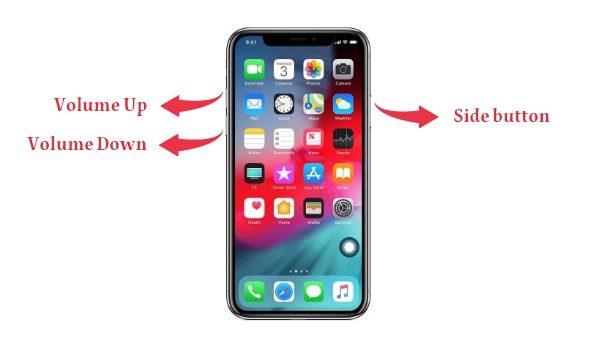
For iPhone 7 and iPhone 7 Plus:
For iPhone 6s and earlier:
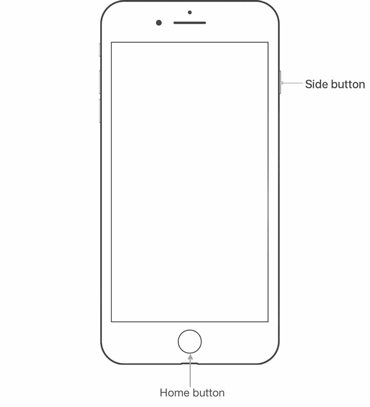
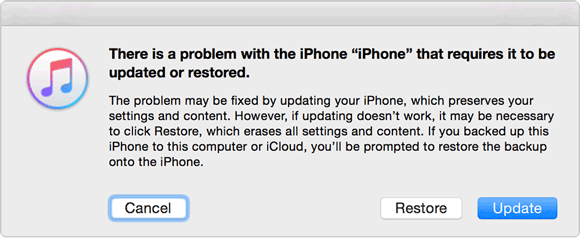
Step 3. Once your iPhone is in recovery mode, you will see a pop-up window in iTunes with two options: "Update" or "Restore". Choose the "Restore" option and wait for iTunes to download and install the latest iOS version onto your iPhone.
Step 4. Once the restoration process concludes, your iPhone will reboot and present the welcome screen. Follow the on-screen instructions to configure your iPhone or recover data from your backup, if available.
If you have backed up your locked iPhone an iTunes backup, there are two methods you can choose to recover data from a disabled iPhone.
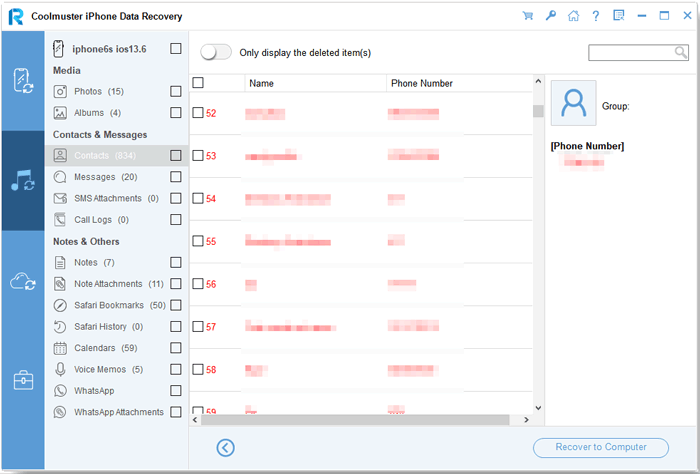
Assuming you have previously backed up your iPhone through iTunes before it was locked, you can use Coolmuster iPhone Data Recovery to restore your iPhone without connecting it or deleting the current data on the device. This software supports various data types, including photos, videos, music, contacts, messages, call logs, and more.
Key Features:
How can I recover data from a locked iPhone using Coolmuster iPhone Data Recovery? Follow the steps below:
01Download and run Coolmuster iPhone Data Recovery, then select the "Recover from iTunes Backup File" option on the left side.
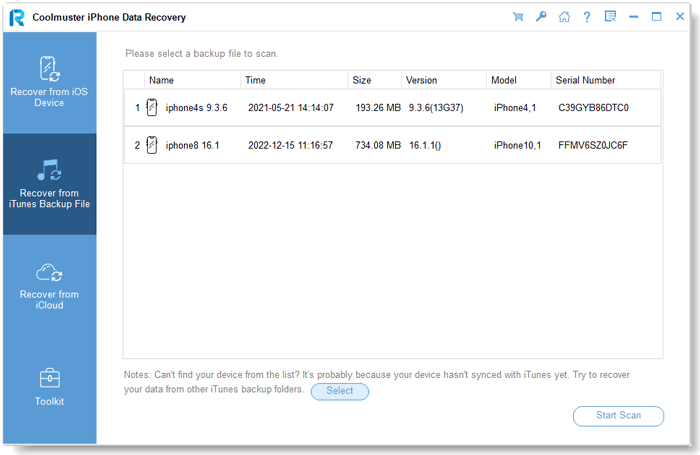
02Initially, it will scan the default iTunes backup location on your computer. Choose a backup file from the interface list and click the "Start Scan" button. If the desired file is not found, click the "Select" icon to choose an iTunes backup file from another folder.
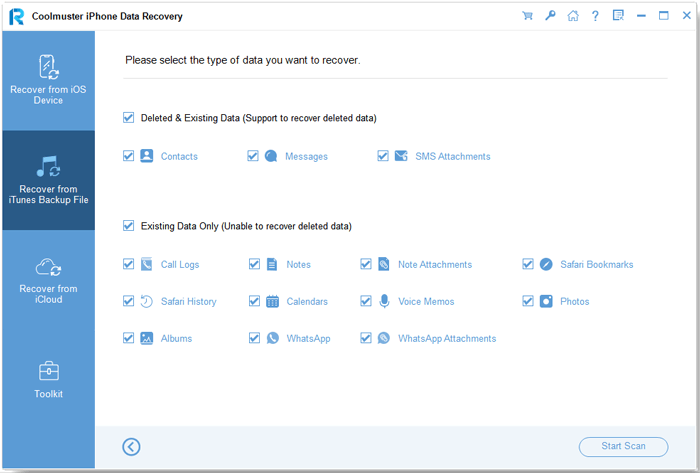
03Check the data types you want to recover, then click the "Start Scan" icon in the bottom right corner. Afterward, you can preview the iTunes backup file on your computer.
04Click on a category, then choose specific deleted and existing files on the right side. Finally, click the "Recover to Computer" icon to initiate the file recovery from the iTunes backup.
If you have previously synchronized your device with iTunes, you can directly use iTunes backup to restore data. You don't even need to unlock the disabled iPhone with a password. The system will automatically detect your disabled iPhone. Here is how to use iTunes to achieve disabled iPhone data recovery:
Step 1. Open iTunes on your computer. If you are using a Mac with macOS Catalina 10.15 or later, open Finder.
Step 2. Connect your iPhone to the computer using a USB data cable.
Step 3. When your device appears on the iTunes or Finder interface, click on your device.
Step 4. Click on the "Restore Backup" button under the "Backup" section, then select the most relevant backup in the small pop-up window.
Step 5. Click the "Restore" button to confirm and wait for the entire restoration process to complete.
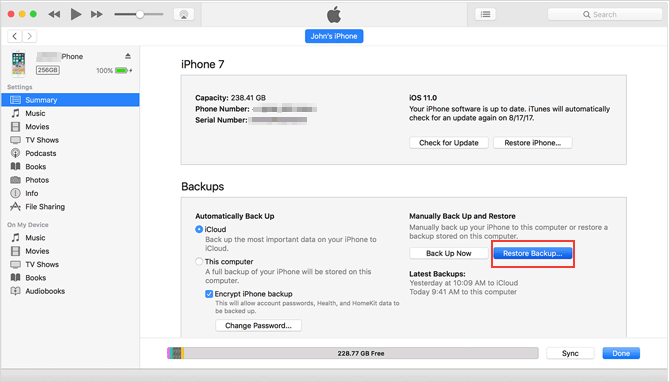
Keep in mind that this method will replace all the current data on your device with the data from the chosen backup.
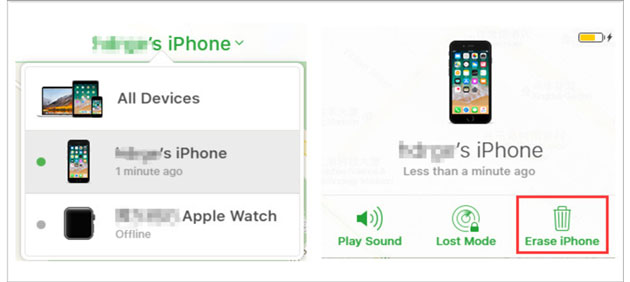
To recover data from a locked iPhone via iCloud, you must first remotely remove the locked password through iCloud. Then, you can follow the quick guide below to restore the data. Here are the steps to perform locked iPhone data recovery:
Step 1. On your computer, access iCloud.com through a web browser, then enter the same Apple ID and password used on your locked iPhone to log in.
Step 2. Click on "All Devices" and select your disabled/locked iPhone. Then, click on "Erase iPhone".
Step 3. Set up your iPhone as a new device, then on the "Apps & Data" screen, choose the option "Restore from iCloud Backup".
Step 4. After confirming with your Apple ID, select the most recent backup file and click the "Restore" button.
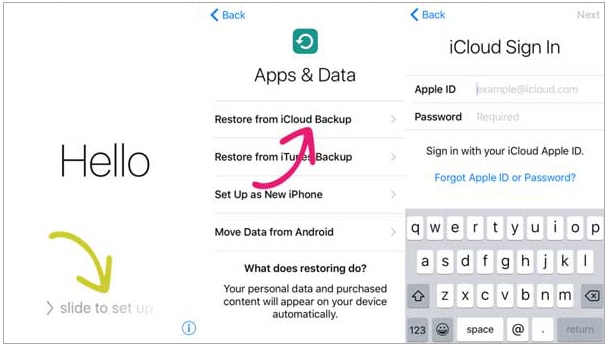
Similar to iTunes backup, this process will overwrite the existing data on your device.
From the above, we have introduced how to recover data from locked iPhone with or without backup. Among these methods, we highly recommend using iOS Data Recovery and Coolmuster iPhone Data Recovery, two data recovery software options. These tools allow you to recover data from a disabled iPhone without any backup or selectively retrieve specific data from your existing backups instead of restoring the entire backup file. They are easy to operate, user-friendly, have a fast recovery speed and a high success rate, and support various types of data. They stand out as your best choice for recovering data from a disabled iPhone.
Related Articles:
Locked Out of iPhone after Update? 6 Effective Fixes You Never Know
Strategies on How to Recover Deleted Saved Passwords on iPhone
How to Get into A Locked Phone with or without A Password? (Full Guide)
What to Do When My iPhone's Lost & How to Recover Data from Lost iPhone


