
How to Recover Deleted Photos on Keepsafe? - 3 Effective Ways

Popular picture vault app Keepsafe hides and encrypts sensitive photos on your phone. However, you may mistakenly remove Keepsafe photos or lose them due to phone loss, damage, or resetting. If your Keepsafe photos disappeared, is there a way to recover deleted photos from Keepsafe? Thank goodness, yes. Here is a step-by-step guide on how to recover deleted photos on Keepsafe. Choose one that fits your needs.

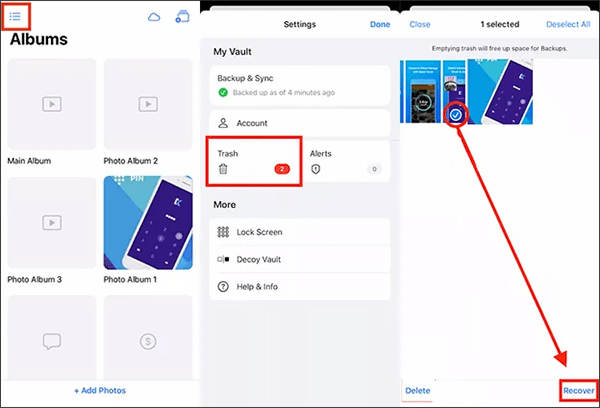
Keepsafe provides a "Trash" folder to store deleted photos, allowing users to recover deleted photos from Keepsafe Trash at any time. However, this feature is not available for Keepsafe Basic or free version users. Keepsafe restricts the option to recover deleted photos to its premium users. Here is a step-by-step guide on how to recover old Keepsafe pictures from the Keepsafe Trash on iPhone or Android.
On iPhone:
Step 1. Open your Keepsafe application.
Step 2. Access the "Settings" in the top left corner.
Step 3. Open the "Trash" to view its contents.
Step 4. Select the desired items and click "Recover".
Step 5. Choose the album where you want to move the items or create a new album using the icon in the top right corner.
On Android:
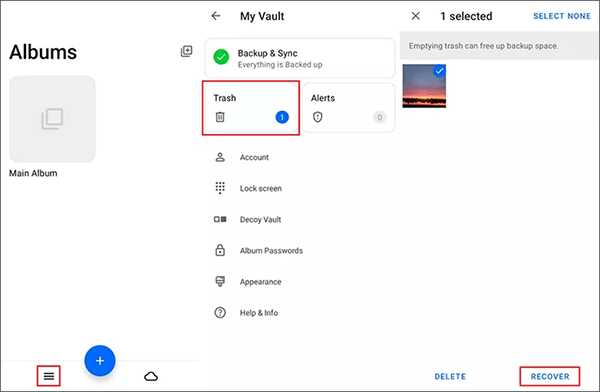
Step 1. Open your Keepsafe application.
Step 2. Access the "Settings" in the bottom left corner.
Step 3. Open the "Trash" to view its contents.
Step 4. Select the desired items and click "Recover".
Step 5. Choose the album where you want to move the items or create a new album using the icon in the top right corner.
If you can't find photos in the Keepsafe Trash, uninstall and reinstall the application. Then, open the "Trash" folder of the application to recover photos on iOS or Android devices.
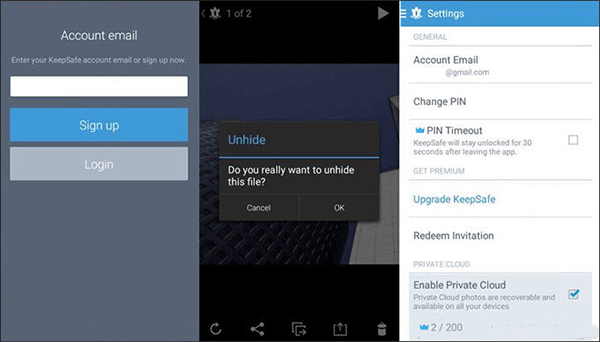
This method will be effective if you have activated Private Cloud, switched to backup, and haven't cleared the Keepsafe Trash. By activating Private Cloud, you can download and recover Keepsafe photos (and other items) on another device in case your iPhone/Android is damaged, lost, or stolen (what to do if your iPhone is stolen/lost?). Here's how to perform Keepsafe picture recovery by reinstalling the application:
Step 1. Uninstall and reinstall Keepsafe from the app store on your phone.
Step 2. Log in to your current Keepsafe account used for photo recovery.
Step 3. Navigate to "Menu" > "Settings".
Step 4. Select the "Enable Private Cloud" option to activate it.
Now, close Keepsafe and reopen it on your phone. All lost or deleted Keepsafe photos will be recovered.
If you are not a premium user, then, how to recover Keepsafe photos without premium? In such cases, data recovery software is the best option. It can assist you in scanning and recovering deleted or lost data on your phone, including photos, videos, music, documents, and more. Here, we introduce data recovery software suitable for Android and iPhone, so let's see how to use them.
Coolmuster iPhone Data Recovery is a data recovery software specifically designed for iOS users, aiming to assist in the recovery of deleted or lost data from iPhones, iTunes backups, or iCloud backups. It can recover various types of data such as photos, contacts, messages, call logs, calendars, memos, music, videos, and more. With its intuitive interface and advanced scanning capabilities, Coolmuster iPhone Data Recovery enables you to efficiently retrieve deleted photos from Keepsafe on iPhone as long as you have backed up your iPhone with iTunes or iCloud.
Key Features:
Here is how to use Coolmuster iPhone Data Recovery to perform Keepsafe picture recovery on iPhone:
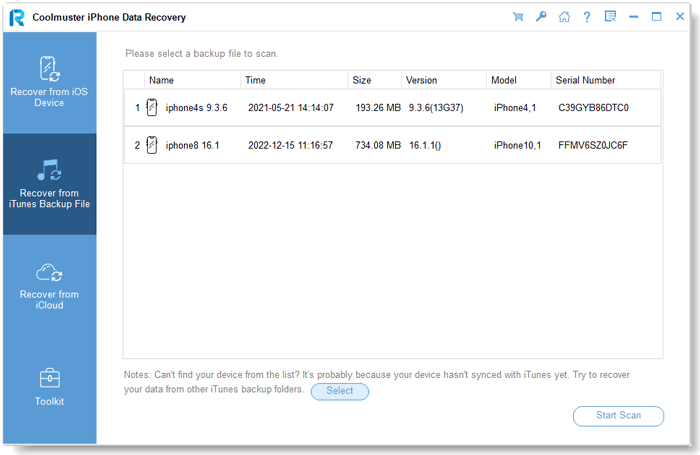
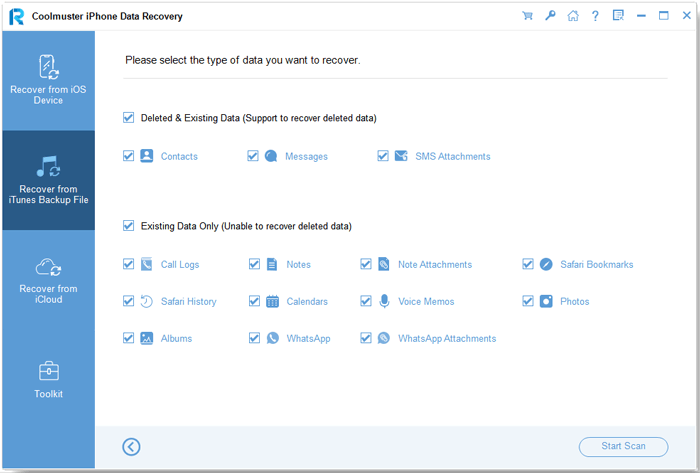
01Download and run Coolmuster iPhone Data Recovery, then choose the "Recover from iTunes Backup File" option on the left side. It will search through the default iTunes backup location on your computer. Choose a backup file from the list on the interface, and then click the "Start Scan" button.
02Please check the types of data you want to recover, then click the "Start Scan" icon in the bottom right corner. After that, you can preview the iTunes backup files on your computer.
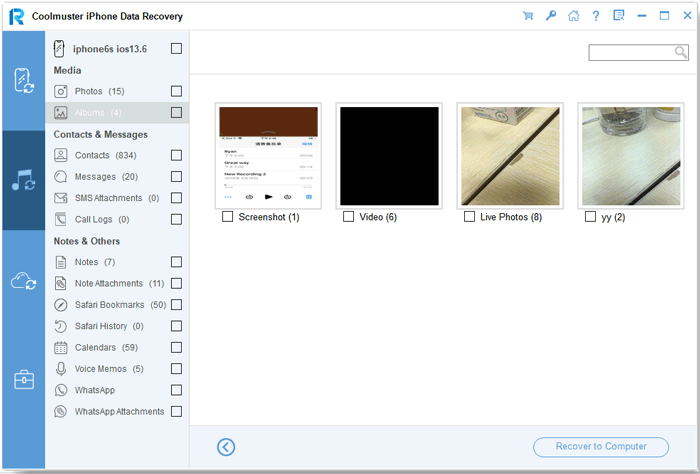
03Choose the "Photos" category, then select the specific deleted and existing files on the right. Finally, click the "Recover to Computer" icon to initiate the recovery of files from the iTunes backup.
Coolmuster Lab.Fone for Android is a data recovery software specifically designed for Android users. It aids in the recovery of deleted or lost data, including photos, videos, music, documents, contacts, messages, call logs, and more, from the internal memory or SD card of Android smartphones or tablets. With its user-friendly interface and advanced scanning capabilities, Lab.Fone enables users to preview and selectively recover their valuable data, ensuring a smooth and reliable recovery process for Android users.
Key Features:
Here is how to use Coolmuster Lab.Fone for Android to perform Keepsafe file recovery on Android:
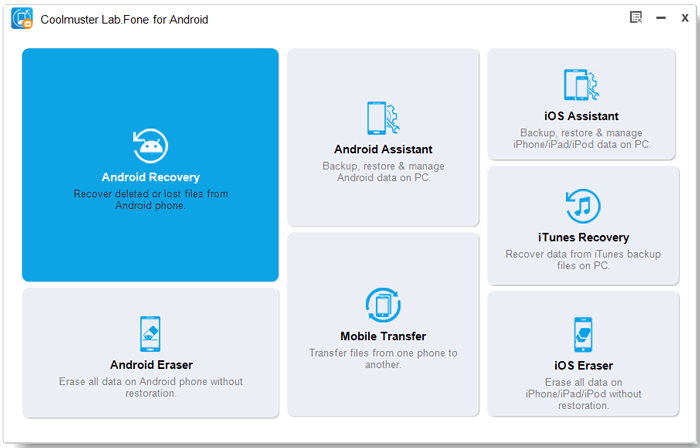
01Once you have installed and launched the software on your computer, click on the "Android Recovery" module to access Coolmuster Lab.Fone for Android and leverage its capabilities to manage your Android data.
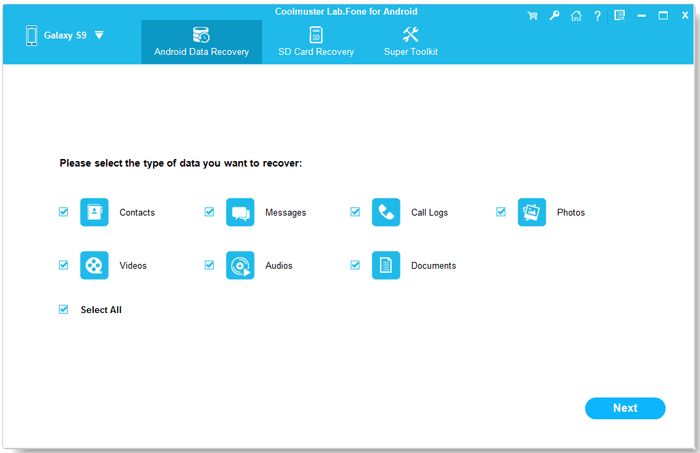
02Connect your Android phone to the computer and scan Android files. After finishing, you can choose the file types holding the files you want to recover in this interface. Click "Next" to continue.
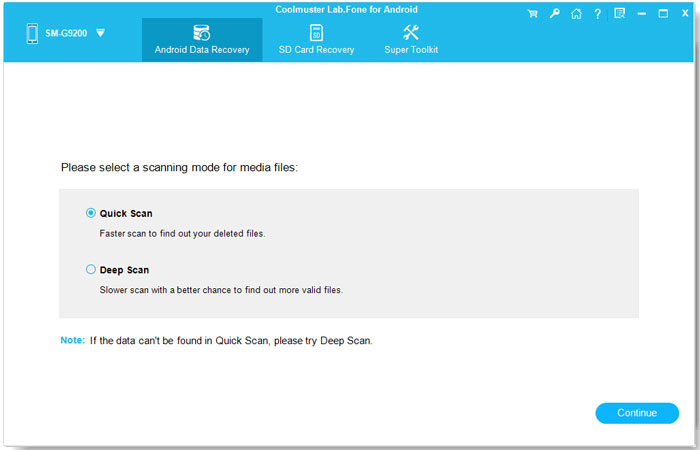
03Select between "Quick Scan" or "Deep Scan" modes. After making your choice, click "Continue" to start the data scan on your Android phone.
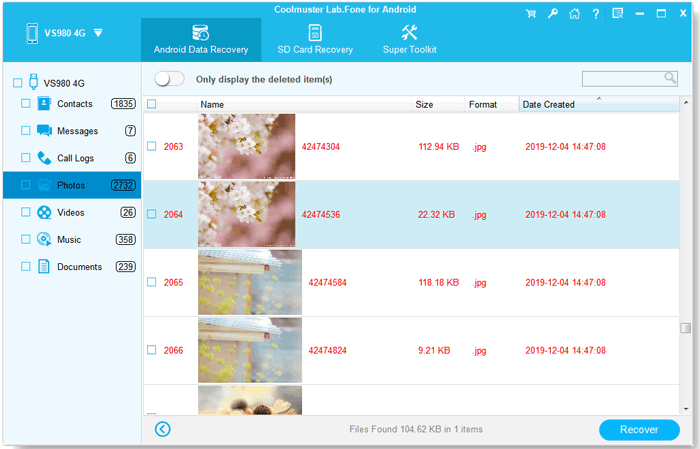
04After the short scan, all present and lost files will be listed on the left. Click "Photos", mark the files you want to recover, and click "Recover" to effortlessly save them to your computer.
That's all about how to recover deleted photos on Keepsafe. For a comprehensive and efficient solution, we highly recommend using Coolmuster iPhone Data Recovery for iPhone users and Coolmuster Lab.Fone for Android for Android users. These tools ensure a smooth and reliable recovery process, safeguarding your cherished memories with ease.
Related Articles:
[Solved] How to Recover Deleted Photos from iPad? (2024 Update)
How to Recover Deleted Photos after Deleting from Recently Deleted Album on iPhone?
[4 Ways] How to Recover Permanently Deleted Photos from iCloud?
How to Restore Photos from iCloud? Successfully Resolved in 6 Ways


