Coolmuster Android Assistant for Mac Online Help
This how-to guide shows how to use Coolmuster Android Assistant for Mac to manage data on Android device step by step. Here you will learn how to connect Android device to Mac, how to import, export, edit, delete, copy, forward, send Android files on Mac computer in an organized way without hassle.
Part 1. Preparation - Connect your Android Device to Mac
Part 2. How to Transfer and Manage Android Data on Mac
Part 3. One Click to Back Up & Restore Android Data on Mac
Part 1. Preparation - Connect your Android Device to Mac
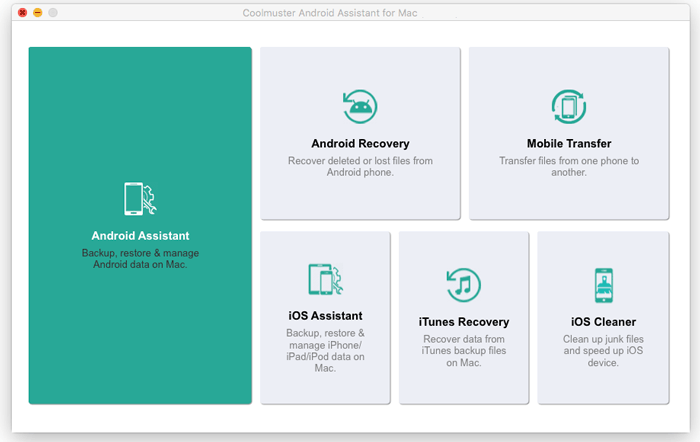
When you launch the software on your Mac after installation, you might get the following toolbox at first, where there are different separately charged software. Please click "Android Assistant" to access Coolmuster Android Assistant for Mac and manage your Android data with it.
To make your Android device detected by the program, you can choose to connect via USB cable or Wi-Fi network.
- Connect Android to Mac via USB Cable
Quick look: Connect Android to Mac via USB > enable USB debugging on Android > allow USB debugging on Android > install Android Assistant (Android Version) > Android is connected.
1. After launching the program on Mac, please plug your Android device to Mac via a USB cable.
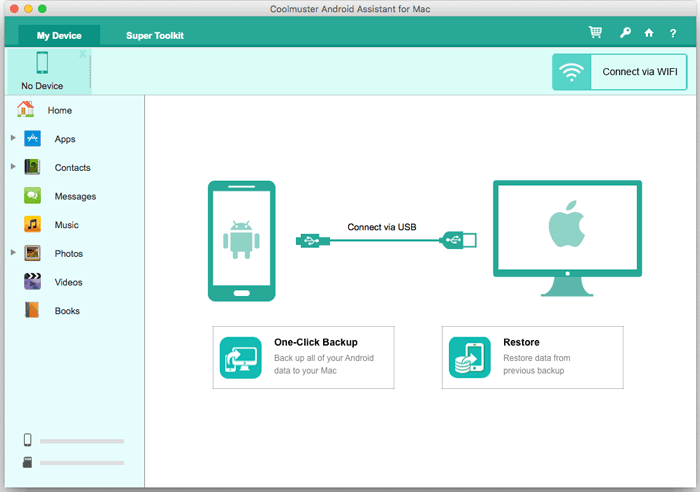
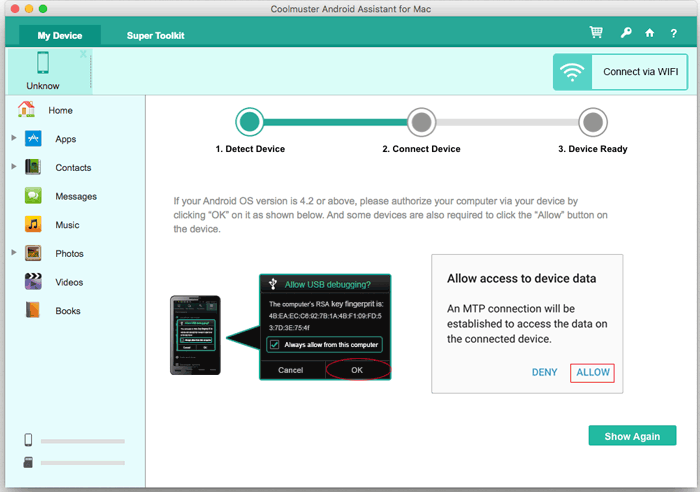
2. Then the program will try to detect your device. If the following interface shows up, please enable USB debugging on your Android phone to continue.
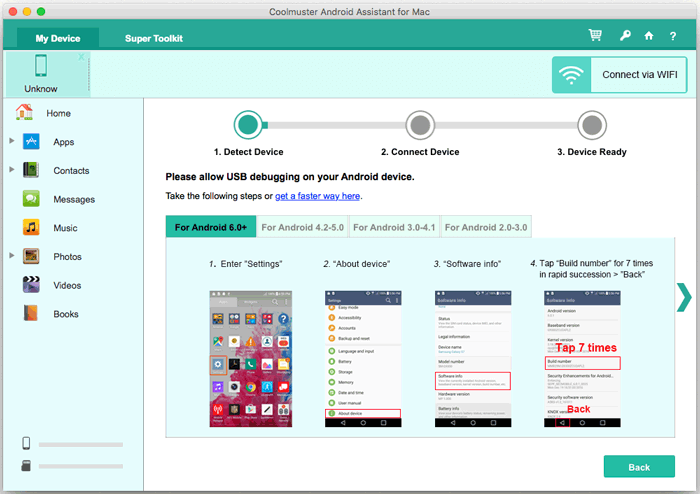
Note: For the first time you connect your Android device to the program, the Coolmuster Android Assistant (Android version) will be automatically installed on your Android device for successful connection.
3. For Android device running Android 4.2 or up, please tap "ALLOW" or "OK" button on your device to access your device data successfully. Can't see this pop-up window? Click "Show Again" button to authorize it again.
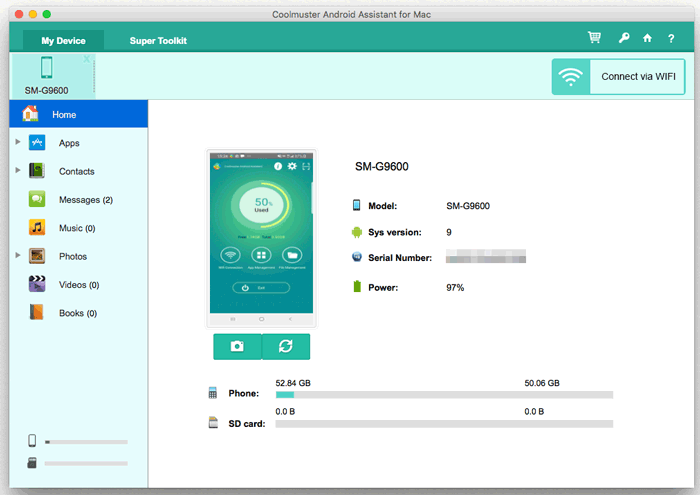
Now, your Android phone will be connected to Mac successfully and show you the main interface as below. You can now start to manage Android data on Mac. Failed to connect Android to Mac with USB cable?
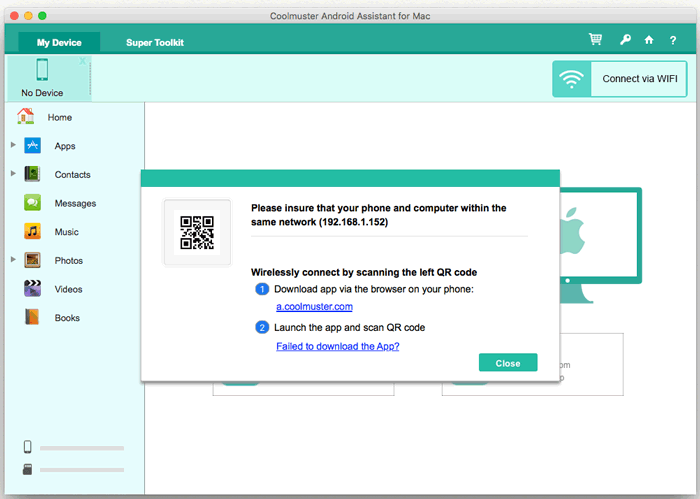
- Connect Android Devices to Mac with Wi-Fi
Quick look: Hit "Connect via WIFI" > download and install Coolmuster Android Assistant (Android Version) > run the Android Version and scan the QR code > Android is connected. See the detailed steps >>
Tip: Failed to connect Android to Mac via Wi-Fi? Learn what to do here >>
Part 2. How to Transfer and Manage Android Data on Mac
1. Selectively Transfer Data from Android Device to Mac
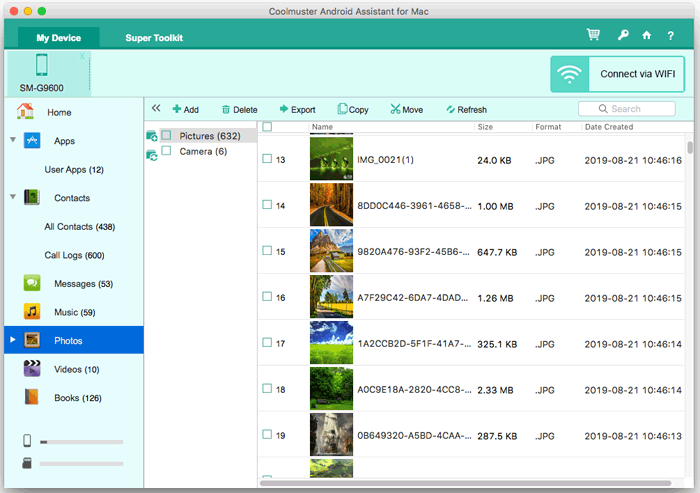
You can preview and choose whichever file(s) to transfer from Android to Mac. To do so, simply go to the corresponding file tab on the left panel, then tick off the file(s) you want, and click "Export" button.
For example, to transfer one or multiple songs from Android to Mac, please click "Photos" > "Photo Gallery", check the box of each pictures you want and click "Export" button to transfer all selected photos from Android to Mac immediately.
2. Selectively Transfer Files from Mac to Android Device
To restore data from Mac to Android phone, you can go to the corresponding file tab and click the "Import" (or "Add") button to bring out a file browser window, choose the contents you want to import and click "OK" to complete the process.
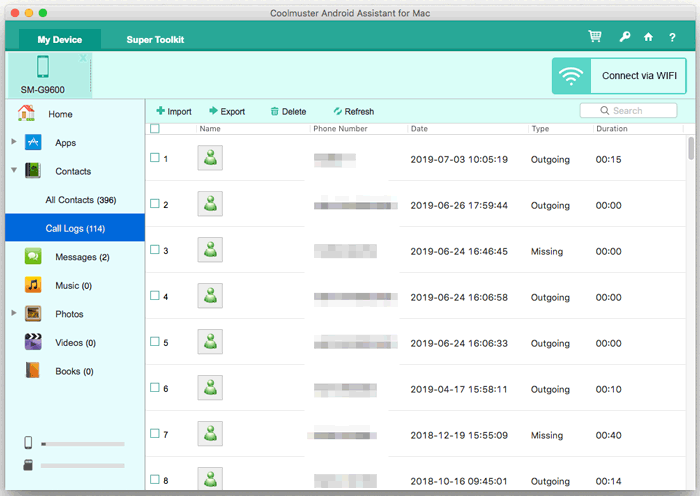
For instance, to import call history from Mac to Android, simply go to "Contacts" > "Call Logs" > "Import" > select call log file and click "OK" to start transferring.
3. How to Import/Export/Delete Android Media Files on Mac
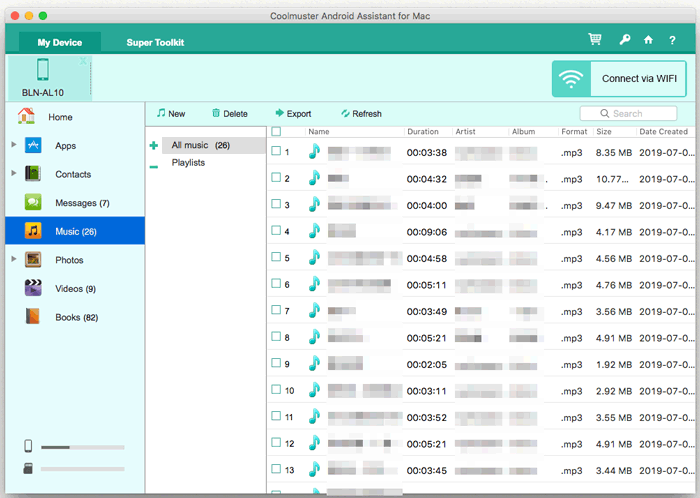
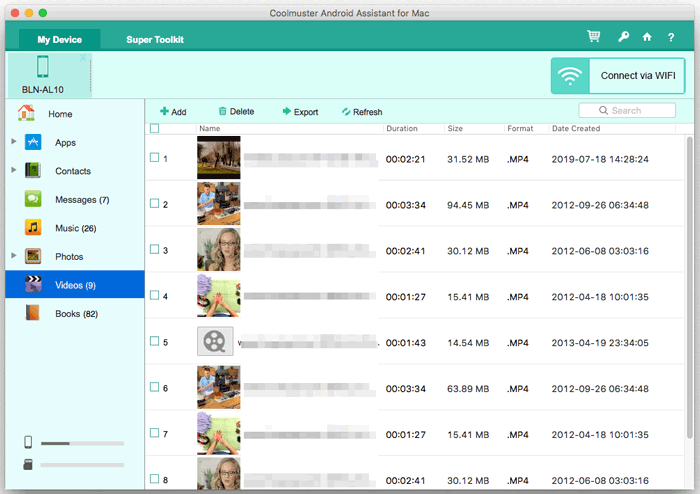
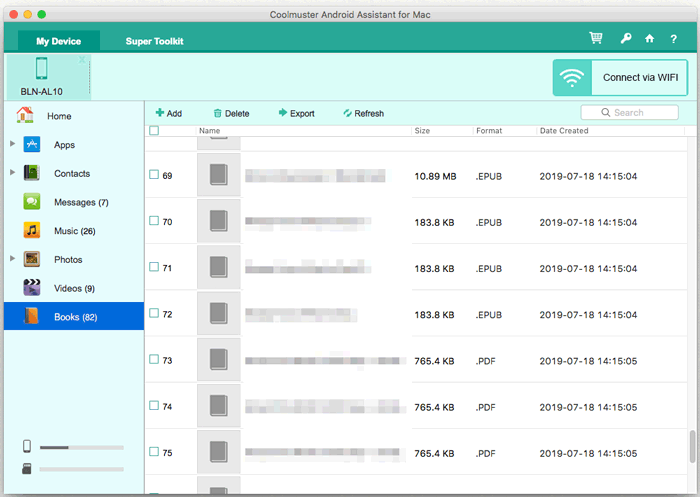
To manage media files on Android, simply go to "Photos", "Music", "Videos" or "Books" tabs in the left menu, then follow these steps:
- Export media files from Android to Mac: Tick off the files you want, click "Export" button.
- Import media files from Mac to Android: Click "Add/New" button to browse and choose files on Mac, and confirm by clicking "OK".
- Delete unwanted media files in batches: Tick off the files you want to remove from your Android phone, and click "Delete" button.
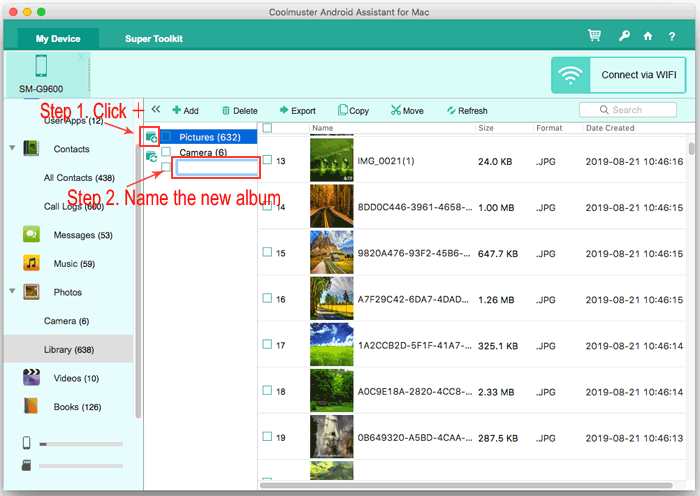
- Add new albums with 1 click: Click on the "+" icon to create a new album and enter the album name.
Manage Music:
Manage Videos:
Manage Books:
Manage Photos:
4. How to Add/Delete/Modify Android Contacts on Mac
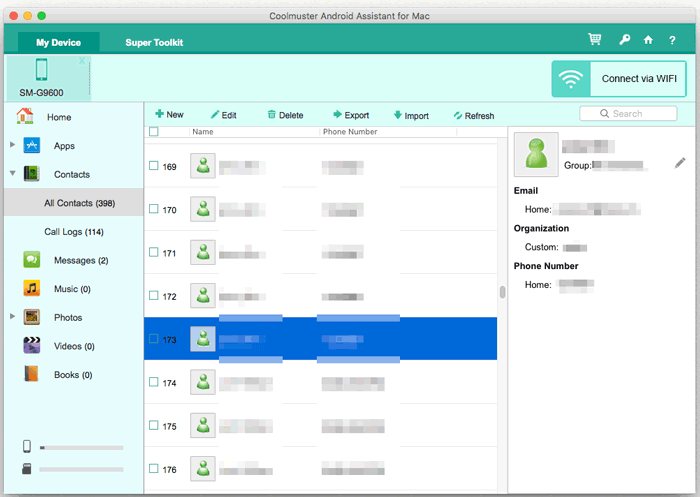
To manage Android contacts on Mac, simply choose the "Contacts" > "All Contacts" tab from the left sidebar, then follow these steps:
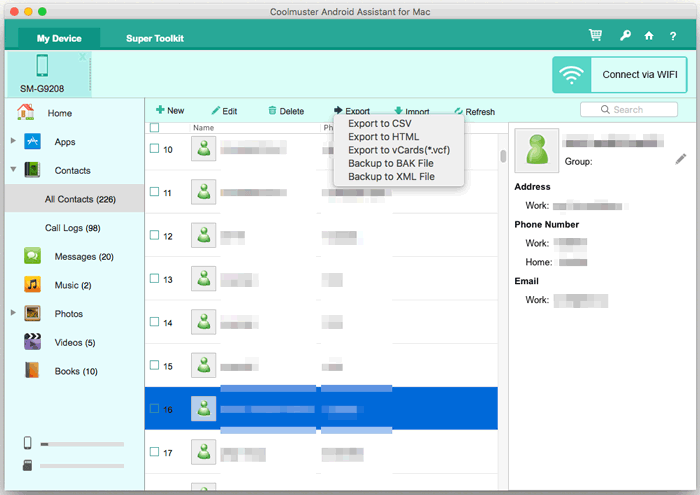
- Export contacts from Android to Mac: Select one or more contacts and click "Export" button, then choose an output format to save them on Mac as a CSV, HTML, VCF (vCards), BAK or XML file.
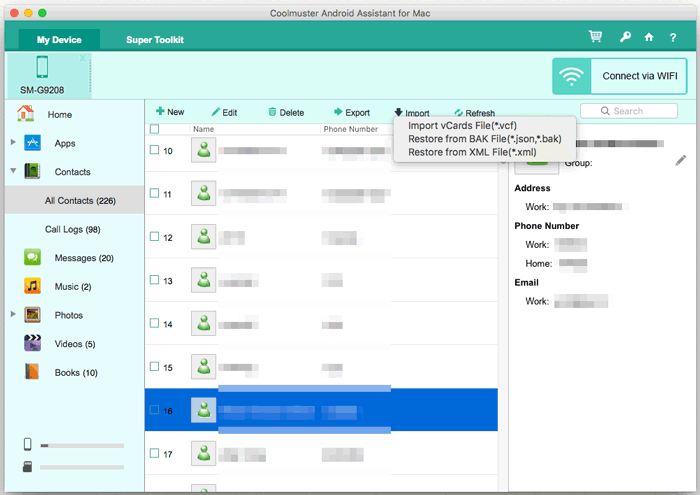
- Import contacts from Mac to Android: Click "Import" button to preview and choose desired contact files on Mac, and confirm it to start transferring.
- Add new contacts to Android phone: Click "New" button to pop up a window where you can enter the information of the new contacts, including the contact name, phone number, email, address, contact group, website and other customized contact info.
- Modify the info of the existing contacts: Click "Edit" button, you can add new info, delete unwanted info or modify wrong info of the existing contacts.
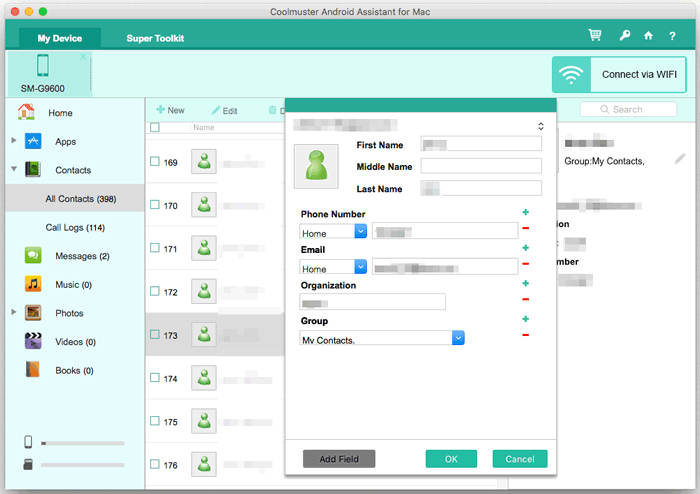
- Delete unwanted contacts from Android>: Tick off the contacts you don't want, and click "Delete" button to remove them from your Android phone.
5. How to Delete/Reset/Export/Import/Send Messages on Mac
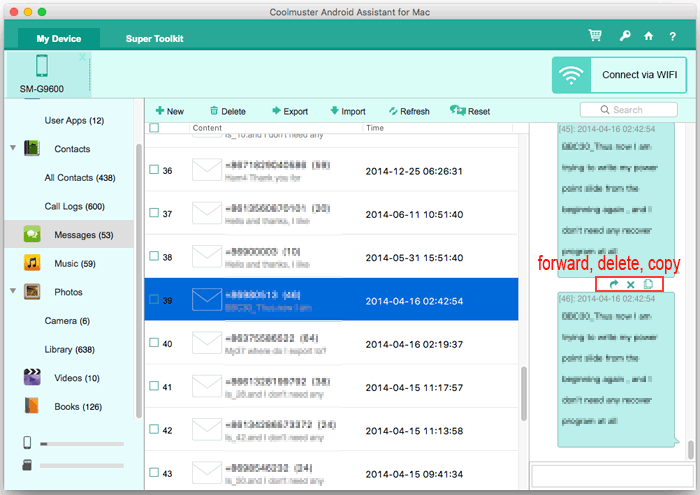
To manage Android SMS on Mac, simply go to "Messages" tab, then follow these steps:
- Export messages from Android to Mac: Mark the messages you want, click "Export" button and choose an output format to save them on Mac, either HTML, TXT, CSV, BAK or XML format.
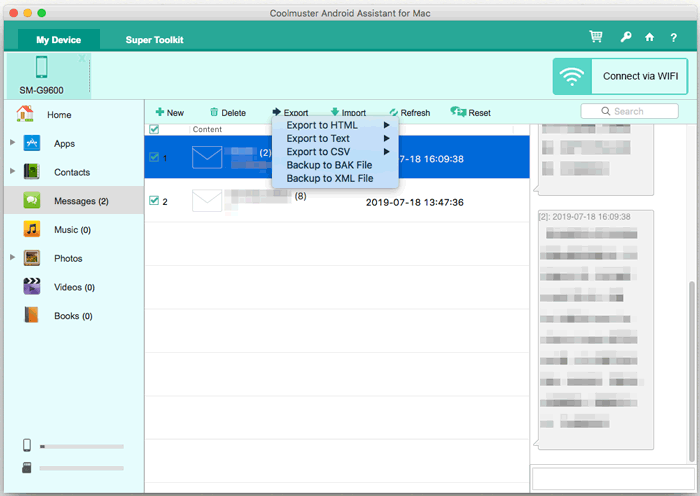
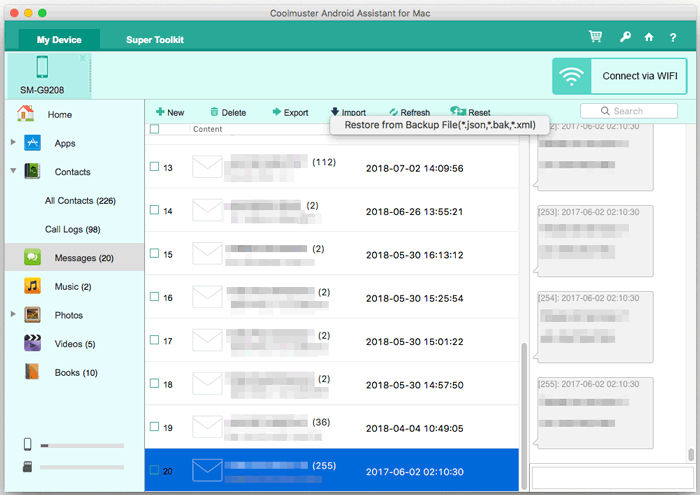
- Import messages from Mac to Android: Click "Import" button and choose the file you need from Mac, then confirm it to start the transfer process.
- Send messages to any phone number(s) on Mac: Click "New" button to pop up a window where you can edit your message content and choose one or multiple contacts (recipients), and click "Send".
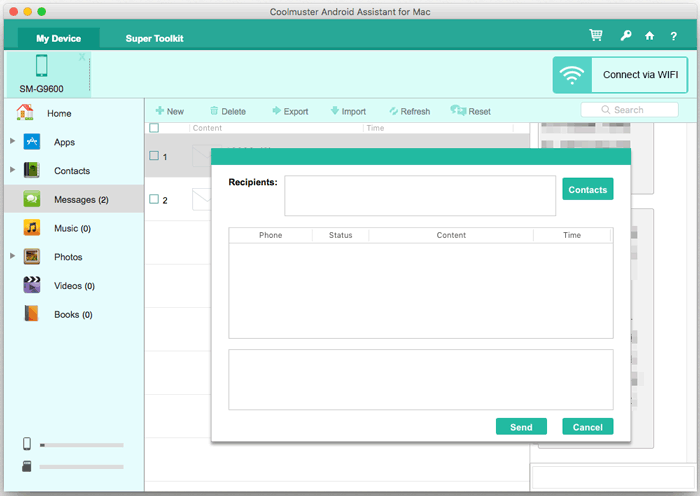
- Delete unwanted messages from Android on Mac: Choose unwanted text messages and click "Delete" button to clean them out from your Android device.
- Forward, delete and copy SMS conversations on Mac: Open SMS, find the SMS conversation you want, click the corresponding buttons to forward, delete and copy this content.
6. How to Manage Android Apps on Mac
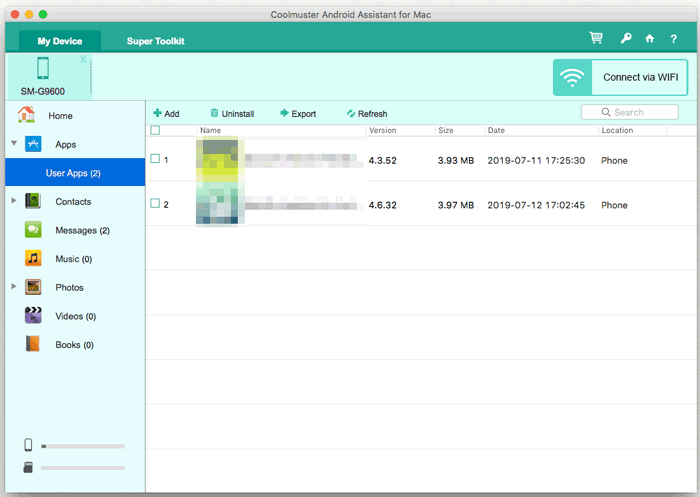
To manage applications that you have installed on your Android phone, you can go to "Apps" > "User Apps", then follow these steps:
- Install apps onto Android phone: Click "Add" button, which allows you to browse and choose whichever apps online to download and then install to your Android phone with ease. You can also search for the APK file on Mac to install it on your Android in this way.
- Uninstall apps from Android phone: Select the unwanted apps from the app list on the right panel, and click "Uninstall" button to delete them from your Android phone right away.
- Export apps from Android to Mac: Choose the apps that you want to back up, then click "Export" button to save them on Mac.
Part 3. One Click to Back Up & Restore Android Data on Mac
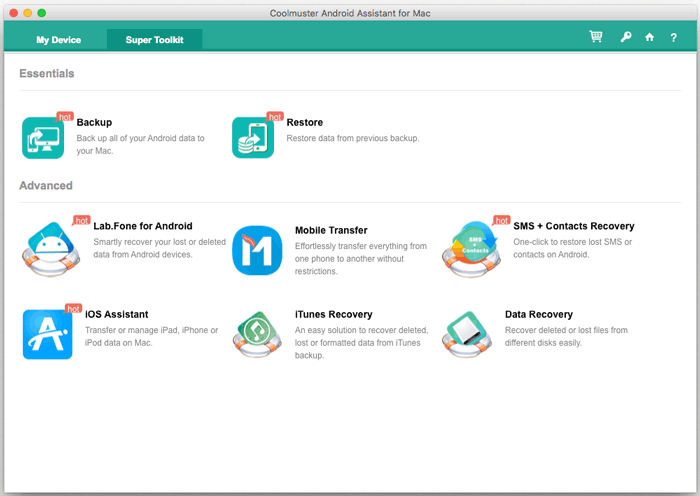
Want to back up all Android files so that you don't need to export them one by one? Coolmuster Android Assistant for Mac provides you with the 1 click Backup & Restore feature to help you back up all data from Android to Mac with 1 simple click, and also restore any backup files to any Android devices with 1 click.
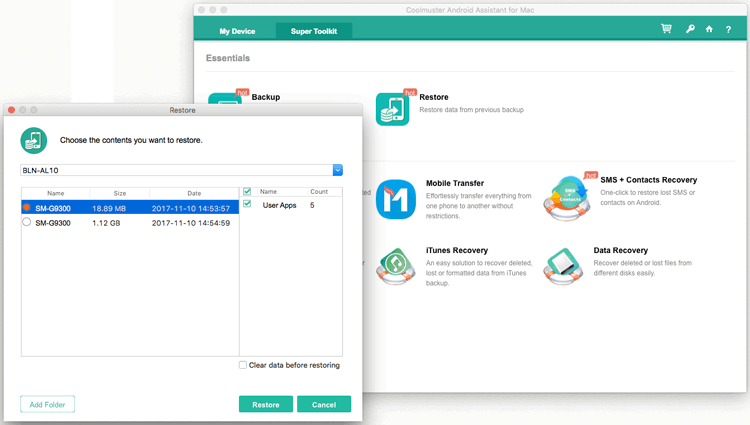
To achieve it, please go to "Super Toolkit" section where you can see the option of "Backup" or "Restore" as below:
- 1 Click to Back Up Android Data to Mac:
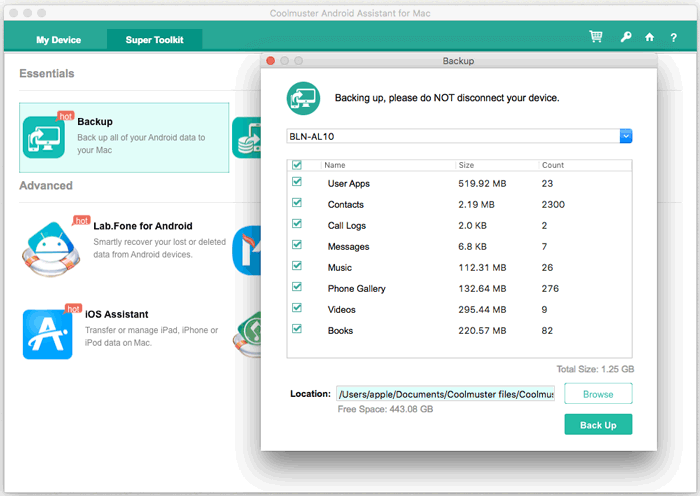
Click "Backup" button on Super Toolkit, select the contents you want to back up, click "Browse" to choose an output location on Mac to save the backup, then click "Back Up" button to start to back them up to the target folder.
- 1 Click to Restore Backup to Android:
Click "Restore" button on Super Toolkit, make sure your phone is selected. Now, choose the backup file and the file types you want to restore, check "Clear data before restoring" if needed, then click "Restore" button to start restoring your selected files to the connected Android device.
