
How to Convert Photo to PDF: 3 Online and 3 Offline Methods Unveiled

If you have a lot of photos on your personal computer, you may need help managing them. One of the ways is to convert photos to PDF for easier file management. When it comes to turning images into PDFs, there are several photo-to-PDF converters. Below is a step-by-step rundown on how to convert photos to PDF.
1. PDF enables you to keep your image files organized. You can use PDF files to group photos by placing related photos in one PDF.
2. PDF helps to protect your photos with a password. In contrast to photos, PDFs are easily locked with a password.
3. Converting photos to PDFs helps save storage space on your device since PDFs are generally smaller than original image files. Moreover, it makes it easier to share multiple photos with one PDF.
4. Turning your images into PDF files helps preserve the quality and layout of your photos.
Converting photos to PDF documents using offline tools is a straightforward process that can be useful for various purposes, such as creating digital portfolios, sharing documents, or archiving important images. In this part, we will explore the basic steps involved in this conversion process using offline software.
When converting images to PDF, Coolmuster JPG to PDF Converter is a powerful application that serves as a versatile photo-to-PDF converter for all kinds of image files, including TIFF, BMF, PNG, and JPG. Additionally, Coolmuster JPG to PDF Converter combines powerful performance with a user-friendly interface, ensuring high-quality PDFs every time. The software also provides various customization options, allowing you to control the layout, orientation, and quality of the resulting PDFs, ensuring that your converted documents meet your specific requirements.
Key Features:
Here's a step-by-step tutorial on how to convert images to PDF using Coolmuster JPG to PDF Converter:
01Download, install, and launch Coolmuster JPG to PDF Converter on your computer.
02Use the Add Folder or Add File button to upload the JPG, BMP, PNG, or TIF files you want to convert to PDF. Or, you can drag and drop directly into the application's interface. The uploaded files will appear in the file list area. Click Delete to erase any unwanted files.
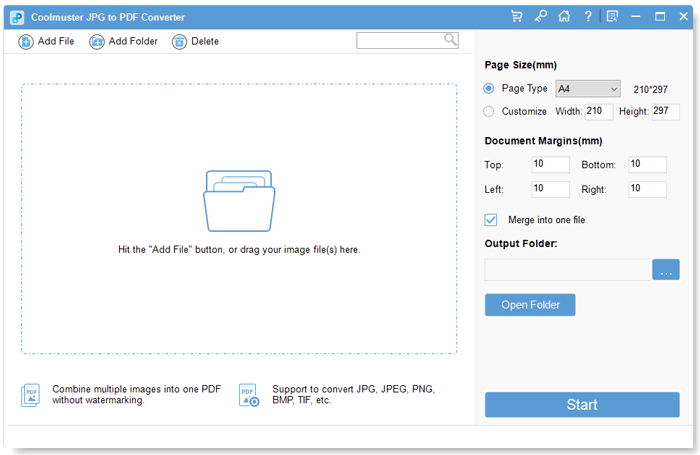
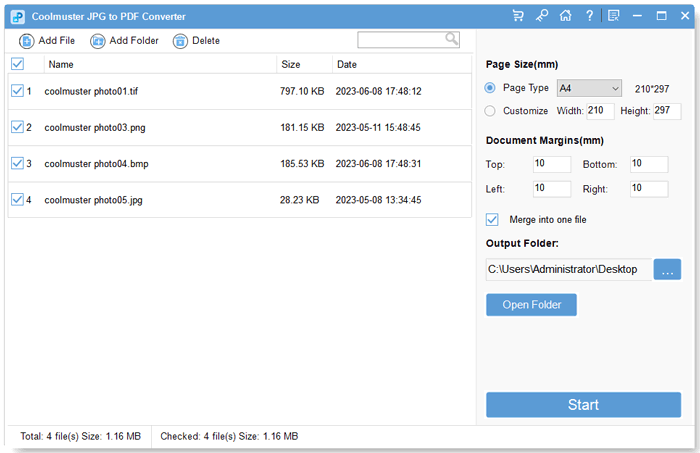
03Select the image files you want to convert to PDF from the list on the left, and set up the output PDF Page Size and Document Margins as needed. Then, set the Output Folder location or keep the default folder.
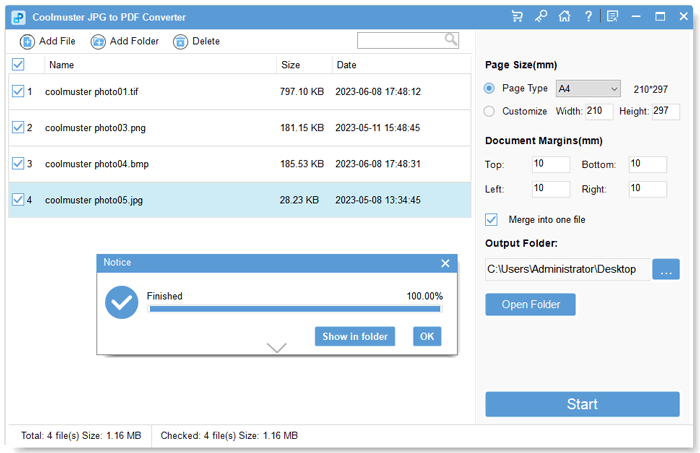
04After completing all the necessary settings, click Start to begin to convert your images to PDF. When the progress bar reaches 100%, the conversion process is complete. Click Show in Folder in the pop-up window or select Open Folder in the application interface to access the output PDFs.
Microsoft Print to PDF is a built-in feature for Windows users to create and edit PDFs from their PCs. It features some of the best editing tools across its interface. How do you convert photos to PDF with Microsoft Print to PDF as a photo-to-PDF converter? Follow this comprehensive guide to turn photos into a PDF with Microsoft Print to PDF:
Step 1. First, choose the photos you want to convert to a PDF. You can select multiple photos by holding down the Ctrl key while clicking on each photo.
Step 2. Once you've selected the photos, right-click on any of the selected photos and choose Print from the context menu. Alternatively, you can click the Print button in the top-right corner of the window if you're using the built-in Photos app.
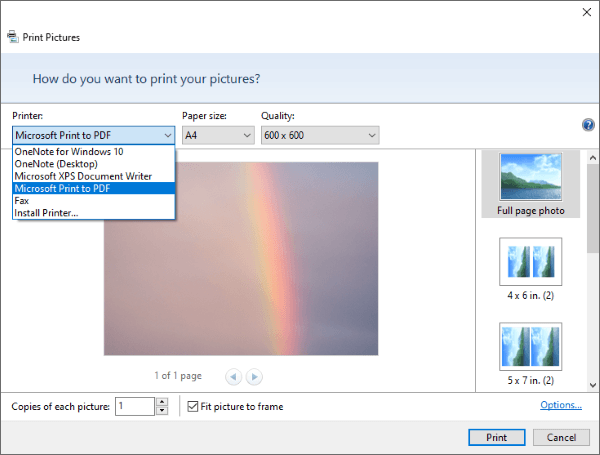
Step 3. In the Print Pictures dialog box that appears, go to the Printer section. From the drop-down menu, select Microsoft Print to PDF.
Step 4. Below the Printer selection, you can choose where you want to save the PDF file. Click on Browse to select a specific folder and give your PDF file a name.
Step 5. Once you've configured your settings and chosen the destination, click the Print button. Windows will now convert your selected photos into a PDF file. You'll be prompted to choose a location to save the PDF. Select a folder and click Save.
Preview is a powerful application for Mac users that goes beyond just viewing photos and PDFs. It allows you to make basic edits to images, annotate PDFs, and, of course, turn a photo into a PDF. Here's a general guide on how to save a photo as a PDF on Mac with Preview:
Step 1. First, choose the photos you want to convert into a PDF. You can select multiple photos by holding down the Command key while clicking on each photo.
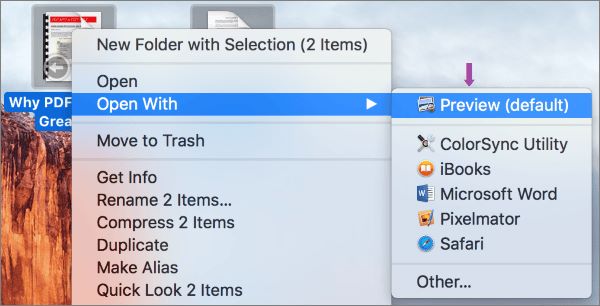
Step 2. After selecting the photos, right-click on one of the selected photos. From the context menu, hover over Open With and select Preview.
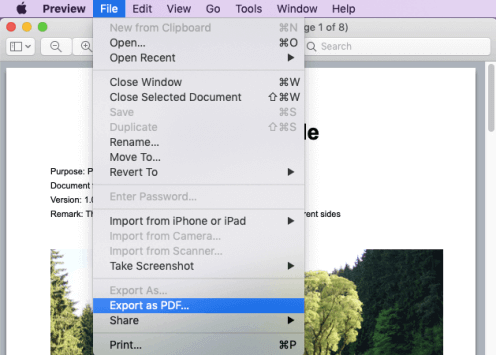
Step 3. With your photos open in Preview, click on the File menu at the top-left corner of your screen and select Export as PDF.
Step 4. Choose a location and set the file name for your PDF. Once you've configured your settings and chosen the destination, click the Save button. Preview will convert your selected photos into a PDF file.
Instead of downloading and installing a photo-to-PDF converter, you can leverage online photo-to-PDF converters in your web browser to convert photos to PDF to save you time. In addition, they don't require subscribing, and they can be accessed from Mac, Windows, and Linux operating systems. This section explores how to save images as PDFs with online photo-to-PDF converters.
Sejda is a popular online PDF platform known for its intuitive interface and various tools for PDF editing and conversion. It offers a straightforward method to convert photos to PDF. Here's how to make a photo a PDF online using Sejda:
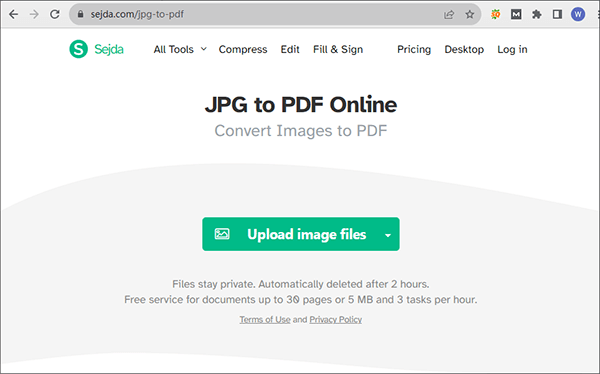
Step 1. Open your search engine on your computer and navigate to the Sejda online photo-to-PDF converter.
Step 2. Click Upload image files to upload the image file.
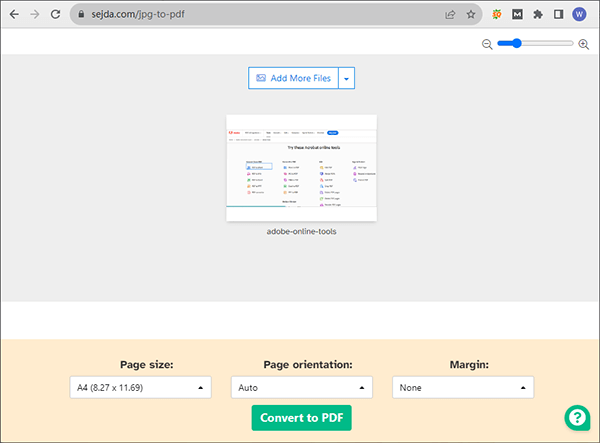
Step 3. After uploading, Click Convert to PDF. Sejda automatically converts the file.
Step 4. Click Download to save your PDF file on your PC.
Note: Wondering how to convert PNG to PDF? There are 3 offline methods and 5 online methods.
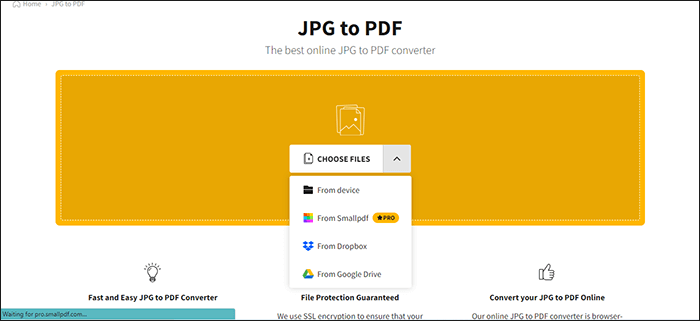
SmallPDF is a user-friendly online PDF tool known for its simplicity and efficiency. It provides a simple and fast solution to convert various file formats, including images, into PDFs. Follow these simple steps to convert images to PDF online using SmallPDF:
Step 1. Open your web browser on your computer and go to SmallPDF online photo-to-PDF converter.
Step 2. Click Choose Files to upload the image file. Also, you can drop the image file in the drag-and-drop area.
Step 3. After uploading, Click Convert. SmallPDF automatically converts the file.
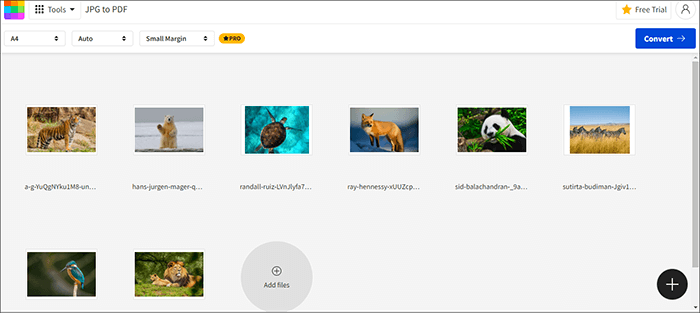
Step 4. Click Download to save your PDF file on your PC.
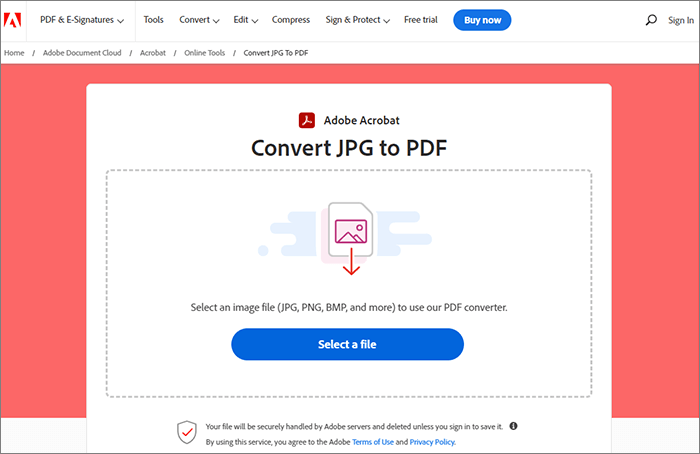
Adobe Acrobat is known for its comprehensive set of PDF tools, including editing PDFs, splitting PDFs, merging PDFs, compressing PDFs, and, of course, converting photos to PDFs. Its online version offers accessibility from anywhere with an internet connection and provides several options to customize your PDF file. Here's how to convert a photo to PDF online using Adobe Acrobat online:
Step 1. Open your search engine on your PC and go to Adobe Acrobat online photo-to-PDF converter.
Step 2. Click Select a File or drag and drop to import the image file to be converted to PDF. After uploading, Adobe Acrobat automatically converts the document.
Step 3. Click Download to save your PDF file on your computer.
In this article, we provided some online and offline methods to convert photos into PDFs, among which I highly recommend the software - Coolmuster JPG to PDF Converter. Coolmuster JPG to PDF Converter is a more professional, comprehensive solution for converting photos to PDF fast, efficiently, and with zero quality loss. Download Coolmuster JPG to PDF Converter today to convert photos to PDF. Moreover, it comes with a free trial, experience its robust powers and user-friendliness.
Related Articles:
How to Convert Image to PDF with Ease: 7 Methods Unveiled
Convert Photos to PDF: Top Offline & Online JPG-to-PDF Converters Free
How to Add Image to PDF Like a Pro [6 Efficient Methods + 1 Bonus]
How to Scan a Picture to PDF Like a Pro? Your Ultimate Guide


