
[Comprehensive Guide] How to Delete All Photos from iPhone?

"I know I can delete one or multiple photos but how can I delete all photos? I don't see a select all photos option for me to delete."
- from Apple Community
The storage space on an iPhone is limited, and photos often take up a large portion of it. When you want to free up storage, clean up your photos, or prepare to sell your iPhone, deleting all photos is a necessary step. However, Apple does not provide an option to delete all photos with a single tap, so you need to use different methods to accomplish this task. This article will guide you on how to delete all photos from iPhone, helping you easily clean up your photo library.
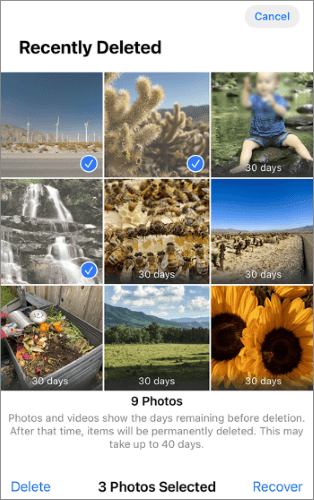
The simplest and most direct way to delete all photos is by using the built-in Photos app on your iPhone. However, since there is no direct "Select All" button, you need to manually select all the photos before deleting them. Additionally, deleted photos will go into the "Recently Deleted" album, and you'll need to manually empty that album in order to permanently delete all the photos.
Here is how to delete all photos on iPhone using the Photos app:
Step 1. Open the Photos app on your iPhone.
Step 2. Go to the "Library" section and select "All Photos", then tap "Select".
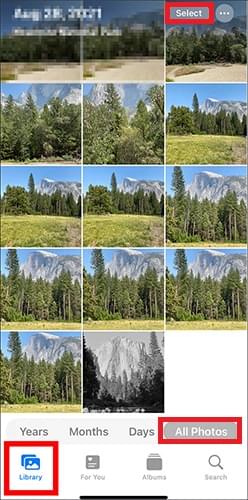
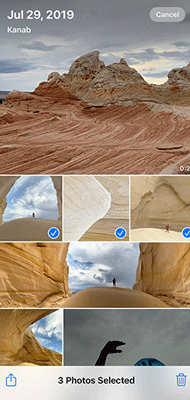
Step 3. Choose multiple photos by tapping or sliding your finger across them.
Step 4. Tap the "trash" icon and confirm to delete the selected photos.
Step 5. Next, navigate to "Photos" > "Albums" > "Recently Deleted".
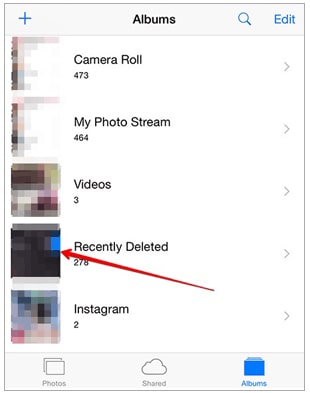
Step 6. Select the specific photo or video you wish to remove, and then tap "Delete". To delete all the content within the album, simply tap "Delete All".
If you don't want to manually select and delete photos, you can use Coolmuster iOS Assistant, a professional iPhone data management software that supports one-click deletion of all photos. It is the best way to delete all photos from iPhone. It also allows you to back up photos to your computer to prevent accidental data loss. Compared to manual deletion, this method is more efficient, especially for users with a large number of photos.
Key features of iOS Assistant:
Here is how to delete all pictures from iPhone using iOS Assistant:
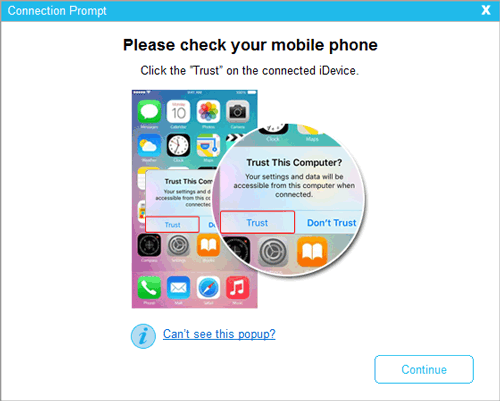
01Download this tool, open it, and connect your device to the computer using a USB cable. Select "Trust" on your device and click "Continue" to proceed when a pop-up window appears on your computer.
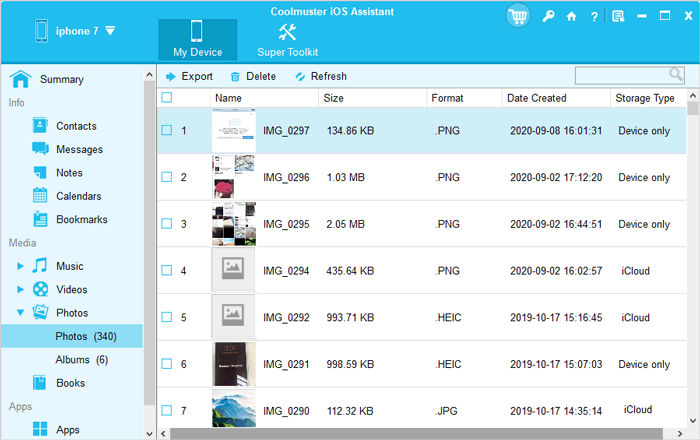
02Once your device is recognized by the software, you'll see all your file folders neatly organized on the main interface.

03Navigate to the "Photos" tab on the left. Check the box under "Export" to select all your photos, and then click "Delete" to remove all photos from your iPhone.
If you have iCloud Photos enabled on your iPhone, you can delete photos from any device via iCloud.com, which will sync and delete all photos on your iPhone. (iCloud Photos not syncing?)
How do I delete all photos from my iPhone via iCloud.com? Follow the steps below:
Step 1. Visit iCloud.com in your browser.
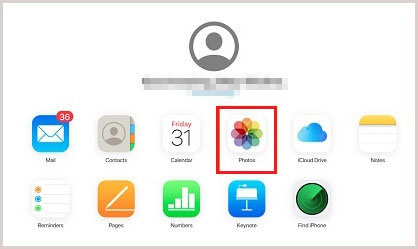
Step 2. Log in with your Apple ID and click on "Photos".
Step 3. Go to "Library", click "Select", and select all photos (you can quickly select all by pressing Cmd + A / Ctrl + A).
Step 4. Click the "Delete" button and confirm the deletion.
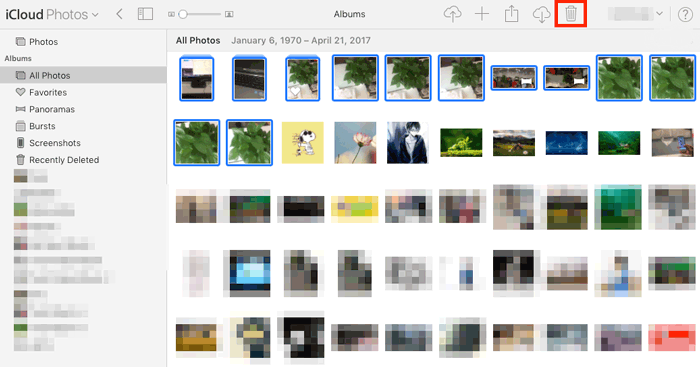
Step 5. Go to "Recently Deleted" and click "Delete All" to permanently remove the photos.
If you use iCloud, you can also delete iPhone photos using a Mac. Any photos you delete from the Photo Library on your Mac will also be removed from your iPhone. Here is how to delete all photos in iPhone using a Mac:
Step 1. Open the Photos app on your Mac.
Step 2. Choose "Photos" from the Library section at the top of the left sidebar.
Step 3. Choose the photos you wish to delete (press "Command+A" to select all photos in your library) and press the "Delete" key.
Step 4. Confirm the deletion by clicking "Delete".
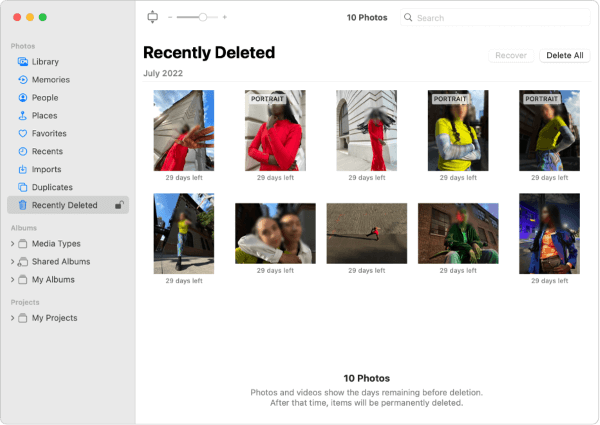
Step 5. Next, go to the "Recently Deleted" section in the "Library".
Step 6. Click "Delete All" in the top-right corner of the window. Click "OK" to confirm.
That's all about how to delete all photos from iPhone. Although we have various methods to choose from, for users who need to quickly and efficiently delete a large number of photos, we highly recommend using Coolmuster iOS Assistant. This software is easy to use, powerful, and can greatly save time and effort. Whichever method you choose, please ensure to back up important photos to avoid unnecessary loss in case of accidental deletion.
Related Articles:
How to Delete Photos from iPhone But Not iCloud? Solved in 5 Ways
[Step-by-Step Guide] How to Remove iPhone Photos from Computer Quickly?
Simplified Guide: How to Delete Photos from iCloud in Seconds
How to Delete iPhone Photos from Mac? Successfully Solved in 5 Ways


