
How to Permanently Delete Photos from iPhone 16/15/14/13? (4 Ways)

"I'm seeking assistance with permanently deleting photos from my iPhone. I've been trying to manage my phone's storage and want to ensure that the photos I delete are completely removed and not just sitting somewhere in the device. However, I'm not entirely sure about the correct process to do this. When I delete photos, they seem to still occupy space or remain in some sort of 'Recently Deleted' album. I'm looking for a way to ensure that once I delete a photo, it's gone for good and not recoverable, as I need to free up space on my device efficiently. Any guidance on how to achieve this, or any tips on managing photos and storage on an iPhone would be greatly appreciated".
- from Apple Community
It is believed that the iPhone is an ideal tool for taking photos. However, there must be some photos that you don't need any longer after you've looked through them over and over. In this case, you can easily delete them from your iPhone. However, why are deleted photos still on my iPhone? Can deleted photos be permanently deleted on iPhone? Of course. This guide focuses on how to permanently delete photos from iPhone. No matter whether you want to sell the iPhone to someone else or switch to a new phone, you will not worry about the privacy leaked to others.

When it comes to permanently deleting photos from an iPhone, the safest way to do it is to use a professional iOS eraser tool. Although there are many choices in the market, the Coolmuster iOS Eraser is the most popular one that you can use. With this powerful tool, you are able to erase all the data on your iOS device without restoration, including the photos. Moreover, it offers three security levels for you to choose according to your own needs. The most important point is that the deleted data can not be recovered with any data recovery software.
Highlights of iOS Eraser:
Download this software on your computer.
Here is how to permanently delete photos so that it cannot be recovered using iOS Eraser:
Note: iOS Eraser doesn't support selectively erasing data, and once the data is deleted by this tool, it is unrecoverable. Therefore, you must back up your important data on your iPhone beforehand.
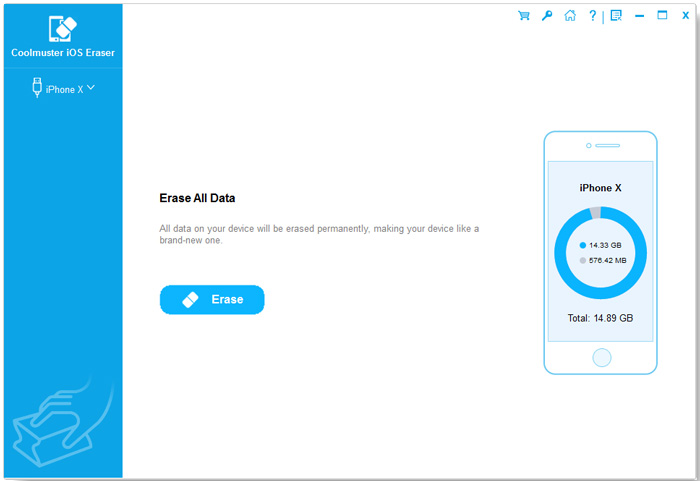
01Launch this software on your computer and connect your iPhone to the computer with a USB cable. After your iPhone is successfully connected to the computer, you will see the interface below. Now, click the "Erase" button to start the process.
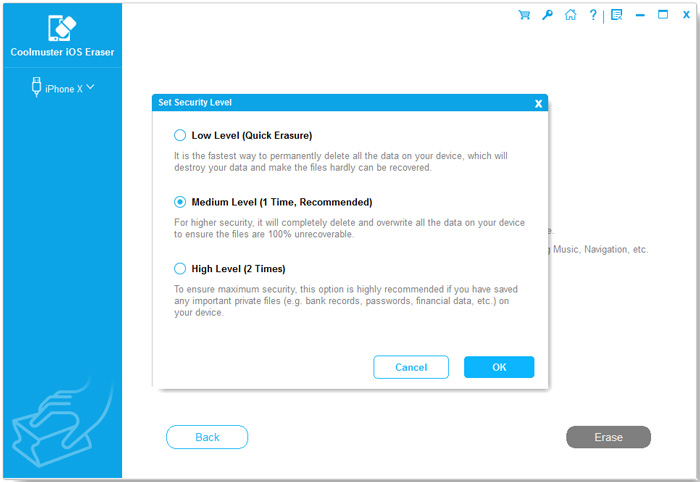
02Please click the menu beside Security Level to choose the security level for erasing. Then click on the "OK" button after the selection. Now, type "delete" in the blank to confirm erasing data from the iPhone.
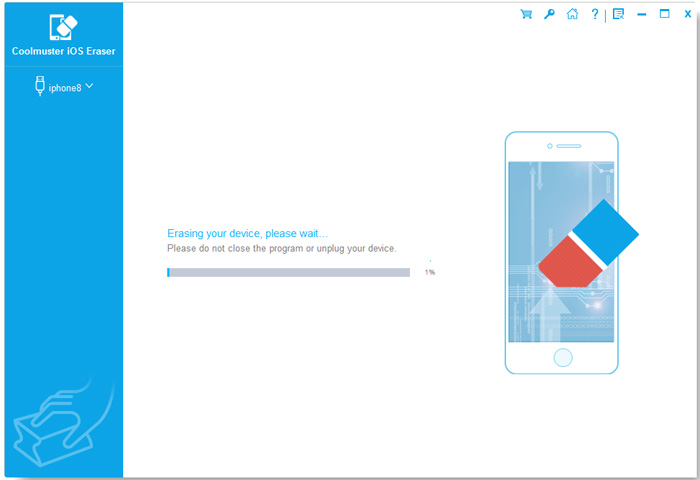
03When you confirm the erasing procedure, the program will quickly scan your iPhone. Then, it starts to erase data from your iPhone.
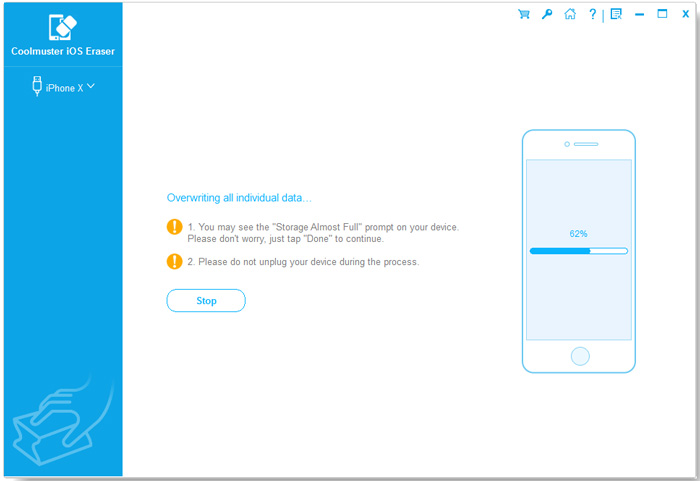
04When the erasing process is finished, your iPhone will automatically restart. After it restarts, you are supposed to unlock your iPhone and reconnect it to the program. Then, the program will continue to overwrite your iPhone data. When the whole process is complete, your data, which includes those photos, is successfully deleted from your iPhone permanently without a chance to be restored.
As iPhone users, you may find that when you delete the photos by simply choosing them and tapping the trash icon, the photos are actually not entirely deleted. They still remain on your iPhone and will stay there for 30 days in the Recently Deleted album before being permanently removed. Therefore, you have to delete those deleted photos once again in the Recently Deleted album.
Here is how to delete recently deleted photos on iPhone:
Step 1. Open the "Photos" app on your iPhone.
Step 2. Choose "Album" from the bottom of the screen and then click on "Recently Deleted".
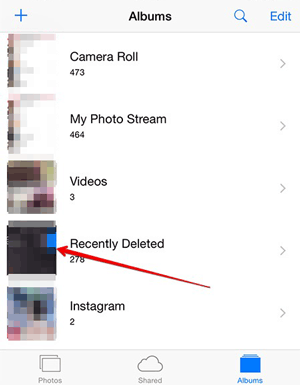
Step 3. Tap the "Select" in the right corner to select the photos you want to delete from your iPhone. Or, if you want to delete them all, you can click "Delete All" to mass delete photos from iPhone.
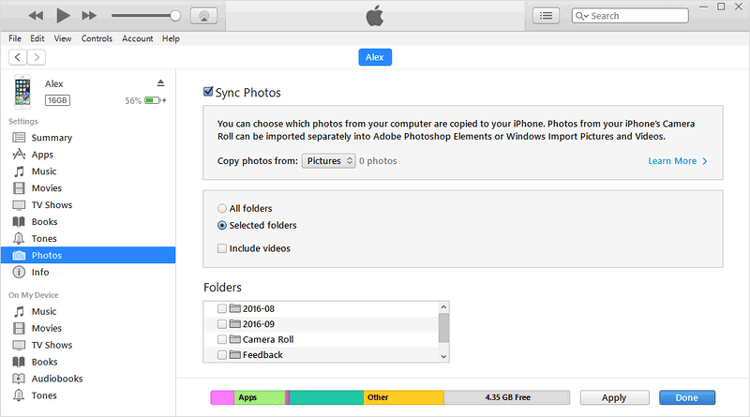
Maybe you will encounter such a situation where you cannot delete your pictures or an album by tapping the trash icon. This may be because your photos are synced with iTunes. If you want your iPhone to delete photos permanently, you can do the following steps:
Step 1. Install and launch the latest version of iTunes on your computer.
Step 2. Connect your iPhone to the computer via a USB cable.
Step 3. Click the "Photos" tab in the left sidebar.
Step 4. Tick the box next to "Sync Photos". If already checked, move to the next step.
Step 5. Under "Copy photos from", click the drop-down menu.
Step 6. Choose "Select Folder" > "All Folders" to ensure no photos remain.
Step 7. Click "Apply" to sync the changes and delete all stored photos from iTunes.
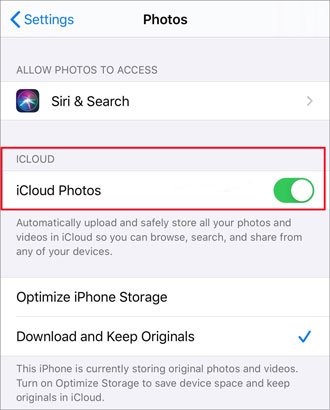
If you have enabled iCloud Photo Library, photos will automatically sync to iCloud, meaning that even if you delete them, they may still exist in the cloud. Therefore, to ensure the photos are completely deleted, you also need to visit iCloud and remove the relevant photos.
How do I permanently delete deleted photos from iPhone via iCloud? Here are the steps:
Step 1. On your iPhone, go to "Settings" > Tap your name > Select "iCloud".
Step 2. Tap "Photos" and make sure "iCloud Photos" is enabled.
Step 3. Open iCloud.com and log in with your Apple ID.
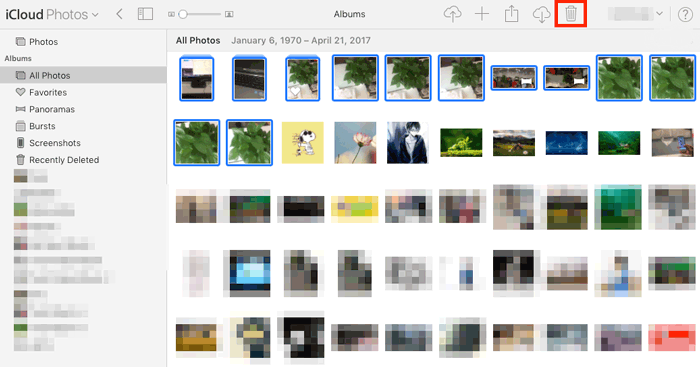
Step 4. Go to the "Photos" section, and select the photos you want to permanently delete.
Step 5. Tap the "trash can" icon in the top-right corner and confirm the deletion.
Considering that some of you may want to delete photos either from iCloud only or from iPhone only, here we also provide a guide:
There are four ways on how to permanently delete photos from iPhone. You can follow the step-by-step guide listed below to permanently delete your photos from your iPhone. If you are looking for the safest way to do this, Coolmuster iOS Eraser is the best choice. With this tool, you can permanently delete data, not limited to photos, from your iPhone with ease, and it can never be recovered with the data recovery software.
Download and try it right now. It won't disappoint you.
Related Articles:
How to Delete Albums on iPhone Easily and Quickly?
How to Delete Files on iPhone/iPad in 6 Ways [Step-by-Step Guide]
Does Restoring iPhone Delete Photos? Find the Answer Here!
Where Do Permanently Deleted Photos Go on iPhone? [Answer & Solutions]


