
[7 Quick Fixes] How to Fix AirDrop Declined on iPhone/iPad?

"I have two iPhones and both worked fine when I airdropped from one to the other. I updated both to iOS 17 and now one phone declines airdrop to the other".
- from Apple Community
AirDrop is a convenient tool for transferring files between Apple devices, but sometimes you may encounter issues where AirDrop is declined or unable to receive files. This can interrupt your workflow and prevent important files from being delivered on time.
Why is AirDrop declined? How to fix AirDrop declined your request? In this article, we will explore the reasons for AirDrop declined in iPhone and provide effective solutions. Additionally, if AirDrop is not working properly, we will also introduce alternative methods for transferring data.
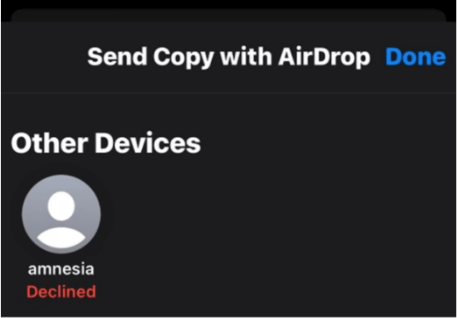
Why does AirDrop say declined? There are too many reasons for AirDrop keeps saying declined. Here are a few common possibilities:
Why does my AirDrop keep declining? Now, you know the reasons. Let's look at some simple solutions to resolve the problem on your own. Here are seven solutions to fix AirDrop declined your request.
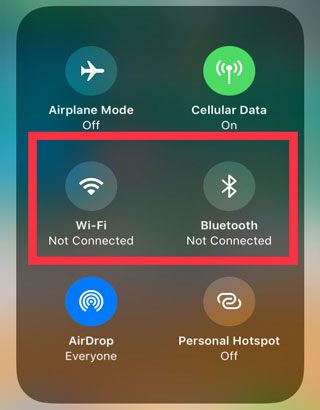
AirDrop uses Bluetooth to locate nearby devices and establishes a private peer-to-peer Wi-Fi network for file transfers. To resolve the AirDrop declined issue, ensure that both Bluetooth and Wi-Fi are enabled on your devices.
Swipe down from the home screen to access the iPhone Control Center and turn on both Wi-Fi and Bluetooth. You can also enable Bluetooth and Wi-Fi through the device settings.
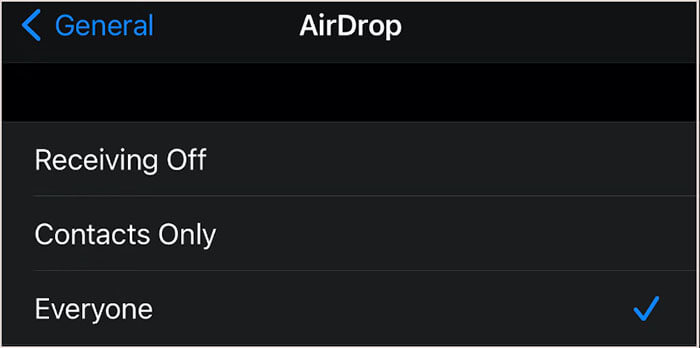
AirDrop has various settings: Receiving Off, Contacts Only, and Everyone. If set to Receiving Off, your device won't be discoverable. Contacts Only restrict transfers to saved contacts, while Everyone allows you to send and receive from anyone within range.
If AirDrop declined automatically, set it to Everyone on both the sending and receiving devices to see if this resolves the issue. Here is how to do it:
Step 1. Open the "Settings" app on your device and choose "AirDrop".
Step 2. You'll see the three options. Select "Everyone" to receive files from any device.
Is AirDrop Contacts Only not working? Read the following articles to learn how to solve this issue.
AirDrop Contacts Only Not Working? - Reasons and 5 Solutions Inside!AirDrop's effective transmission range is about 30 feet (approximately 10 meters). If the devices are too far apart, the transfer may fail. Additionally, physical obstacles (such as walls) or wireless interference can impact AirDrop's connection quality. Therefore, it is crucial to ensure that the devices are within the effective range.
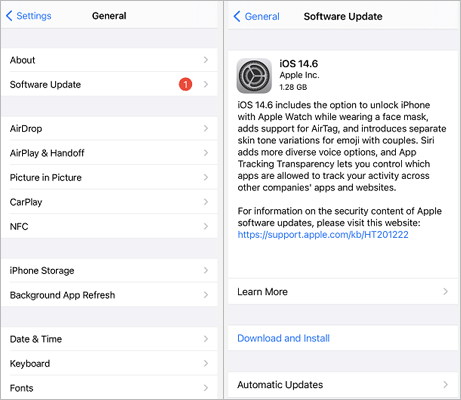
If your device doesn't meet AirDrop's minimum requirements (iOS 7 or later), you'll need to update iOS to ensure compatibility. To update your iPhone, follow the steps below:
Step 1. Go to "Settings" > "General" > "About" to check if your current iOS is compatible with AirDrop.
Step 2. Next, tap "Software Update" to view the latest available iOS version for your device. (iPhone stuck on software update?)
Step 3. Click "Download and Install" to update to the newest version.
When facing the AirDrop declined issue, check your network and connectivity settings to ensure everything is working properly. Also, disable Personal Hotspot, Airplane Mode, and VPN services, as these can interfere with the Wi-Fi signal.
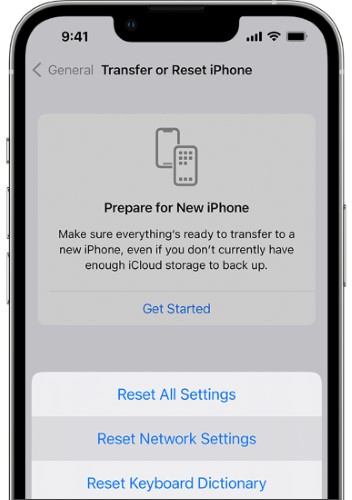
For a more thorough fix, consider resetting your network settings on your iPhone. Note that this action will erase all Wi-Fi passwords and network settings, but it will not delete other data on your device. Here are the steps to follow:
Step 1. Open the "Settings" app.
Step 2. Select "General", then tap "Transfer or Reset iPhone".
Step 3. Tap "Reset Network Settings" and follow the prompts to complete the process.
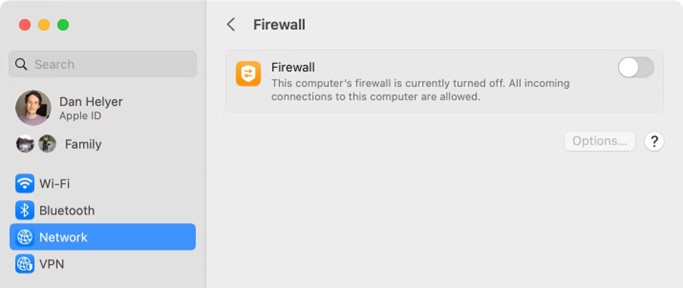
This fix applies to macOS devices and users trying to AirDrop from an iPhone/iPad to a Mac computer. If your MacBook's firewall is set to block all incoming connections, AirDrop will automatically decline all incoming transfers. You can check and adjust the firewall settings using the following steps:
Step 1. Open "System Settings" on your macOS device, then select "Network" and turn off the "Firewall" switch.
Step 2. Enter your Mac's admin password if prompted to authorize the change.
Step 3. Once the firewall is disabled, your Mac will accept more connection requests, including AirDrop file transfers.
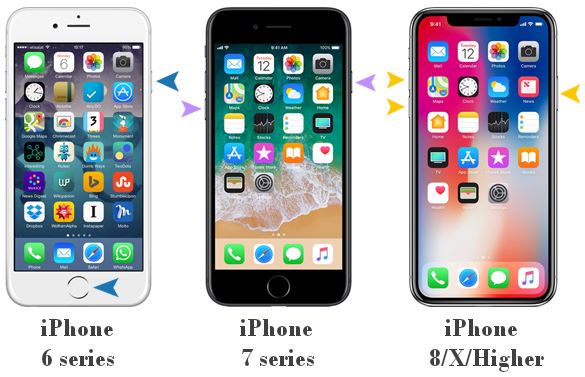
Sometimes, temporary issues can cause AirDrop to malfunction. Restarting both the sending and receiving devices can help resolve these problems. After rebooting, try using AirDrop to transfer files again.
If AirDrop still isn't working after trying the above methods, consider using alternative methods to transfer data. Here are two effective options:
If you need to transfer data between two iOS devices, Coolmuster Mobile Transfer is a great option. Unlike AirDrop, Mobile Transfer doesn't require a network connection, is user-friendly, and supports transferring large amounts of data in one go.
What Coolmuster Mobile Transfer can do for you:
Follow these steps to transfer data from iPhone to iPhone using Mobile Transfer:
01Download, install, and open the tool on your computer. Connect both iPhones to the computer with USB cables. When prompted, tap "Trust" on each iPhone to allow the connection.
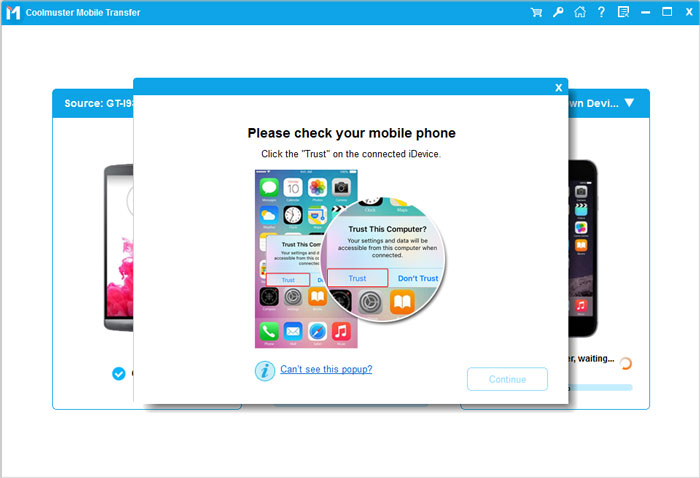
02After both iOS devices are connected, you'll see the program interface. Verify that the source and target devices are correctly identified. If not, click the "Flip" button to switch their positions.
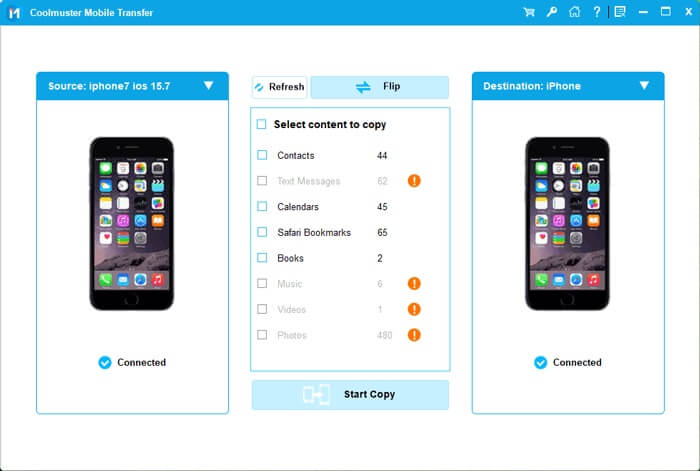
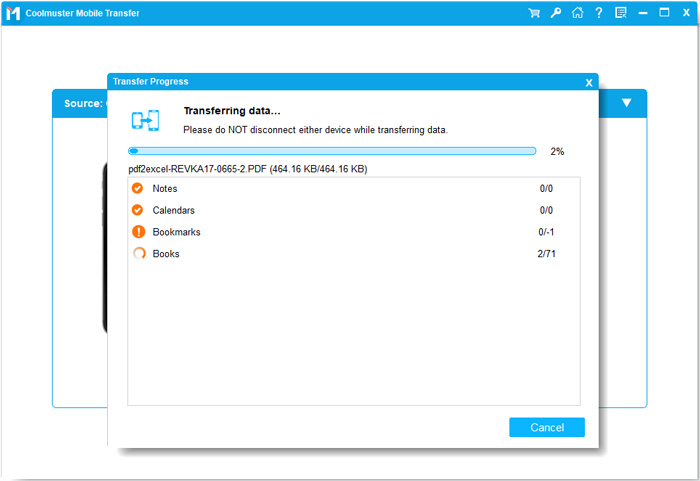
03Select the items you want to transfer from the content list, such as Contacts, Notes, Calendars, Bookmarks, and Books. Then click the "Start Copy" button to begin the transfer process automatically.
Video Tutorial:
Coolmuster iOS Assistant is another powerful tool for transferring files between iOS devices and Macs. It supports the transfer of various file types and offers device backup and management features, making it ideal for users who frequently need to move data between devices.
Core features of Coolmuster iOS Assistant:
Follow these steps to transfer files between your iPhone and Mac:
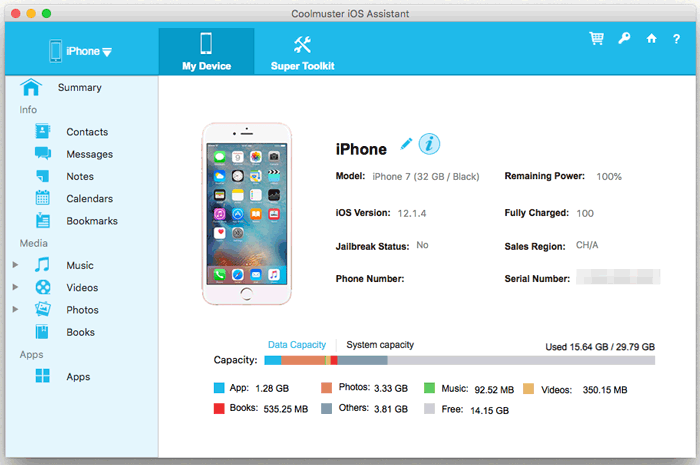
01Download, install, and launch the tool on your Mac. Connect your iPhone to the Mac using a USB cable and trust the device when prompted. Once successfully connected, you will see the interface.
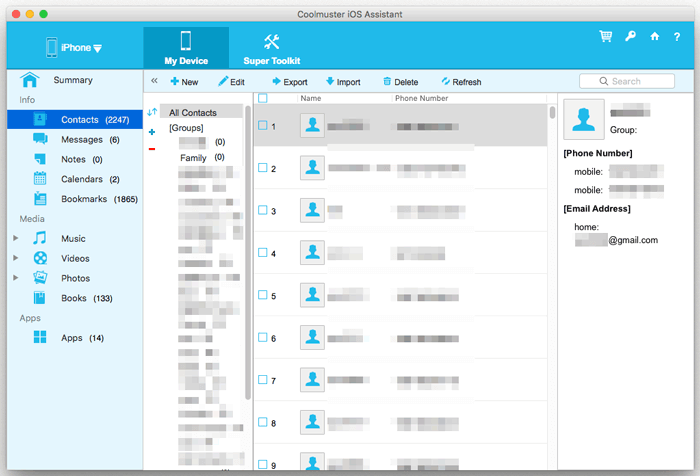
02Select a category from the left panel and choose specific items from the right panel. To transfer files from iPhone to Mac, click the "Export" button. To transfer from Mac to iPhone, click the "Import" button.
Video Tutorial:
When AirDrop is declined, don't get discouraged. Try the methods mentioned above to resolve the issue. If the problem persists, consider using Coolmuster Mobile Transfer and Coolmuster iOS Assistant as alternatives, both of which offer stable and efficient data transfer solutions.
Related Articles:
[2024 Updated] Top 10 AirDrop Alternatives for Windows/Android
How to AirDrop from iPhone to PC Windows 11/10/8/7 in Six Practical Ways?


