
[Solved] How to Create a New Apple ID and Transfer Everything?

In some cases, you may need to create a new Apple ID, such as when changing regions, avoiding privacy leaks, or wanting a more independent account. However, creating a new Apple ID also presents a challenge: how to seamlessly transfer all your existing data (such as photos, contacts, apps, settings, etc.) to the new account. This article will detail how to create a new Apple ID and transfer everything smoothly.
When it comes to creating a new Apple ID, you can set it up during your device setup or do it later through the App Store.
Create a new Apple ID during setup
If you have a new iOS device, you can easily create a new Apple ID during the setup process. Here is how to do it:
Step 1. Turn on your new iOS device and follow the on-screen instructions to start setting it up.
Step 2. When prompted to log in to your Apple ID, tap "Forgot password or don't have an Apple Account?" and then select "Create a Free Apple Account".
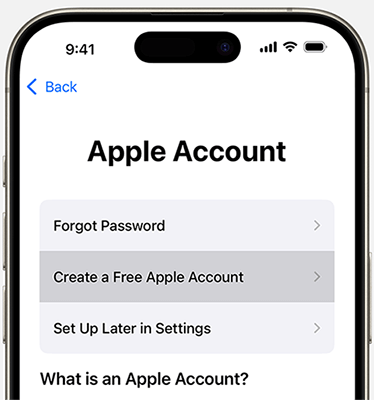
Step 3. Enter your birthday and name, then tap "Continue".
Step 4. Choose "Use your current email address" or select "Get a free iCloud email address".
Step 5. Verify your email, create a strong password, set your device's region, and enable two-factor authentication.
Create a new Apple ID using App Store
If you are already using a device or have only one iOS device, you can create an Apple ID directly through the App Store. Here are the steps:
Step 1. Open the App Store, tap the "Account" button, and then select "Create New Apple Account". (App Store disappeared from iPhone?)
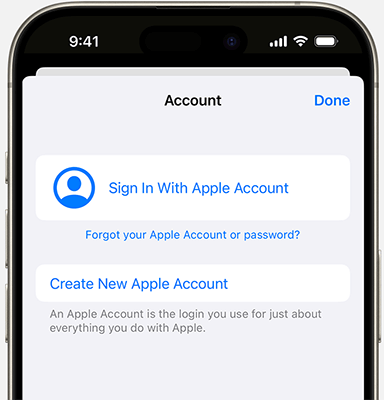
Step 2. Follow the on-screen instructions to provide an email address, create a strong password, and set your country or region.
Step 3. Enter your payment method and billing information, then tap "Next". Confirm your phone number and tap "Next".
Step 4. Check your email for a verification message from Apple and verify your email address. Once you've verified it, you can sign in to your new Apple ID to access the App Store and other Apple services like iCloud.
After creating a new Apple ID, you can transfer data from your old Apple ID to the new one using the following methods.
Note: Before you begin transferring data from one Apple ID to another, make sure to disable iCloud syncing. This step is crucial because any data synced with iCloud will not be saved on your iPhone. If you forget to turn off iCloud syncing before the transfer, you may not be able to transfer everything successfully. To do this, go to "Settings" > tap on your name > select "iCloud". Turn off the types of data you want to keep for the new Apple ID and choose "Keep on My iPhone".
iCloud is Apple's official cloud storage service that helps you sync data across devices and complete backups, allowing for data migration between Apple IDs, but it requires a certain amount of storage space. (iCloud storage full?)
If you've deactivated iCloud and saved data on your iPhone, you can transfer data between Apple accounts using iCloud sync.
Step 1. Sign out of your previous Apple ID and log in to your new Apple ID. (Can't sign out of your Apple ID?)
Step 2. Turn on the relevant icons and select "Merge" to sync your data to the new Apple account.
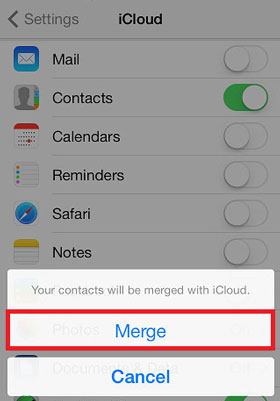
Besides iCloud sync, you can also use iCloud.com to transfer files from one Apple ID to another.
Step 1. Visit iCloud.com on your PC and log in with your old Apple ID.
Step 2. Preview, select, and download the data you want to keep onto your PC; you can choose options like Photos, Notes, or others.
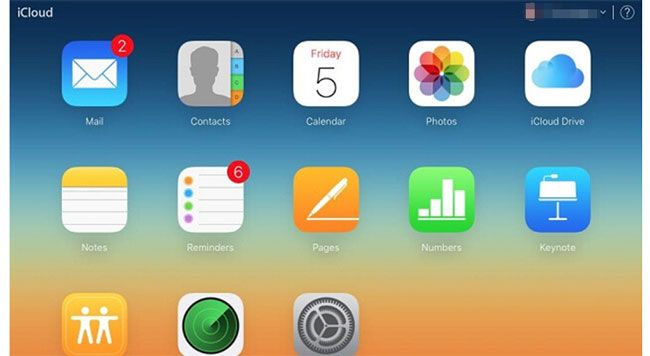
Step 3. Sign out of the old Apple ID and log in with your new Apple ID. Then, click on each option to upload the saved data to the new account.
The methods above are too complicated. If you want to transfer data from iPhone to iPhone with different Apple IDs in one click, Coolmuster Mobile Transfer is a good tool to try. With this phone-to-phone transfer tool, you can easily transfer files between your iOS devices.
Highlights of Coolmuster Mobile Transfer:
Here is how to transfer data from iPhone to iPhone with different Apple IDs using Mobile Transfer:
01Download and run this tool on your computer and connect the two iPhones with different Apple IDs using USB cables.
02Tap "Trust" on each iPhone when asked, and then you will see the connected interface as below.
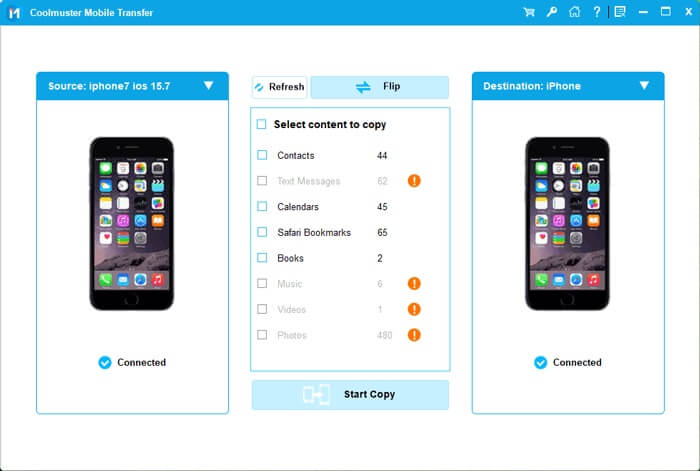
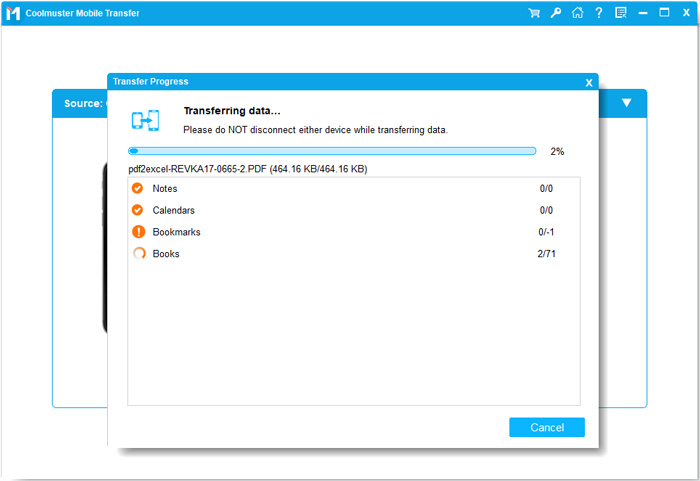
03Select the items you want to transfer from the list. Then, just click the "Start Copy" button to begin the transfer process automatically.
Video Tutorial:
Q1. How many new Apple IDs can you create?
You can create up to three Apple IDs per device within a year. If you reach this limit, you can use another device to create additional Apple IDs.
Q2. Can I access the content I purchased with my old Apple ID from the new ID?
No, you cannot. Purchased content (such as apps, music, subscriptions, etc.) is tied to the Apple ID and does not transfer when switching accounts. You will need to make purchases with the new Apple ID.
Q3. Will I lose data from my old Apple ID after switching to a new ID?
No, your data will not be lost. The data associated with your old Apple ID remains in the cloud and on your device, and you can log back into that account at any time to access it.
That's all about how to create a new Apple ID and transfer everything. You can create an Apple ID during device setup or directly from the App Store. When you want to transfer data between two devices with different Apple IDs, Coolmuster Mobile Transfer is recommended; especially if you have a large amount of data or want an efficient and seamless transfer, it's a reliable choice.
Related Articles:
How to Change Apple ID without Losing Data [Proven Tutorial]
How to Transfer Contacts from One Apple ID to Another without Trouble
[3 Reliable Ways] How to Transfer Music from One Apple ID to Another?
What Happens If I Sign Out of My Apple ID? Find the Answer Here!


