
3 Solutions to Transfer iTunes Backup to Samsung Galaxy Devices

Since Samsung launched the latest flagship smartphone Galaxy S9/S9 +, its beautiful appearance and superb features have attracted many mobile phone users to upgrade from other devices, such as Android and iPhone to S9. Replacing your smartphone means you need to transfer data from your old device to your new device. If your old phone is the same Android device, then the process of Android transfer to Samsung is very simple. But if it is a cross-platform transfer, such as iOS to Samsung, the process becomes tricky.
If you have synced your iPhone to iTunes and now want to transfer iTunes backup files to the Samsung S9, what should you do? Please put your troubles aside. In this guide, we will guide you through three simple ways to transfer your iTunes backup to the Samsung Galaxy S9/S9 plus.
Way 1: Transfer iTunes Backup to Samsung S23/S22 with Phone Transfer
Way 2: Sync iTunes Backup to Samsung S23/S22 Edge with Samsung Kies
Way 3: Transfer iTunes Backup to Samsung S23 with Smart Switch
The first method we want to tell you to get iTunes backup data on Samsung Galaxy S9/S8/S7/S6 is using a piece of third-party software called Phone Transfer. It provides 1-click transfer solution to help you transfer your files, including music, videos, photos, contacts, SMS, call logs, calendar, notes and more from phone to phone, iTunes to phone, iCloud to phone, etc. Besides transferring backup data from iTunes to Samsung, Phone Transfer also can help you backup phone data to computer and restore files from computer to phone easily and quickly.
By using Phone Transfer, you can transfer everything from an iTunes backup file, such as music, photos, contacts, videos, etc. to your Samsung Galaxy S23/S22. Follow the steps below to see how to use this program to achieve that.
3 Steps to Transfer iTunes Backup to Samsung S23 with Phone Transfer:
Step 1. Install and launch Phone Transfer
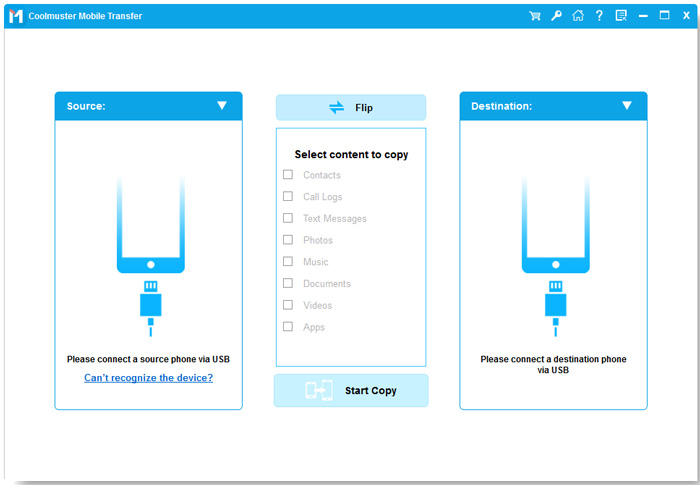
At the very beginning, you should download and install the transfer program on your computer. Then, launch it and you should choose "Restore from Backups" > "from iTunes backup file" options from the primary interface to go to the next window.
Step 2. Connect Samsung S9 to computer
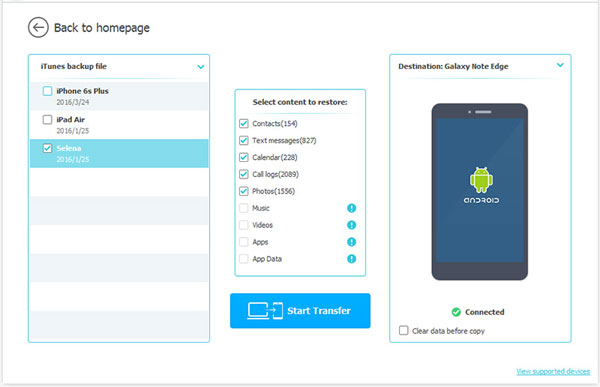
Next, you need to connect your new Samsung Galaxy phone to the computer using a USB cable. Enable USB debugging on the phone if you haven't done it before. After that, Phone Transfer will detect the Samsung device automatically.
Step 3. Transfer iTunes backup to Samsung
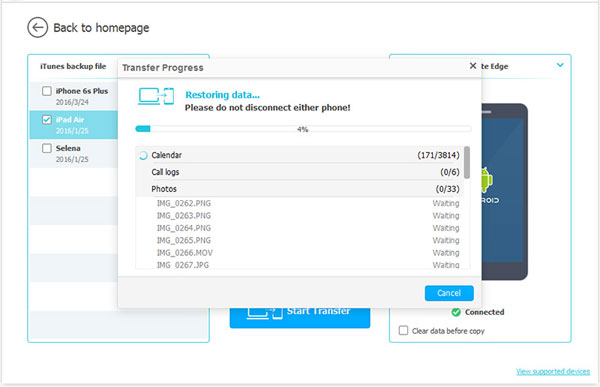
Once your S9 has been detected by the program, You can see all the files in the iTunes backup displaying on the left side and your S9 on the right. Just choose the file types you want to transfer to your Samsung phone and click "Start Copy" button.
People Also Want to Know:
How to Transfer Music from Android to iPod
How to Transfer Photos from Samsung Galaxy to iPad
The second method is using Samsung Kies, which is introduced by Samsung company, which is now available for Windows and Mac operating system. It is a great tool for you to backup and restore Samsung devices. With it, you can manage, download and transfer data from iTunes to Samsung Galaxy S9/S9 Edge and other Samsung Galaxy S/Note series devices completely. Please note Samsung Kies is compatible with all Samsung devices running on Android OS 2.3 or higher.
You can follow the steps in the below to sync data from your iTunes to Samsung Galaxy S9 with the help of Kies. Here, we will set Kies on Mac OS as example.
Step 1: Download Samsung Kies from this link and choose the Mac OS version. Install it on your Mac computer and launch it.
Step 2: Connect your Samsung Galaxy S23/S22 to the Mac computer via a USB cable. Wait until it is detected by the Samsung Kies and you will see it is shown in the left side panel on the program's interface.
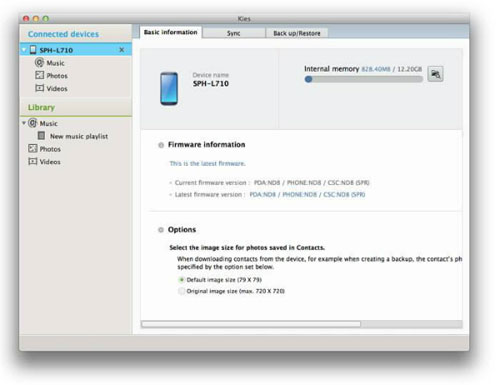
Step 3: Then, go to the top menu to choose the "File" button and choose the "Import iTunes playlist to Library" option from the drop-down list. Under the "Library" menu on the left side of the interface, you should click on the "New playlist" and then all your iTunes library will be displayed here.
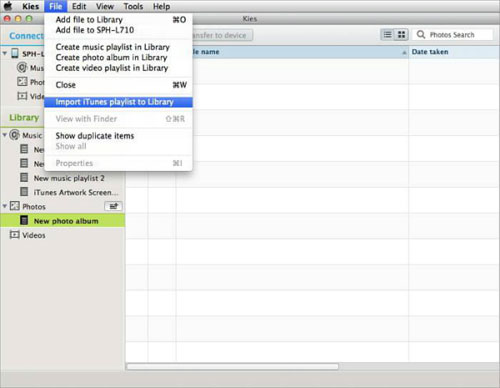
Step 4: Finally, you can select the files that you want to transfer from iTunes to Samsung Galaxy S9/S9 + and click on the button of "Transfer to device" to transfer them to your Samsung device.
The last method is to use Samsung's official solution, the Smart Switch, to transfer iTunes backup file data to the Samsung Galaxy S9. To use this method, you need to make sure your iOS device must be running at least iOS 10.6 or higher, and you need to write down the location of the iTunes backup file, which is usually located at: C:\Users\[username]\AppData\Roaming\Apple Computer\MobileSync\Backup\
Next, you can follow the steps below to transfer iTunes backup file data to Samsung Galaxy with the help of Smart Switch.
Step 1. Download, install the Smart Switch application on your Mac or Windows computer and open it directly.
Step 2. Connect your Samsung Galaxy phone to the same computer using a USB cable and it will be detected by the Smart Switch app.
Step 3. Click the Restore button from the main interface of Smart Switch.
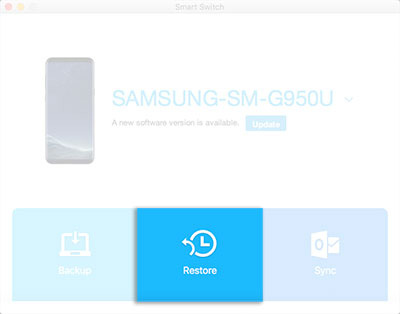
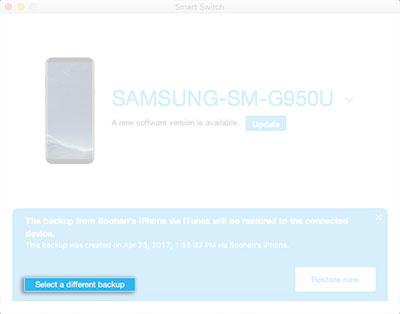
Step 4. Turn to the bottom left-hand side and click Select a Different Backup, which allows you to choose the individual files or backup file that you want to use. If the available data is just what you want to import to your phone, you can directly select the Restore Now option.
Step 5. After you have selected the individual files, you can select iTunes Backup Data from the drop-down menu. The available content will then be displayed for you. Just select what you want and choose confirm to start the transferring process.
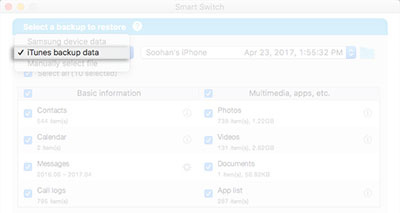
Done! All your selected content will then be transferred to your Samsung phone completely and you can use them on your device now.
As you can see, there are many different solutions you can use when you have the need to transferring data across from an iTunes backup file to your Samsung Galaxy devices, and we just list three of the best for your reference. Just pick out the one you feel best to completely control and manage your phone data effortlessly.
Related Articles:
Move SMS Messages between BlackBerry and Samsung


