When you're upgrading to a new Android phone, switching to a different device, or simply ensuring your contacts are safely backed up, you might want to transfer contact info from your old smartphone to the new one. Well, in this comprehensive guide, we shall introduce how to transfer contacts from Android to Android phones using scientific approaches. Now, stick with us to the end of this article to make the job straightforward and error-free.
The simplest and most effective method is to use tools. In this section, we have introduced you to the three most commonly used tools. Let's take a look together.
The first tool is Coolmuster Mobile Transfer. This smart software allows you to connect both phones to your computer and complete the contact transfer at short notice. Moreover, it also allows for the transfer of text messages, music, apps, and more between Android phones.
What benefits does Mobile Transfer offer?
How do I transfer contacts from Android to Android with Mobile Transfer? Here are the steps:
01Begin by downloading and installing the utility on your computer. Once the installation is complete, double-click the tool to launch it.
02Next, connect the source and destination devices to your computer via USB. Make sure to enable USB debugging on both phones. Then, this program will promptly detect them. (Click on "Flip" in the middle of the screen if they are wrongly placed.)
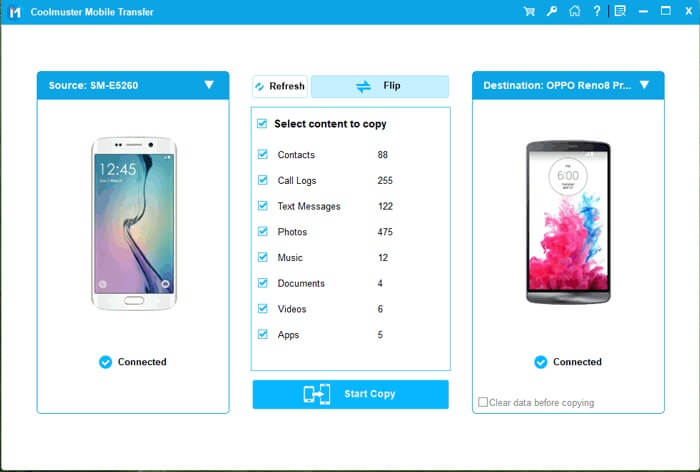
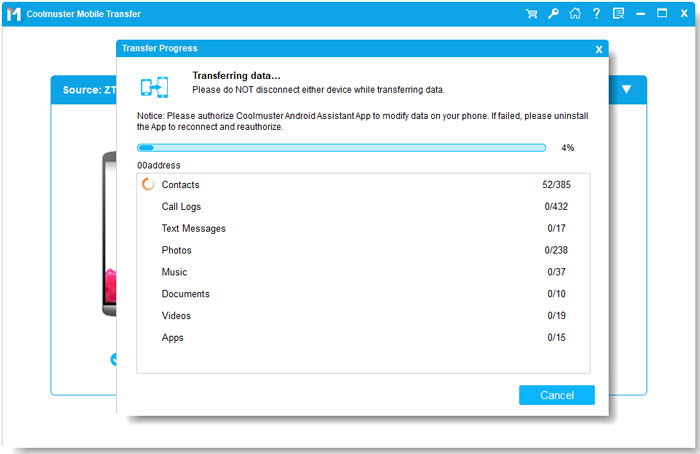
03Pick "Contacts" within the program. If necessary, you can select additional files as well. Finally, click "Start Copy" at the center bottom of the screen. Your contacts will be transferred from one Android phone to another in a matter of moments.
Video Guide
Are you interested in effortlessly transferring contacts between Android phones and backing them up on your computer? Your solution is Coolmuster Android Assistant. Unlike Mobile Transfer, this exceptional software empowers you to transfer, back up, restore, and manage various Android content, including contacts, call logs, apps, SMS, music, photos, videos, and books. With this professional tool, you can efficiently perform these tasks on your PC or Mac, ensuring both speed and security.
Highlights of Android Assistant:
How to enable Android to transfer contacts to the new phone using Android Assistant?
01Download and install Android Assistant on your computer. Then, launch the software.
02Connect your old Android phone to your computer using USB cables. Ensure that USB debugging is enabled on it. The software will automatically detect and recognize your device.
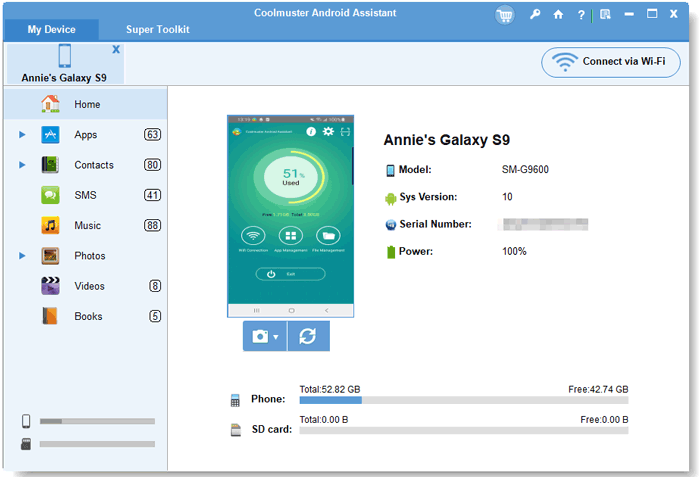
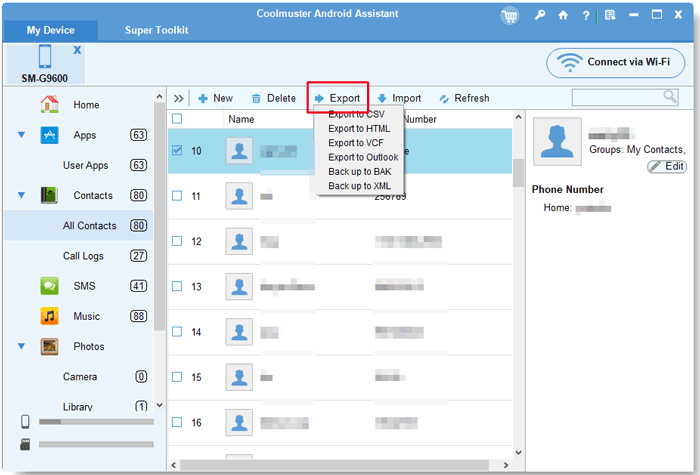
03On the left side of the main interface, click the "Contacts" category to display your contacts on the right. Choose the items you want to transfer by selecting the checkboxes. Afterward, click "Export" at the top and choose a format for the transfer. Then, specify the location on your computer to save the contacts.
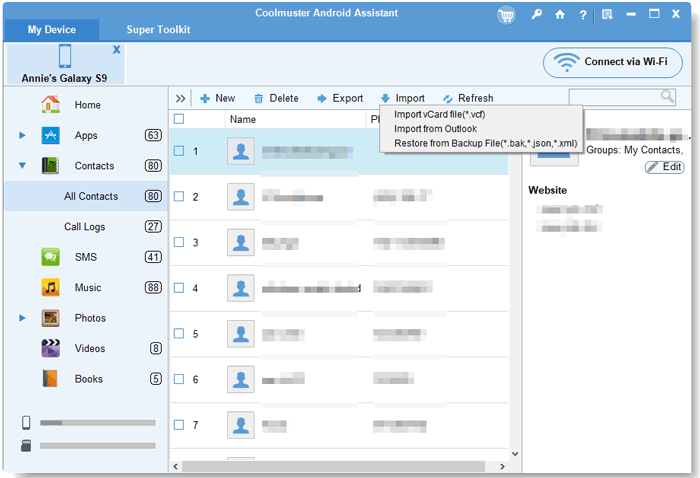
04Now, disconnect the source phone and connect the destination one. When identified, please tap "Contacts" and click "Import". Browse for the exported contacts on your computer and initiate the transfer from your computer to the new Android phone.
Video Guide
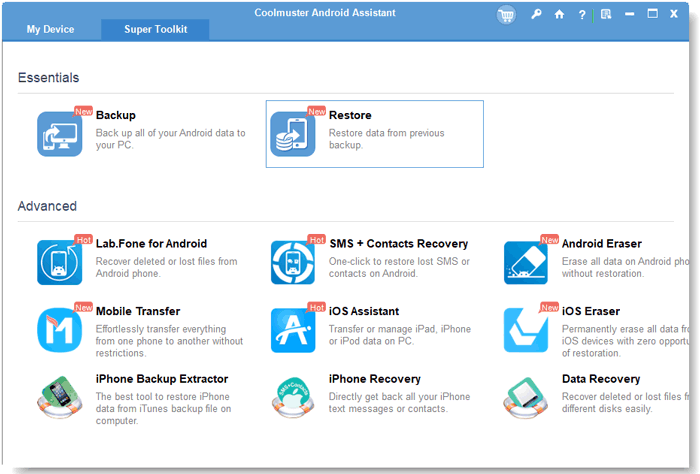
This versatile tool provides an alternative method for bulk contact transfer to your new phone. Here's how: Go to its "Super Toolkit" > "Backup" > select your source device > choose "Contacts" for backup > specify the backup location on your computer > click "Back Up". Then, proceed to "Super Toolkit" > "Restore" > choose your target phone > select the backup containing contacts > click "Restore".
SHAREit, a great mobile app, excels at transferring contacts between Android devices. This app simplifies contact management, allowing you to move specific contacts or entire address books effortlessly. Next, how to use this app for transferring contacts from Android to Android? (If needed, click the SHAREit review to learn more.)
Step 1. Install SHAREit on both devices from the Google Play Store and ensure both are within the same Wi-Fi network.
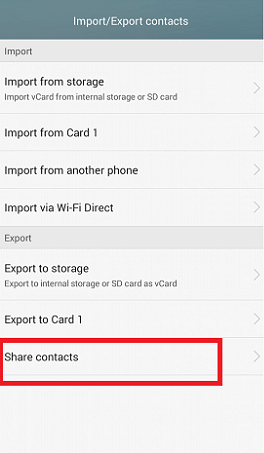
Step 2. Open the Contacts app on the source device, go to the menu, and choose "Import/Export".
Step 3. Pick the contacts you want to transfer and select "Share contacts".
Step 4. Choose "SHAREit" as the transfer medium.
Step 5. On the destination device, open SHAREit. Have the source device scan the target one. Once recognized, initiate the transfer.
If you don't want to use third-party tools, the built-in features of your phone can also help you transfer contacts between Android phones.
You can also utilize Google's Cloud to upload contacts (and even calendars if desired), making this information accessible on any device linked to your Google account. How can you do it?
Step 1. Start by adding a Google account to your source device. To do this, navigate to "Settings" > "Users & Accounts" > "Add account", and choose "Google".
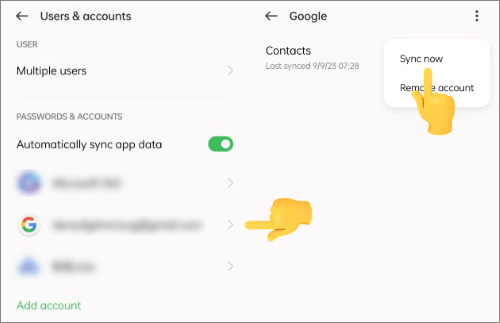
Step 2. Sign in to your Google account to add it. Next, go to "Settings" > "Users & Accounts" > "Google" on your source device and enable "Sync Contacts".
Step 3. After a while, contacts will be synced to Google servers. On your destination device, add the same Google account.
Step 4. Go to "Settings" > "Users & Accounts" > "Google" and select "Contacts" from the Google Backups list. Tap on "Sync now", and your contacts will be transferred to the recipient.
Quick Share, alternatively known as Nearby Share (in January 2024, Google and Samsung announced the merging of Nearby Share and Quick Share into a unified app named Quick Share), enables rapid data sharing between nearby Android devices. Note that this feature is compatible with Android 6.0 and later versions, offering a faster and more convenient option for contact transfer than Bluetooth.
Now, how can you transfer contacts from an Android phone to an Android phone using Quick Share?
Step 1. Open the Personal Settings app on your device. Navigate to "Connections" or "Advanced Features" (depending on your device). Select "Quick Share" and turn it on. Ensure that Quick Share is enabled on both the sender's and receiver's devices.
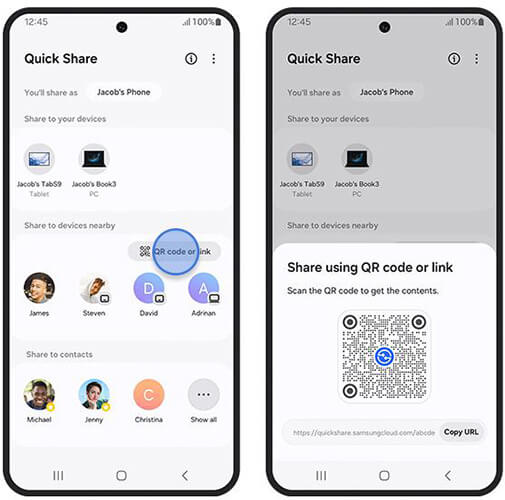
Step 2. Open the contact you wish to share. Tap the "Share" icon. Select "Quick Share" from the available options. Your device will automatically detect nearby devices that are set up for sharing.
Step 3. You can share with nearby devices or select to share with contacts, sending files to up to 8 nearby devices. Even if the recipient's device isn't displayed, you can still transfer data by tapping the QR code icon and scanning the QR code with the other device.
Step 4. Once the selection is complete, the recipient will receive a notification that something is being shared. Tap "Accept" in the pop-up window to initiate the file transfer.
Bluetooth is a commonly used wireless technology for sharing contacts between Android devices. It's reliable but may be slower than newer methods like Quick Share or dedicated apps. Before proceeding, ensure your two smartphones are in close proximity. Here are the guidelines for importing contacts to Android from Android:
Step 1. Open the contacts app on the source device and access the "Menu" > "Share" icon.
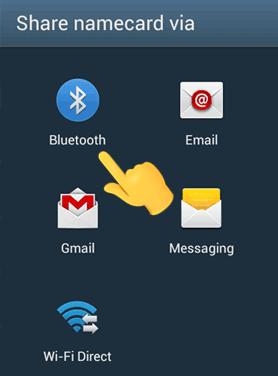
Step 2. Tap on "Import/Export" and then choose "Share name card via". Select the contacts you wish to transfer, or simply use "Select All" to transfer them all.
Step 3. This action will open the sharing options. Opt for "Bluetooth", and if Bluetooth is not enabled, you will be prompted to enable it.
Step 4. Allow Bluetooth to scan for nearby devices and select the destination device when it appears. Once the devices are successfully paired, the transmission should commence automatically.
If your SIM card is compatible with both Android phones, then using a SIM card to transfer contacts is also a good choice. Below, we will guide you through how to move contacts from Android to Android with a SIM card:
Step 1. Open the Contacts app and tap the "More" icon (usually represented by three dots in the top-right corner).
Step 2. Select "Manage contacts" > "Import/Export" > "Export to SIM card".

Step 3. After exporting your contacts to the SIM card, remove the SIM card from the source phone.
Step 4. Insert the SIM card into the receiving Android phone.
Step 5. Open the Contacts app and tap "More" > "Manage contacts" > "Import/Export" > "Import from SIM card".
VCF file is another option. Simply create a VCF file and use your preferred file-sharing method to transfer it to the new phone. This can be done through email, social media, SD cards, USB cables, and more. In the following, we'll walk you through how to transfer contacts from Android to Android via a VCF file:
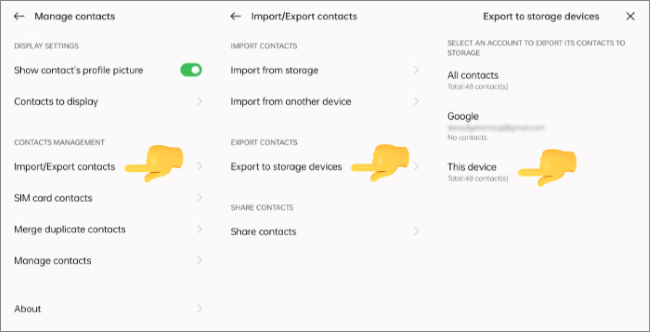
Step 1. Open the Contacts app on your old Android phone. Tap the "More" icon and select "Manage contacts" > "Import/Export contacts". Subsequently, pick "Export to storage devices" > "This device", and the file will be named Contacts.vcf by default.
Step 2. Locate the Contacts.vcf file using your phone's file finder and send this file to your new Android phone via email.
Step 3. On your new Android device, access your email and download the attached Contacts.vcf file. Go to the Contacts app and tap the three-dot icon in the top right corner.
Step 4. Next, select "Manage contacts" > "Import/Export contacts" > "Import from storage" > "This device".
Step 5. Choose the recently downloaded VCF file. Lastly, confirm the action by selecting "OK", and your contacts will start transferring from one Android device to another.
Apparently, we've covered almost all the common methods to ease the transfer of contacts between Android phones, from utilizing professional tools to harnessing the power of phone function. As you navigate through these scientifically-backed techniques, feel free to pick the one that treats your needs and preferences best. Finally, we highly recommend using the secure and efficient Coolmuster Mobile Transfer and Coolmuster Android Assistant.
Related Articles:
Import Contacts to Android Device Effortlessly | 6 Convenient Methods
7 Ways on How to Transfer Contacts to New Phone [Simple & Fast]
How to Transfer Contacts from Android to Computer? (Top 6 Ways)
Where Are Contacts Stored on Android Devices? Easily Find and Back Up Contacts


 Free Download for PC
  Free Download for Mac

