
Top 7 Ways on How to Transfer Photos from Android to Android

Getting a new phone is an exciting thing, but transferring data from your old phone to the new one can be challenging, especially when it comes to how to transfer photos from Android to Android. If you are working hard to solve this problem, congratulations, you came to the right place. You're about to find a solution. This article will introduce you to 7 methods to easily solve this problem.
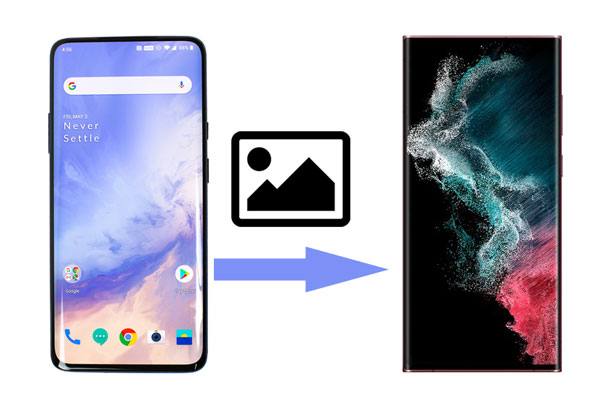
If you're looking for a simple and secure way, Coolmuster Mobile Transfer is the best choice. Coolmuster Mobile Transfer is a powerful tool designed for hassle-free data transfer between phones. It not only supports data transfer between Android devices but also facilitates transfer between iOS devices and between iOS and Android platforms. With its intuitive interface, you can easily select the types of data you want to transfer, such as photos, and initiate a secure and efficient transfer process.
Key features of Coolmuster Mobile Transfer:
Here's how to transfer photos from Android to Android by Coolmuster Mobile Transfer:
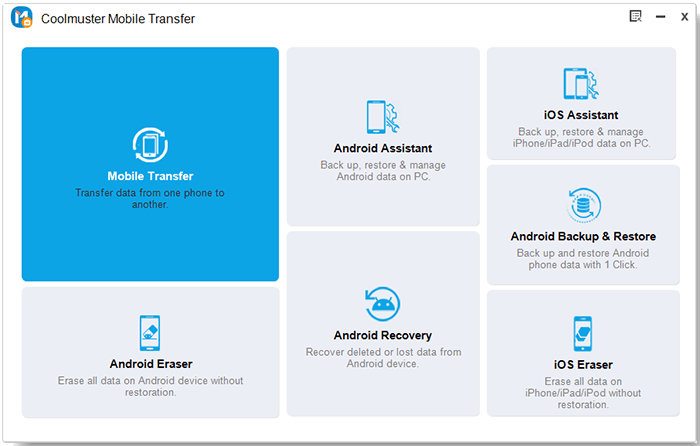
01Download, install, and activate Coolmuster Mobile Transfer. Choose the "Mobile Transfer" module from the homepage to get started.
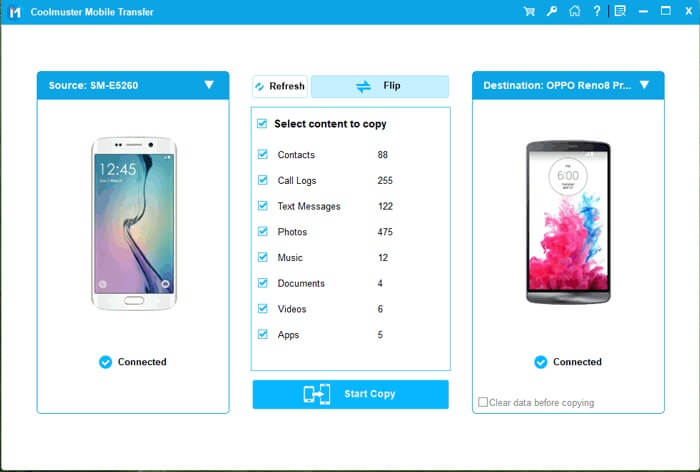
02Connect your Android phones to the computer using a USB cable. After the connection is established, you will see the following interface. Confirm phone positions or utilize the "Flip" option to switch if necessary.
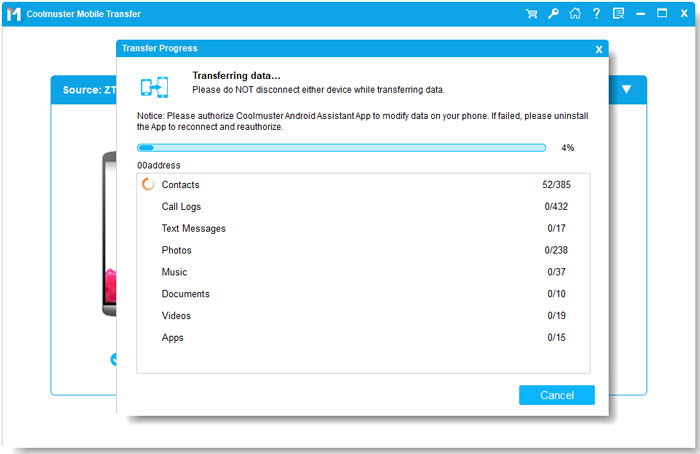
03In the list, choose "Photos" and click "Start Copy" to begin transferring music to the new Android phone.
Video Guide
In order to demonstrate the operation process more intuitively, we have specially prepared a video tutorial. Please follow the video to learn more deeply.
Read More: Want to transfer apps from Android to Android? This article can help you.
Another straightforward way for Android picture transfer is through Bluetooth. This may be one of the most commonly known and working ways for transferring photos between two Android devices. Here is how to transfer photos from old Android to new Android via Bluetooth:
Step 1. On both your old and new Android devices, go to "Settings" and enable Bluetooth.
Step 2. On the old device, go to "Bluetooth" settings and make the device discoverable. On the new device, scan for available devices and select the old device to pair them.
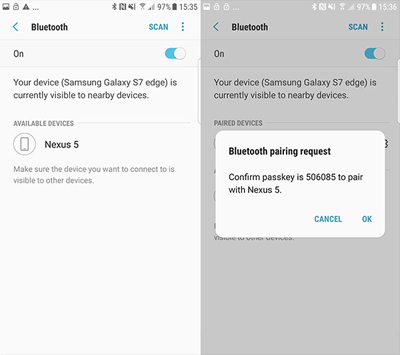
Step 3. On the old device, open the gallery or photo app and choose the photos you want to transfer.
Step 4. Look for the option to "Send via Bluetooth" or "Send via" in the photo app's menu. Select the paired new device as the recipient.
Step 5. On the new device, accept the incoming Bluetooth transfer request. The photos will start transferring.
USB connections remain a classic and effective choice for transferring photos. Transferring photos from one Android device to another using a USB connection is a straightforward process. Here's a step-by-step guide to help you through the process:
Step 1. Plug one end of the USB cable into the USB port of the source Android device (the one containing the photos).
Step 2. Plug the other end of the USB cable into the USB port of the destination Android device (the one you want to transfer the photos to).
Step 3. On the destination device (the one receiving the photos), go to "Settings". Scroll down and select "About device" > "Version". Tap on "Build number" seven times to enable Developer options.
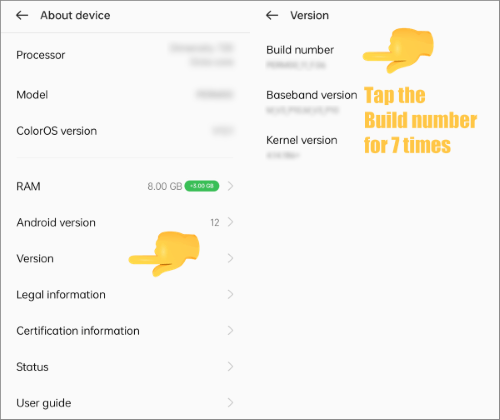
Step 4. Go back to the main settings menu and enter "Developer options". Enable "USB debugging".
Step 5. On the source device, you may see a notification indicating that the USB is connected. Open the notification. Choose "File transfer" as the USB connection mode.
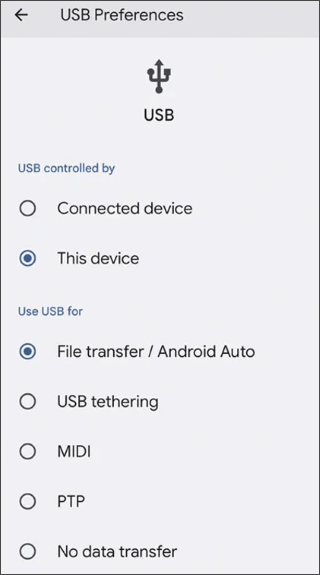
Step 6. On the destination device, open the file manager app. Look for the connected device in the file manager.
Step 7. Once you have access to the source device's storage, navigate to the folder where the photos are located.
Step 8. After selecting the photos you want to transfer, look for an option like "Copy" or "Cut". Navigate to the destination folder on the destination device and paste the photos.
May Like: For the safety of pictures, we recommend that you back up the photos on your Android phone.
Nearby Share is a feature on Android devices that allows you to quickly and wirelessly share photos, videos, and other files with nearby Android devices. Here's how to transfer photos from Android to Android without a computer using Nearby Share:
Step 1. On both Android devices, ensure that Bluetooth and Location services are turned on. Swipe down, access Quick Settings, and tap the "Nearby Share" icon to enable.
Step 2. On the device sending the pictures (the sender), go to "Settings". Select "Google" and then tap on "Device connections". Look for and select "Nearby Share".
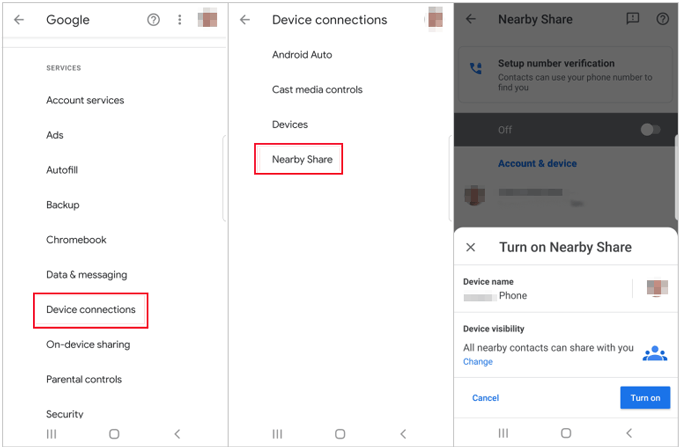
Step 3. Open the gallery or file manager on the sender's device. Navigate to the folder containing the pictures you want to transfer.
Step 4. Select the photos you want to transfer, look for the share icon (usually represented by three dots connected by lines or a "Share" option), and tap on it. From the sharing options, select "Nearby Share" or "Send via Nearby Share".
Step 5. On the receiving device, a notification will prompt the user to accept the incoming files. Tap the "Accept" similar option to start the transfer.
Android Beam is a feature that allows you to share content between two Android devices by bringing them close together. Below is a simple guide on how to get pictures off Android phones using Android Beam:
Step 1. On both devices, ensure that NFC (Near Field Communication) and Android Beam are enabled. You can find these options in the device settings.
Step 2. On the device sending the photo, open the Gallery or Photos app and select the photo you want to share.
Step 3. Bring both devices close together, back to back. On the sender's device, tap the back of the phone against the back of the receiving device. You'll feel a vibration, and the devices will make a sound to confirm the connection.
Step 4. Once connected, the sender's device screen will show "Touch to Beam". Tap the screen to start the transfer.
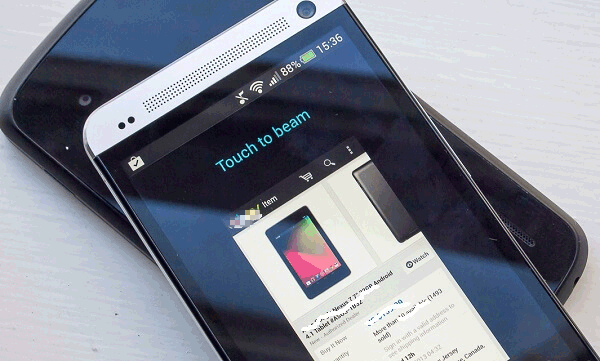
Step 5. On the receiving device, a notification will appear, prompting the user to accept the incoming photo. Tap to accept. Once the transfer is complete, both devices will provide a confirmation.
See Also: If your phone lacks storage space but you don't want to lose your photos, you can transfer photos from Android to flash drive to free up some space.
Google Photos is a cloud-based photo service provided by Google, allowing us to store and manage high-quality photos and videos for free. With features such as automatic backup, intelligent search, and organization, we can easily browse, locate, and share our media content. Additionally, Google Photos supports cross-platform usage, enabling us to access our albums on different devices. To do this, you can follow these steps:
Step 1. Ensure that Google Photos is installed on both Android devices. Open Google Photos on the source device. Sign in with your Google account.
Step 2. On the source device, go to the Google Photos app. Tap on the three horizontal lines (menu) in the top left corner. Select "Settings" and then tap on "Backup & sync". Turn on "Backup & sync" to start backing up your photos to Google Photos.
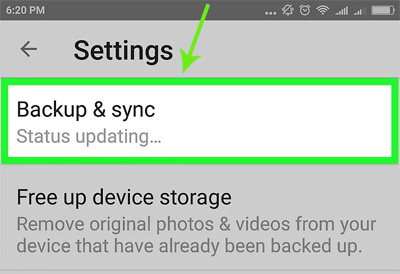
Step 3. Allow some time for Google Photos to upload your photos to the cloud. The speed of this process depends on your internet connection and the number of photos.
Step 4. On the destination device, open Google Photos and sign in with the same Google account used on the source device. Go to "Settings" > "Backup & sync" on the receiving device. Turn on "Backup & sync" to sync the photos from your Google account to the device.
Email usually limits the size of files and is not the most effective way to transfer a large number of photos directly between two Android devices; however, for quick sharing of small photos, you can still transfer specific photos between devices through email attachments. Here's a step-by-step guide on how to transfer photos from Android to Android via email:
Step 1. On the source device (the phone with the photos you want to transfer), open the Gallery or Photos app. Navigate to the album or folder containing the photos you want to transfer.
Step 2. Select the photos you wish to send and select the "Share" icon. Choose the option to share via email.
Step 3. The email app will open with the selected photos attached. Enter the email address of the recipient in the "To" field.
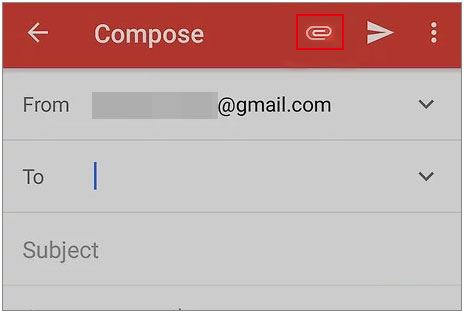
Step 4. Tap the "Send" icon to send the email with the attached photos.
Step 5. On the receiving device, open the email app. Locate the email with the attached photos and download them.
In conclusion, whether opting for third-party software like Coolmuster Mobile Transfer, utilizing built-in features like Bluetooth and Nearby Share, or relying on cloud services such as Google Photos, you can choose the method that best suits your needs. By following the comprehensive guide provided, you can ensure a smooth and successful transfer of your cherished photos, preserving memories as they transition to a new Android device.
Related Articles:
6 Top Ways to Transfer Files from Android to Android Wirelessly
How to Transfer Videos from Android to Android Quickly?
Top 8 Ways on How to Transfer Photos from Android to Computer
How to Delete Photos from Android Phone Permanently [Solved]


