How to Transfer Videos/Music from Nokia to iPhone?

Smartphones have become cheaper over the years and today you will find users having in their possession more than two devices. These devices offer different apps and functionality therefore it will come a time when a user will favor one smartphone over another. As an individual who wants to ensure that the environment is saved, you may opt to recycle your old phone. Even though you have not used it for quite sometime, it still contains photos, videos and music useful to you. Therefore, you can transfer the information before recycling the device. For example, after you purchase a new iPhone, you can copy all files you think valuable, such as videos and music, from your old Nokia phone to the new iPhone for continued use.
However, you may encounter some troubles when transferring data from Nokia to iPhone due to the different operating systems they are running. Don't panic. Nokia to iPhone Transfer is a Windows and Mac OS compatible program that helps you to transfer your music, photos, videos, contacts, apps and more from one phone to another with 1 click only. With it, you are able to copy videos and music files from Nokia to iPhone 14/13/12/11/X. What's more, even you can finally back up your data, such as contacts, apps, photos, videos and music playlists from your phone to the computer thanks to the backup functionality provided by the software.
As I mentioned above, Nokia to iPhone Transfer works on both Windows and Mac platforms, therefore, you need to pick up the right version to download on your computer. Please note the screenshots in the guide below are captured from Windows version, but the operations are suitable for both Windows and Mac users.
Step 1. Get the program installed on your computer
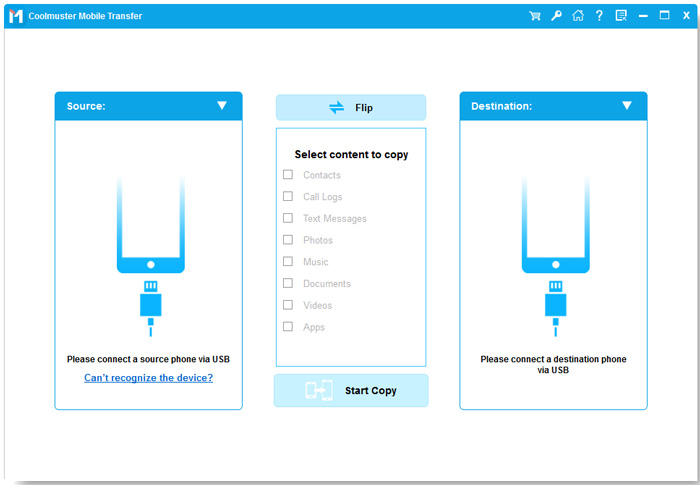
To start with, get Nokia to iPhone Transfer downloaded and installed on your computer. Launch it immediately and after a few while, you will see its main interface on the computer screen. Choose the first "Phone to Phone Transfer".

Step 2: Connect your Nokia and iPhone to your computer
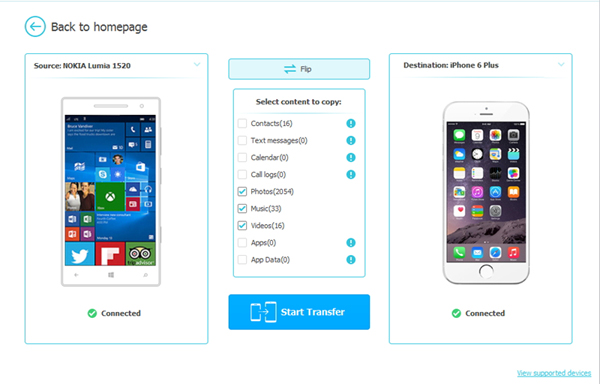
Use two USB cables to connect your Nokia and iPhone to the Mac, and the program will detect the two devices instantly. You can see them displayed on the program window side by side, with all the transferable file types listed on the above.

Step 3. Start to transfer videos and music from Nokia to iPhone
Check the files you would like to transfer. Here, you just need to check "Videos" and "Music", then click the Start Transfer button to initiate the transferring process.

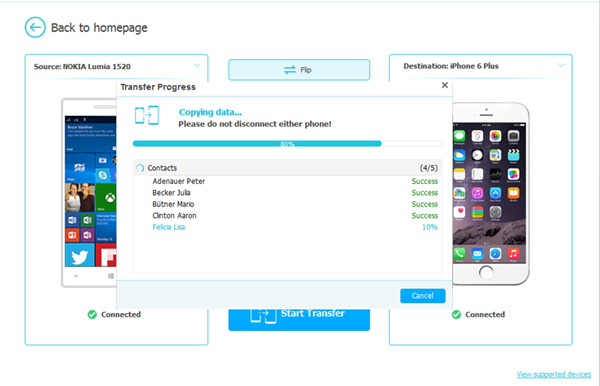
You just need to make sure the two devices are connected well to the Mac the whole time. After a few seconds, all the selected videos and music files will be exported to your new iPhone successfully.
Related Articles:
Transfer Content from iPhone to Nexus 6


