
How to Transfer Voice Memos from iPhone to iPhone? [Top 6 Ways]

Voice Memo is an amazing application that comes pre-installed on iOS devices, including iPhones, so you can capture voice recordings. It makes your iPhone the ultimate personal recorder to capture those heartwarming moments with friends and family or record funny soundbites to reminisce on later. If you want to know how to transfer voice memos from iPhone to iPhone, we have the solutions to help.
MobieSync is the perfect solution to copy and migrate data from one phone to another. Whether your phones run on iOS or Android, a simple connection is all it takes to move contacts, photos, songs and other media files from the old device straight onto the new one. Plus, the option of selecting and previewing the data types makes it an unbeatable tool. Here are some of its features:
How to transfer voice memos from iPhone to iPhone without iTunes? Here's a step-by-step guide:
01Download and install MobieSync on your computer. Launch it and connect both iPhones to the computer with USB cables. Make sure you trust the computer on your iPhones.
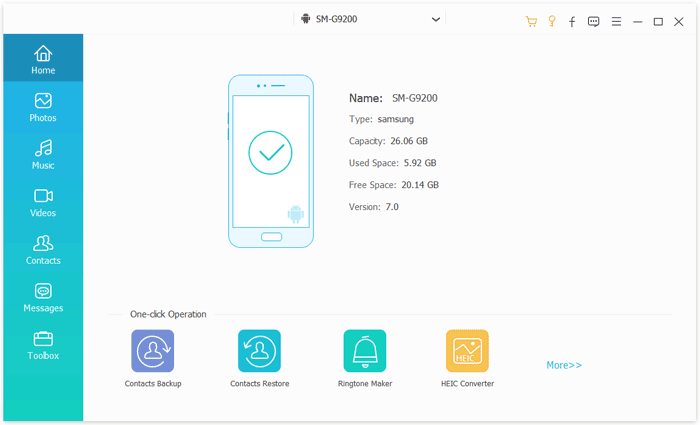
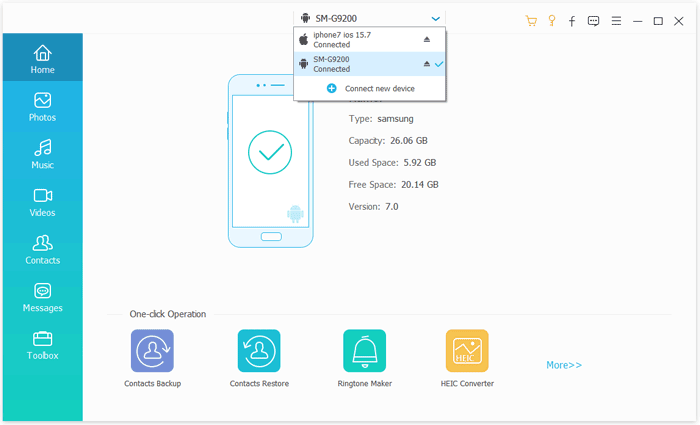
02MobieSync will detect your iPhones and show them on the interface. Select one as the source phone.
03Select Voice Memos from the left panel and preview the voice memos on your source iPhone. You can check the ones you want to transfer or select all of them.
04Click the "Export to Device" button on the top toolbar and choose your target iPhone from the drop-down list. MobieSync will start transferring voice memos from iPhone to iPhone.
Apple's iCloud service is one convenient way to sync and back up your voice recordings on all iOS devices connected to the same iCloud account. As long as you enable iCloud Drive, sharing your files between devices will be easier. But if you have many voice memos, the process will be very tiring because you have to transfer them one at a time. This makes it not a very good way of transferring files between iPhones compared to when you could use the computer. (iCloud backup stuck? Click the link to fix it.)
Here are steps to migrate voice memo files through iCloud:
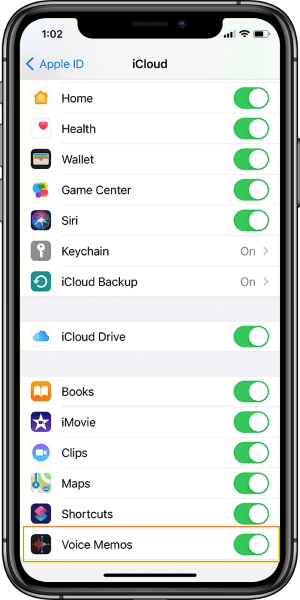
Step 1. First, open Settings application on the new iPhone, then log into iCloud with the correct Apple ID. As soon as you do that, iCloud will be automatically enabled.
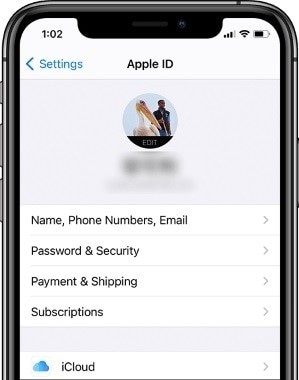
Step 2. Now sync your voice recordings across all your iPhones by heading to the Settings: menu. Click on "[Your Name]", then select "iCloud ". Select which voice memos you need to keep in sync with other iPhone. That's all.
If you're not using any cloud service, the easiest way to take your iPhone voice recordings and move them to the other iPhone is by Email. You just have to select the recordings you'd like to copy and send them as attachments in an email. It's that easy. Here's a step-by-step process of how to migrate voice recordings between iPhones through an email:
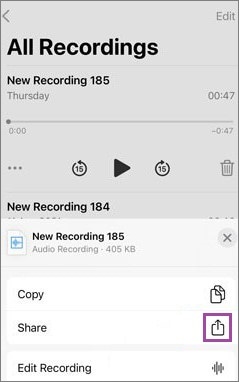
Step 1. Click on the Voice Memos application to open it, then click on the three-dot menu on the recording. You will find several options; choose the "Share" option.
Step 2. Once you choose the Share option, you'll get the share sheet with options like Email. Choose "Email" and enter the Email to receive the files. After that, upload the voice memo recording as a file attachment.
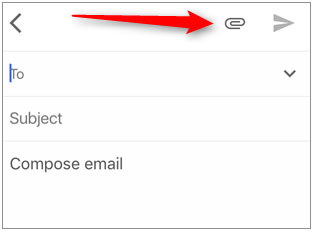
Step 3. Press on the "Send" button to send them to the Email. Now you must log into your Email on your other iPhone and download the voice memo attachment.
Note: Unfortunately, this approach comes with limitations. For instance, you can't upload voice memos exceeding your email service provider's attachment size. Gmail has a 25MB limit for attachment files. This means it will be challenging to send multiple large files. If you have many large voice memo files that exceed this size limitation, you must manually upload the files individually to share them with others.
AirDrop makes sharing data between Apple devices quick and effortless. The Bluetooth Low Energy (BLE) technology helps it to detect nearby compatible gadgets to establish an ad-hoc WiFi network for file exchange without wires. You can swiftly share various files, including Voice Memos, with AirDrop between iPhones. It is easier to set up an AirDrop connection between two iPhone devices, and it doesn't require any additional software or hardware. Here are the steps:
Step 1. Launch the Voice Memo app on the sending device and choose the audio file you wish to share with another iPhone.
Step 2. Now locate the "Share" button, which is usually square with an upward arrow. Choose "AirDrop" as your sharing option.
Step 3. Your iPhone device will begin searching for nearby devices. Those devices with the AirDrop feature enabled will appear on your device.
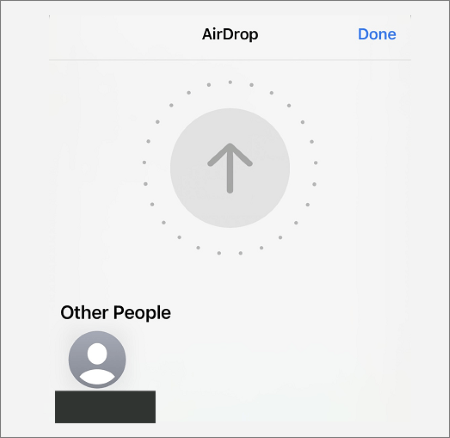
Step 4. Now choose the device you are sending the voice memo files to and click "Send" to start the transfer procedure.
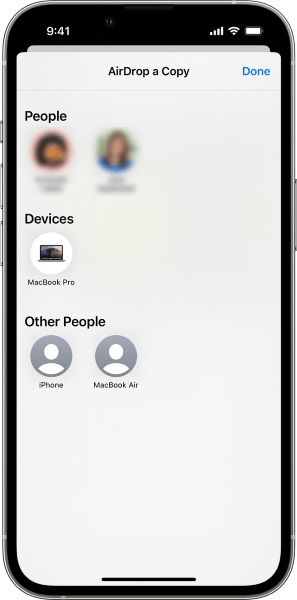
Note: AirDrop also has a few drawbacks, like the low success rate of sending too large a file and being limited to a certain distance. Sometimes, you can encounter AirDrop not working on iPhone when attempting to transfer a file with AirDrop.
Google Drive is one of the most preferred cloud storage services popular among phone users. It helps you save audio clips, images and other documents to copy them to other devices. Google Drive offers 15GB of storage space that's enough for your files. You only have to connect to WiFi and start the uploading process.
First, you have to upload the files to Google Drive:
Step 1. Open the Google Drive application on the sending iPhone and click on the (+) sign. Now Choose the "Upload" option.
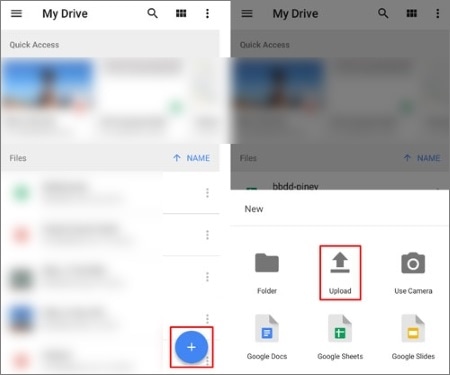
Step 2. Find the Voice Memo files you would like to share and choose to upload.
Step 3. Check the files on your Drive before you download them on another device.
Now download the Voice Memo files to your other iPhone:
Step 1. Download the Google Drive application on your iPhone.
Step 2. Open it and choose the files you've uploaded and download them onto the iPhone.
Read More: How can you transfer voice memos from iPhone to computer? Refer to this article to select a professional way.
Another method is to use iTunes. When you've previously synced these files to your PC's hard drive, you can thus copy them to the new iPhone. iTunes is a default program to back up and manage content on any iOS device.
If you use iTunes a lot to back up your data, transferring voice recordings from iPhone to iPhone will be a piece of cake.
Here's how:
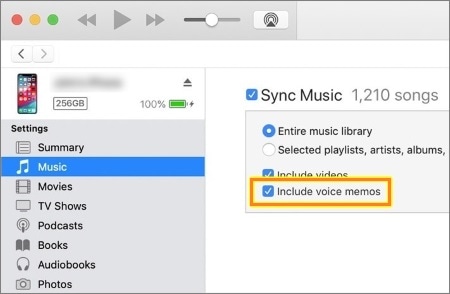
Step 1. Connect the new iPhone to the PC using a USB cord. Launch iTunes and click on the icon of your new iPhone to view its content.
Step 2. Next, click on the "Music" tab on iTunes's left side. Then check the "Sync Music" option and turn on the "Include voice memos" option and hit "Apply" for instant transfer of those precious audio recordings onto your other iPhone device.
Now, transferring voice recordings from an iPhone device to another won't be something to worry about. The above are the best ways to share your voice recordings between iPhones without trouble. Even though some have file size limitations, they can still be helpful in times of need. It's recommended to use MobieSync software to move voice recordings to another iPhone. It is the only quick and easy way to have your previous recordings on the other iPhone without errors or hassles.
Related Articles:
How to Recover Trimmed Voice Memos on iPhone with or without Backup?
How to Recover Voice Memos from iCloud Smoothly | 2 Advanced Solutions
How to Recover Deleted Voice Memos on iPhone with or Without Backup?
[3 Ways] How to Make a Voice Memo a Ringtone on iPhone Effortlessly?