
How to Compress Image Size: 3 Online and 4 Offline Techniques

In today's digital age, photos have become an integral part of our online and offline experiences. Whether you're a photographer sharing your work, a web developer optimizing your website, or simply sending pictures to friends and family, image compression plays a crucial role in making this possible. In this article, we'll explore what image compression is and delve into both offline and online methods to effectively compress image file sizes.
Image compression is the process of reducing the size of an image file while preserving its visual quality as much as possible. The main objective of image compression is to decrease the file size, which helps save storage space, reduce bandwidth usage, and improve the loading speed of websites and applications. There are two primary types of image compression: lossless and lossy.
1. Lossless Compression:
Lossless compression is a technique that reduces file size without losing any image data or quality. (Do you want to enhance your photos with AI tools?) This method is commonly used for images where maintaining the highest quality is crucial, such as medical images, logos, and graphical designs. Lossless compression algorithms work by eliminating redundant data and encoding the image in a more efficient manner.
2. Lossy Compression:
Lossy compression, on the other hand, reduces the file size by eliminating some of the image data. This approach is commonly used for photographs and images where some loss of quality can be tolerated without a significant impact on visual perception. Popular image formats like JPEG, PNG, and GIF often use lossy compression to create smaller file sizes.
You May Like: If you intend to compress photos on your iPhone? Adhere to the possible solutions.
In our quest to effectively manage image file sizes without compromising quality, we turn our attention to offline methods. These techniques are especially useful when you're working on your local device and need to compress photo sizes for various purposes. In this part, we'll explore practical step-by-step methods for image compression on both Windows and Mac operating systems, as well as using the industry-standard Adobe Photoshop. Whether you're a Windows enthusiast or a Mac aficionado, you'll find suitable solutions to compress your images efficiently.
For Windows users seeking a quick and straightforward solution to compress image size without the need for third-party software, the built-in Photos app is a valuable resource. In this method, we'll explore how to harness the power of the Photos app to effortlessly compress images, making them more manageable for sharing, storage, or web use. You can effectively shrink photo file sizes while preserving image quality with just a few simple steps. Here is how to compress photos on Windows via the Photos application:
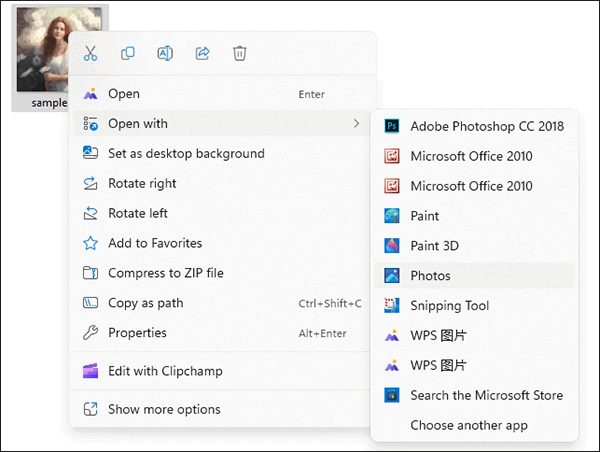
Step 1. Find the image you want to compress, right-click it, choose "Open with", and then "Photos".
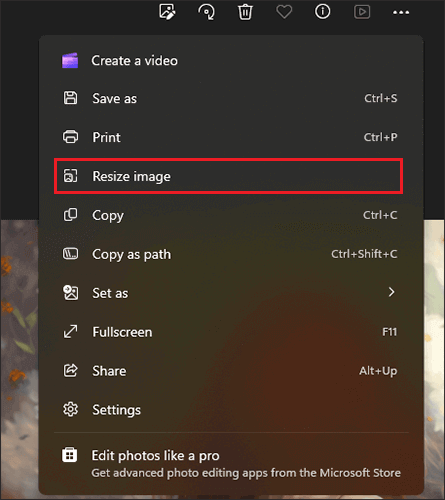
Step 2. Click the "three-dots" icon in the top toolbar and choose "Resize image".
Step 3. You can adjust the "Width" and "Height" to compress images. The Photos app also allows users to adjust photo quality by clicking on the appropriate percentage values.
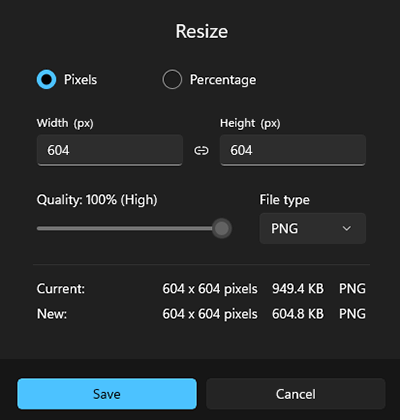
Step 4. Click the "Save" button to save the compressed image.
Mac users often rely on the Preview application, which comes bundled with the operating system, for a wide range of image-related tasks. One such task is image compression. It is a convenient and built-in solution to compress image sizes without sacrificing quality. From simple adjustments to exporting the compressed image, this method provides a user-friendly approach to make your images more manageable and ready for various digital purposes. Here is how to compress pictures on Mac with Preview:
Step 1. Right-click the image you want to shrink and select "Open With" > "Preview".
Step 2. In Preview, go to "File" in the top menu. Then, select "Export" from it.
Step 3. In the "Export As" dialog, choose a format like JPEG. After that, adjust the image quality slider to reduce the file size.
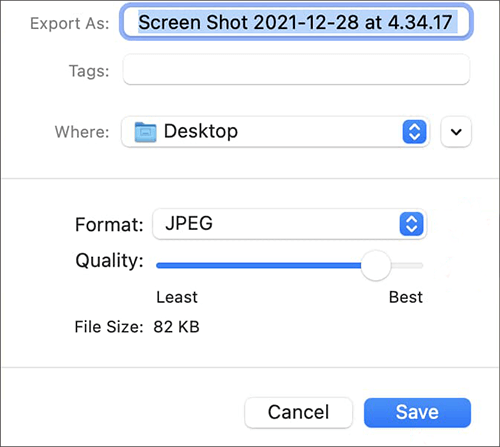
Step 4. Pick a destination folder for the smaller image, then click "Save".
Further Reading: What Does Compressing a File Do? How to Compress a Video File?
When it comes to image editing and manipulation, Adobe Photoshop stands as the industry standard. Whether you're a professional graphic designer or a hobbyist with a penchant for precision, Photoshop offers comprehensive tools for optimizing image size while retaining the desired quality. If you seek granular control over your image compression process, Photoshop is the best choice. Here is how to compress an image in Photoshop:
Step 1. Find the image you want to compress, right-click it, choose "Open with", and then "Adobe Photoshop".
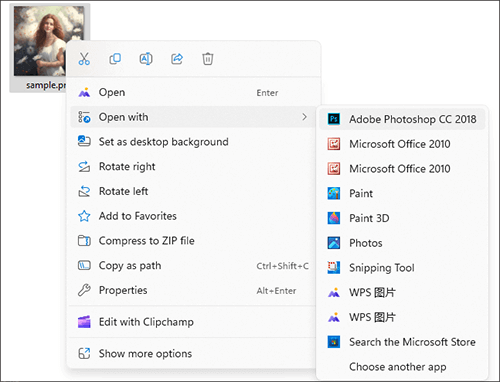
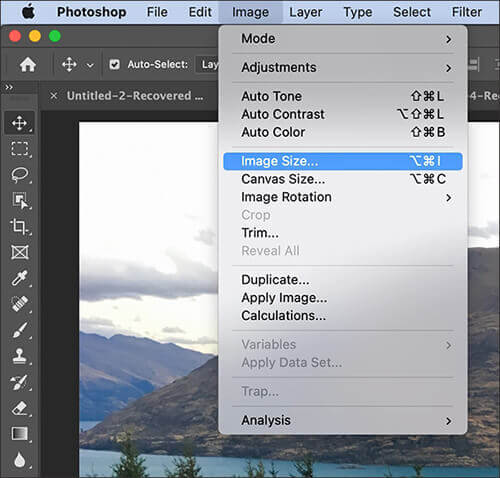
Step 2. In Photoshop, you will see the "Image" menu at the top. Click on "Image Size" in the menu.
Step 3. In the newly opened pop-up window, you will see the current dimensions of the image here. Enter the new dimensions in the "Width" and "Height" boxes to resize the image for the purpose of compression.
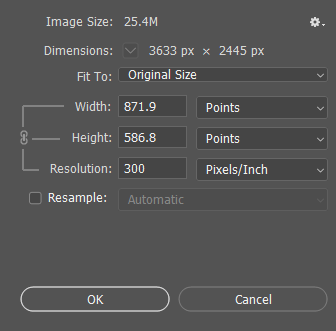
Step 4. Once done, click the "OK" button. Then, click "File" > "Save" to save the freshly compressed image.
Now that we've thoroughly explored the methods of offline photo compression, it's time to shift our focus to the realm of online solutions. This part introduces a selection of web-based platforms that are perfect for reducing image file sizes with convenience in mind.
Whether you're looking for a quick solution for sharing on social media, reduce images size for your website, or simply reducing storage requirements, the online methods provided here offer a range of options to suit your specific needs. So, let's embark on the transition from offline to online and discover the ease and accessibility of web-based image compression.
iLoveIMG is an excellent online tool that allows you to compress your images effortlessly. Simply upload your image, choose the compression level, and iLoveIMG will generate a smaller version of your image. Here is how to shrink image file size via iLoveIMG:
Step 1. Visit the iLoveIMG website in your web browser. Click on the "Compress Image" option in the navigation menu.
Step 2. You can either drag and drop an image file into the designated area on the website or click the "Select images" button to browse and select the image you want to compress from your computer.
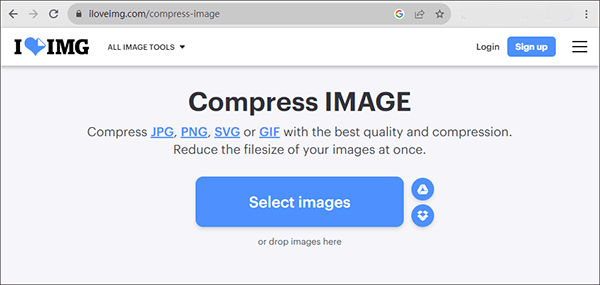
Step 3. Once you've uploaded the image, click the "Compress Images" button.
Step 4. When it's done, you can click the "Download compressed images" button to save the compressed image to your computer.
Compress JPEG is a user-friendly online tool that specializes in JPEG compression. Upload your image, choose the quality level, and it will reduce the image size accordingly. The following are the detailed steps for compressing images:
Step 1. Open your web browser and go to the Compress JPEG website.
Step 2. Once you're on the website, click "Upload Files" or drag and drop your image image onto the designated area.
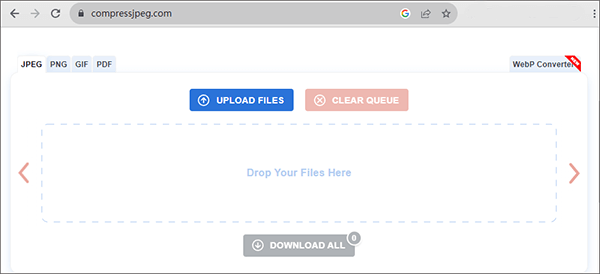
Step 3. After a successful upload, this online tool will automatically compress your image.
Step 4. Once the compression is successful, click the "Download All" button to download the compressed image.
Img2Go is a user-friendly online platform that offers a wide range of image editing and conversion tools. This web-based service empowers users to perform various tasks related to images, such as resizing, cropping, compressing, and converting between different image formats. It is also an efficient and accessible solution to compress image without the need for complex software installations. Here is how to decrease photo file size:
Step 1. Open your web browser and go to the Img2Go website. Then, choose "Compress image" from "All tools".
Step 2. Click the "Choose File" button to upload the image file you want to compress from your computer.
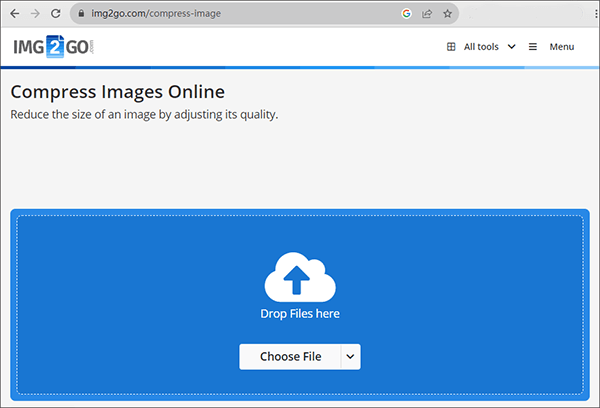
Step 3. Select the desired level of quality for saving your image.
Step 4. Press the "Start" button to initiate the compression procedure.
TinyPNG is a popular online image optimization tool known for its ability to reduce image file sizes without compromising visual quality. It specializes in compressing WebP, PNG, and JPEG images, making them smaller and more web-friendly. Here is how to shrink photo file size via TinyPNG:
Step 1. Open your web browser and go to the TinyPNG website.
Step 2. You will see a large area in the center of the screen that says, "Drop your WebP, PNG or JPEG files here!" You can either drag and drop your image file into this area or click on it to select a file from your computer.
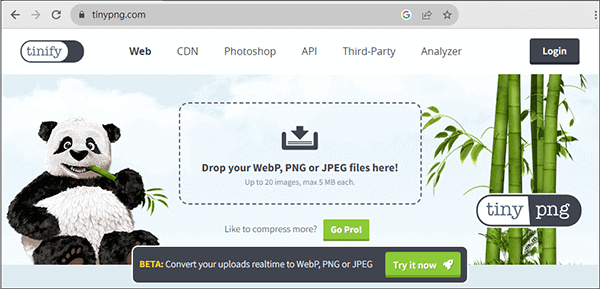
Step 3. TinyPNG will automatically start compressing the image. You'll see a progress bar indicating the compression process.
Step 4. Once the compression is complete, TinyPNG will display the results, including the original image size and the size of the compressed image. Then, click the "Download" button to save the compressed image to your computer.
All in all, image compression is a vital technique for managing image file sizes while ensuring optimal visual quality. Whether you prefer offline or online methods, there are various tools and software available to help you achieve the right balance between size and quality. By understanding the types of compression and exploring the methods outlined in this article, you can effectively compress image size to suit your needs, whether it's for web publishing, sharing on social media, or conserving storage space.
Related Articles:
Top 6 MP4 Compressor: Reduce File Size without Compromising Quality
Top 6 Online File Compressors for Quick and Easy Compression
5 Ways to Batch Convert HEIC to JPG in 2024
Quick and Easy: Compress PDF to 1MB Free with These 8 Techniques