
[Full Guide] How to Fix Erase iPhone Verification Failed Problem?

"Hi, I received a new phone and I'm trying to restore my 4S to factory settings. In order to do this I need to turn off find my iPhone, and/or remove my iCloud account from the phone. Every time I try to turn off find iPhone or delete iCloud I get a verification failure, that says I cannot connect to the server. My password is correct and I've reset my network settings. Any ideas? Or do I just turn on delete iPhone after 10 failed logins? Thanks."
- from Apple Community
When erasing iPhone data, many users may encounter a common issue: "Erase iPhone Verification Failed". This problem typically prevents users from properly clearing device data, whether for privacy protection or preparing the device for sale, which can be quite frustrating. This article will help you understand the cause of this error and provide detailed solutions to fix it.
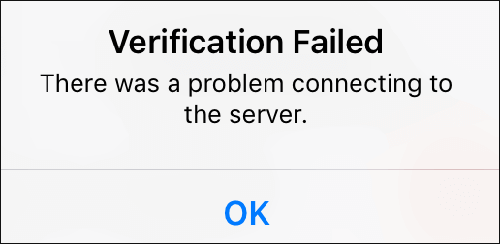
During the process of erasing iPhone data, Apple's servers need to authenticate the device to ensure that the action is being performed by the device's owner. However, if the verification process encounters issues, the system will display the "Erase iPhone Verification Failed" error. The causes of this problem may include the following:
Now that we understand the possible causes, here are some effective methods to help you successfully fix the "Erase iPhone Verification Failed" issue.
A stable network connection is key to completing the erase verification process. If the network is unstable, the device may fail to communicate with Apple's servers, resulting in verification failure. To ensure a stable connection, you can go to "Settings", tap "Wi-Fi", and confirm that you are connected to a reliable Wi-Fi network. If the Wi-Fi signal is weak or the connection is unstable, try switching to a different network.
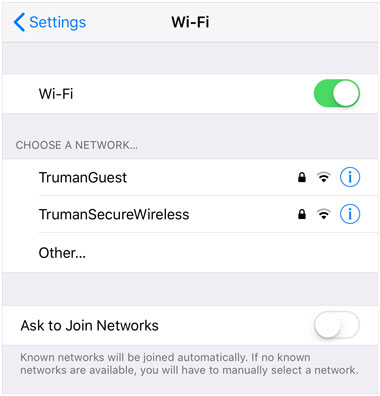
Sometimes, network cache or other network settings issues can cause an unstable connection, which can affect Apple ID verification. Resetting the network settings can clear the cache and restore default settings, helping to resolve potential network issues. Follow these steps:
Step 1. Go to "Settings" and tap "General".
Step 2. Scroll down to "Reset" and select "Reset Network Settings".
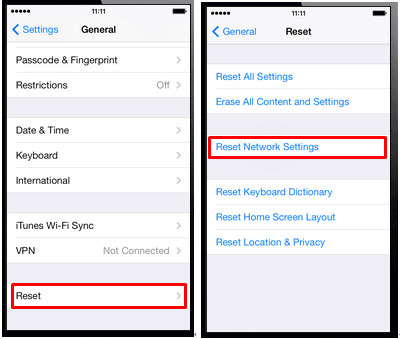
Step 3. Enter your device password to confirm, then tap "Reset" to confirm.
Once the reset is complete, reconnect to Wi-Fi and ensure the connection is stable. After this, try erasing your iPhone again to check if the verification is successful.
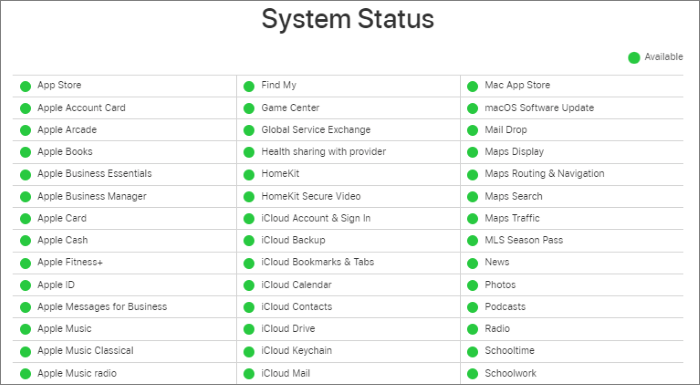
Apple's servers may occasionally undergo maintenance or experience issues, which can lead to Apple ID verification failures. You can check the Apple System Status page to determine if the servers are operating normally.
You can also try signing out of your Apple ID to erase your iPhone without needing to go through the verification process. When you sign out, any data stored in iCloud will still be accessible in iCloud, but it will be removed from your device unless you have a local copy of it on the iPhone.
To do this, follow the steps below:
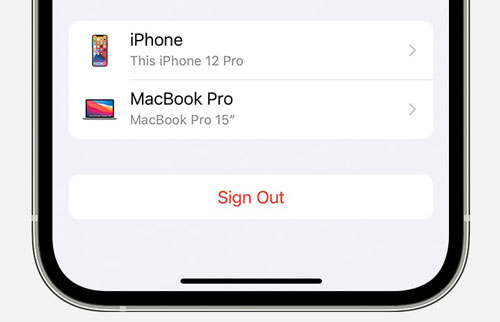
Step 1. Go to "Settings" and tap on your Profile.
Step 2. Scroll down and find the "Sign Out" option. Tap it, then enter your Apple ID password to confirm. (Can't sign out of your Apple ID?)
If Find My iPhone is enabled, it activates an Activation Lock on your device, which requires your Apple ID and password to erase the device. Any issues with the Find My iPhone service could prevent successful verification and erasure. To avoid this, make sure to turn off Find My iPhone before attempting to erase your device.
Here is how to turn off Find My iPhone:
Step 1. Open "Settings", tap on your "Apple ID" profile, then select "Find My".
Step 2. Tap "Find My iPhone" and toggle it off.
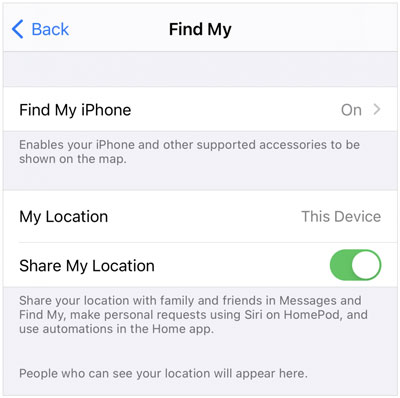
Step 3. The system will prompt you to enter your Apple ID password; enter it and confirm to disable the feature.
Sometimes, a device may fail to perform actions due to prolonged system uptime or cache issues. A simple restart can refresh the device's system processes and resolve minor glitches.
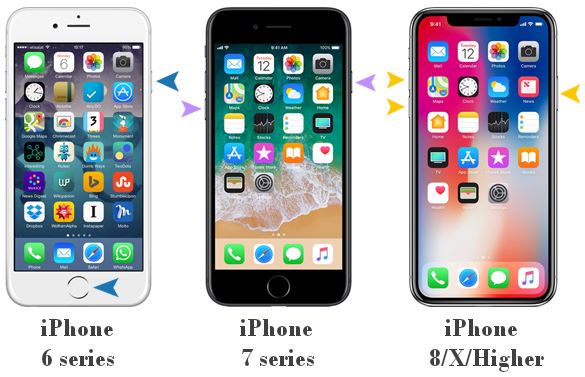
Here is how to force restart the iPhone:
For iPhone 8 and later:
For iPhone 7 and 7 Plus:
For iPhone 6s and earlier:
Sometimes, if the device's iOS version is too outdated, it may be incompatible with the latest Apple verification servers, leading to verification failures. It's recommended to ensure your device is running the latest iOS version. Follow these steps to update your iOS:
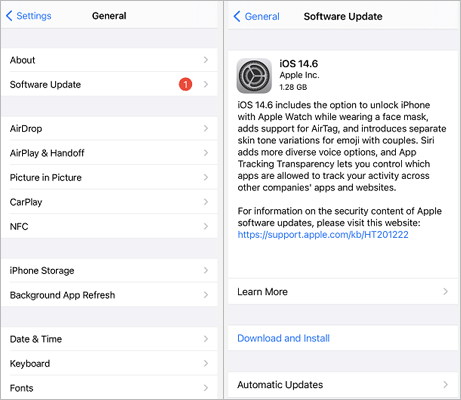
Step 1. Open "Settings" and tap "General".
Step 2. Select "Software Update" to check if any updates are available. (iPhone stuck on a software update?)
Step 3. If an update is available, tap "Download and Install", then wait for the update to complete.
If the above methods don't resolve the issue, it is recommended to use iPhone Unlocker, a professional iPhone unlocking tool that helps users bypass Apple ID verification and easily erase the iPhone.
Key features of iPhone Unlocker:
Here is how to fix the "Erase iPhone Verification Failed" issue using iPhone Unlocker:
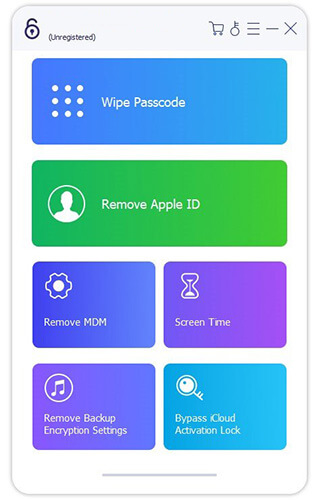
01Launch the iPhone Unlocker on your computer and select "Remove Apple ID" mode.
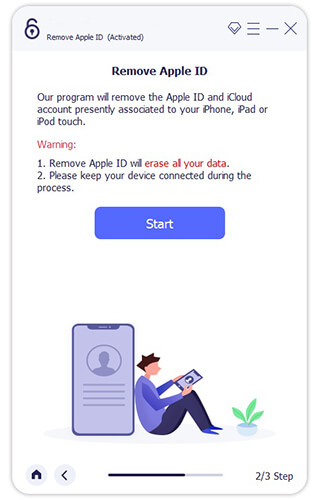
02Connect your iOS device to the computer using a USB cable. Once your device is detected, you'll be prompted to tap "Trust" on your device. Then, click the "Start" button to begin the process.
03iPhone Unlocker will remove the Apple ID without a password if the Find My feature is disabled. If not, you will need to perform a factory reset on your iPhone or iPad through Settings first.
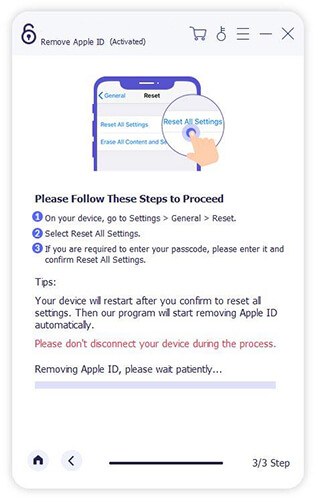
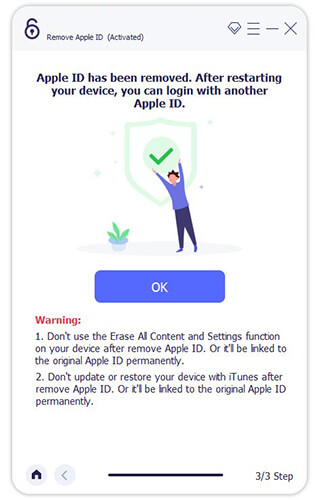
04Follow the on-screen instructions to continue with the removal process. The software will download the appropriate firmware package based on your device model and iOS version. Once downloaded, it will automatically remove the Apple ID and its associated password.
If you want to completely erase your iPhone and ensure that the data is unrecoverable, it is recommended to use Coolmuster iOS Eraser. This tool can thoroughly wipe all data from your iPhone, protecting your privacy, with no possibility of data recovery.
Highlights of Coolmuster iOS Eraser:
Here is how to erase your iPhone using iOS Eraser:
01Launch the iOS Eraser and connect your iPhone to the computer via USB. When prompted, trust the computer. Once connected, the main interface will appear, allowing you to erase the data from your iPhone.
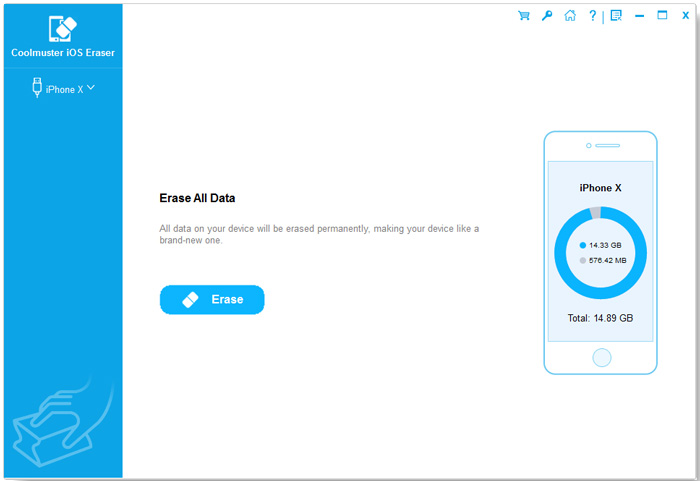
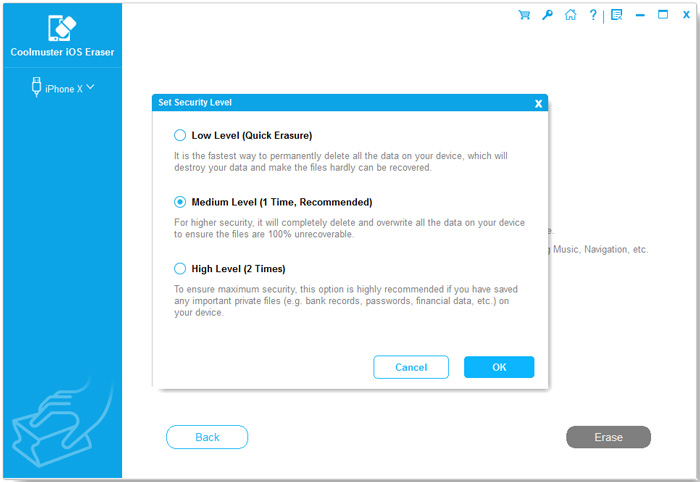
02On the main interface, click "Erase", choose your preferred security level (Low, Medium, or High), and confirm your selection. Afterwards, click "OK" to proceed.
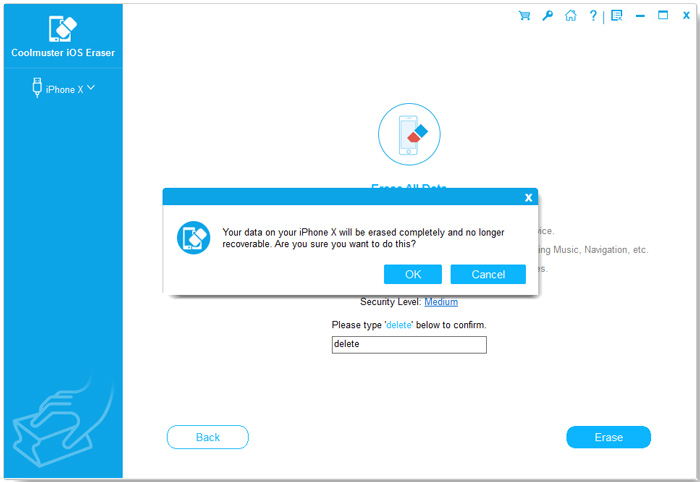
03 Enter "delete" in the provided field to confirm your action, then click the "Erase" button. When prompted, confirm the complete deletion of your iPhone's data by clicking "OK". The program may perform a brief scan before starting the erasure.
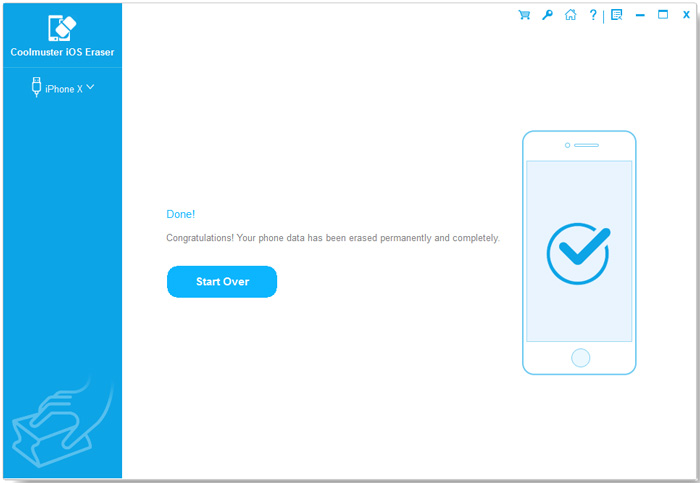
04Once the erasure is complete, your iPhone will automatically restart. The program will immediately begin overwriting your iPhone's data. After the process finishes, all data on your iPhone will be permanently and irreversibly deleted, with no chance of recovery.
Video Tutorial:
The "Erase iPhone Verification Failed" issue can usually be resolved by checking the network connection, resetting network settings, updating iOS, etc. If the problem persists, iPhone Unlocker is a convenient and effective tool that can help you bypass the verification and easily complete the erasure process.
Related Articles:
Erase All Content and Settings Not Working: 6 Ways to Fix iPhone Won't Erase
Keep Seeing "iPhone Backup Failed" Notification? Here're Reasons & Solutions
How to Fix iPhone Stuck on Verifying Update? 15 Fixes in 2024
Reset All Settings vs Erase All Content [Informative Comparison]