
6 Proven Fixes for Your Passcode is Required to Enable Face ID

You know how stressful it can be when you try unlocking an iPhone with Face ID, and it keeps saying 'your passcode is required to enable face ID'. We are so much dependent on our smartphones that when we get such a message, it becomes a nightmare for us. iPhone users face this issue a lot, with several claiming the problem occurs randomly while others say it is persistent at night. What to do in such a case? The answer is to learn how to enable face id without passcode.
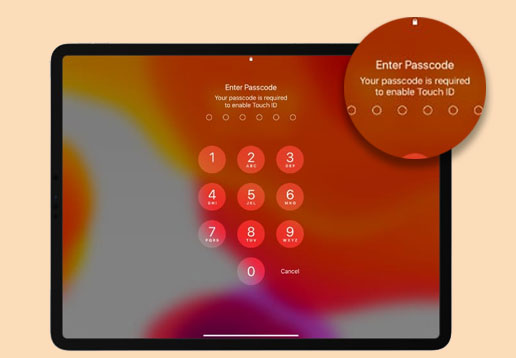
Many iPhone users usually get a pop-up message saying, "your passcode is required to enable Face ID," when they try rebooting or accessing the device through the Find my iPhone feature. Moreover, other common reasons why you may require passcode to enable face ID on your iPhone. They include:
* Malware in your iPhone.
* iPhone can't recognize your facial features.
* Your iPhone's camera has a mechanical damage.
* There's dust or dirt on the device.
* You rebooted your iPhone for the first time after setting it up.
* You have turned on the iPhone after being off for more than 48 hours.
* The iPhone's passcode has not been used for more than six days.
* You have activated SOS emergency on your iPhone (Fix the iPhone stuck on the Emergency SOS mode issue).
* You have entered the wrong passcode for more than five times to access the device through Face ID.
* Find my iPhone feature was used from another device to bypass the screen lock which changed your device's passcode.
Now that you know why your iPhone may ask for a passcode to enable face id, it's time to figure out the capable solutions to tackle the problem.
You may like:
How to Easily Bypass iCloud Activation
How to Check if iPhone Is Unlocked without SIM Card [Proven Guide]
Constantly getting the passcode to enable Face ID messages can be annoying. To fix the problem the right way, use the guidelines elaborated below;
Update iOS systems can help fix errors and bugs in your device. If the operating system of your device is outdated, it might behave in a not normal way. To prevent that, it is vital to update your iPhone. However, you can lose data during the updating process so backing up data is highly advisable. Do the following to check for any updates available;
Step 1: Navigate to "Settings" on your iPhone, to "General," and click "Software Update."
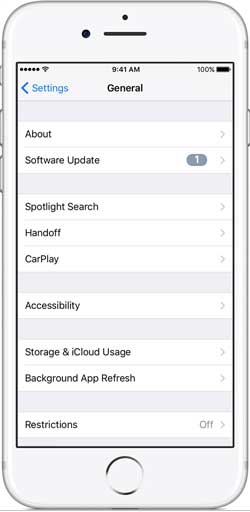
Step 2: Check if there's any update. Click on the "Download" option and "Install," then enter your password to confirm.
Step 3: Wait as the update process completes.
iOS 12 and above will update automatically. To set it, open the "Settings" app, go to "General," to "Software Update," and then choose the "Automatic Updates" option.
The Face ID is specially programmed to try and recognize your face despite minimal changes. However, the device will not recognize you if your facial features have considerably changed. You will be required to create another alternate appearance on your device so that Face ID can recognize you more quickly.
Step 1: Open the "Settings" app and proceed to "Face ID and Passcode" on your device. Enter your passcode to proceed and tap "Set Up an Alternate Appearance."
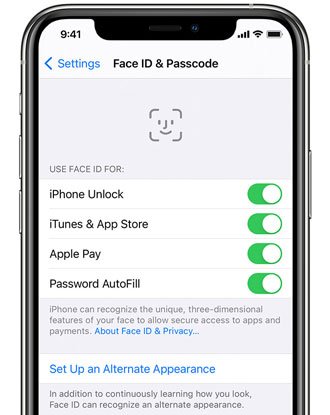
Step 2: Now start creating an alternate appearance. Look straight at your iPhone's camera and ensure that the face fits accurately in the frame. Slightly move your head to enable Face ID to capture your facial features comprehensively.
Step 3: When the Face ID scan completes, tap "Continue" and slightly move your head in the frame and confirm that all your facial features are captured.
Step 4: After completing the Face ID setup, tap "Done" for verification.
See more:
How to Unlock iPhone with Unresponsive Screen? [Full Guide]
iCloud Unlock Service: Bypass iCloud Lock with Legit Methods
If there are complications with your Face ID, check the device's Face ID settings and configuration. Verify that the Face ID settings on the phone are well, and you can adjust them. To check the Face ID settings;
Step 1: Click on "Settings".
Step 2: Look for "Face ID and Passcode".
Step 3: Verify that the Face ID is turned on and the features are allowed.
If the fixes elaborated above do not solve the problem, reset the Face ID and set it up again. This method can solve the problem by registering the Face ID more accurately.
Step 1: Open "Settings".
Step 2: Proceed to "Face ID & Passcode".
Step 3: Tap "Reset Face ID."
It is imperative to periodically wipe your TrueDepth camera and confirm that it is free of dust or dirt. If your iPhone has a case or screen protector, it shouldn't obstruct the TrueDepth camera. When using the Face ID feature, ensure that your eyes, mouth, and nose are visible to the TrueDepth camera to enable it to recognize your facial features easily.
Is your Face ID not working? Entering an incorrect screen passcode in an iPhone device will make you get stuck in 'your passcode is required to enable Face ID.' Usually, you've got several attempts to try to unlock the device. But it's not encouraged to enter the wrong passcode many times as this may disable your device, which may require you to connect it to iTunes.
To prevent all this, you should use a powerful tool like iOS Unlock to bypass the passcode and access your device. The software removes all kinds of screen locks, including Face ID.
Valuable Features of iOS Unlock:
* It can remove iPhone screen lock without passcode in a single click.
* Capable of removing all lock screens, including Touch ID, Apple ID, Face ID, etc.
* Remove the Apple ID and iCloud activation lock easily.
* Easy to use. No technical skills are needed.
How to enable face id without passcode with iOS Unlock
01Install the program on the computer and connect your iPhone
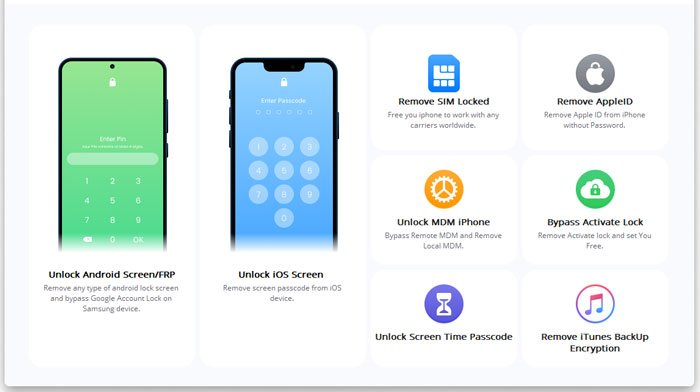
Launch iOS Unlock on your computer and tap "Screen Unlock" from the list. Connect your iDevice to the computer using a USB cable and tap on "Unlock iOS screen" on the menu.
02Boot iPhone in Recovery or DFU mode
Before you remove the iPhone lock screen, you are required to set the device to Recovery or DFU Mode.
* For iPhone 8 or later, press and immediately release the volume down and long press the side till the recovery mode shows on the screen.
* For iPhone 7/7 Plus, press the volume down and top (side) buttons simultaneously. Press until the recovery or DFU mode shows on the screen.
* For iPhone 6s or earlier, Long press the top (side) and home buttons simultaneously. Press until the DFU or recovery mode shows on the screen.
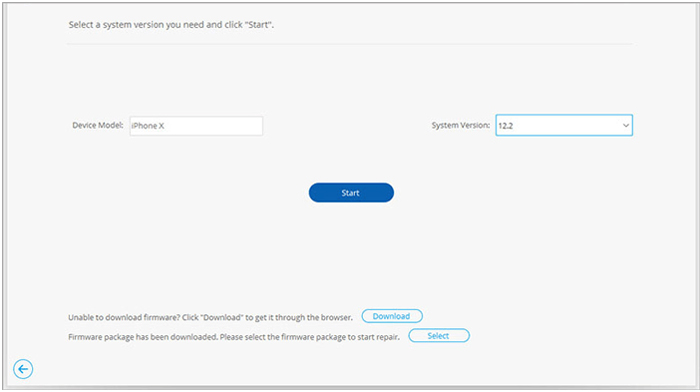
03Confirm iOS device information
When you set up your iPhone in recovery mode, iOS Unlock software will display the device's information, such as Device Model, System Version, etc. You can select the correct information from the categories available. Tap "Download" to start the download process of the iPhone's firmware.
04Unlock iPhone screen lock
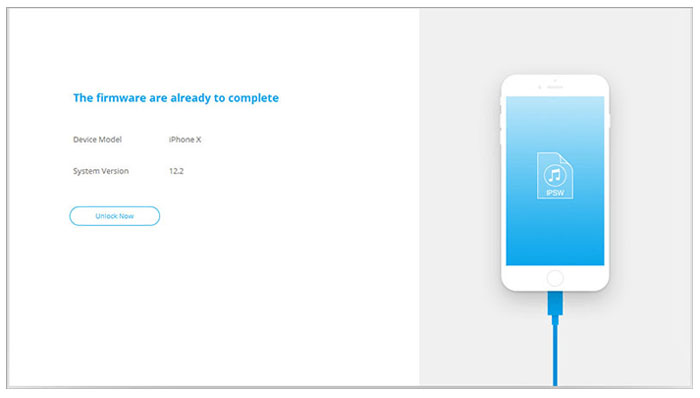
After downloading, tap "Unlock Now" to start the removing the lock. Note that the bypassing process will erase your iDevice. However, it is impossible to remove the screen lock without data loss.
iPhone passcode problem is very common, and anyone can be in such a situation You can still apply a few tricks and get your devices working just fine. The above fixes are helpful in instances when you want to enable Face ID without passcode. iOS Unlock is a pro tool that is effective and swift in bypassing the iPhone screen lock without a password/passcode.
Related Articles:
How to Unlock iPhone without SIM Card? [Updated Tutorial]
Fast Factory Reset iPad without Passcode with 3 Solutions
How to Get into a Locked iPhone without the Password or Face ID? [Solved]
How to Bypass iCloud Activation Lock Easily on iPhone/iPad?
How to Unlock SIM Card on iPhone with Easy Steps [3 Solutions]